Changelog
Aug 12th, 2023: The upcoming OpenWrt version 23.05 will bring a few changes to the way we configure VLANs. I’ll update the guide once 23 becomes the current stable. Until then, if you are using version 23 and playing aorund with VLANs, then refer to the DSA mini tutorial and converting to DSA user guide.
Dec 21st, 2022: Minor updates to streamline a few commands and to add a note here that this guide is still valid for the current stable release version of OpenWrt (22.03.2). I should also mentioned that a user (Iglói) reported that the Linksys EA8300 might not be the best choice for a high-end mesh node because VLAN support is limited in the IPQ40xx hardware. However, I’ve never tested that myself and after glancing over the forum posts, it seems the issue has been fixed in the latest release. In any case, if you want to consider other high-end alternatives, check out the Linksys WRT23x and the ZyXEL NBG6817.
May 4th, 2022: Marc (OneMarcFifty) has published a video tutorial describing how to configure OpenWrt and batman-adv via LuCI, which is only possible because he also wrote a package that gives luci support for the batman-adv protocol (luci-proto-batman-adv). I added a reference to Marc’s tutorial at the end of the Other similar mesh solutions section.
February 4th, 2022: Updated the Hardware-specific configurations section to include info about an issue affecting the GL-AR750 and the AVM Fritz!WLAN Repeater 1750E. Also, the ath10k troubleshooting instructions were slightly modified to make them more general. Thanks to JF and Erik for testing and letting me know about the affected devices and solutions.
January 1st, 2022: Added a new section called Advanced features to cover batman-adv features not previously described in the basic implementation section. The first included feature was the use of multi-links to improve performance and reliability. The subsection includes examples and a how-to for the implementation of multi-links. In addition, I changed the Linksys reference in Hardware to the more stable Linksys EA8300 as reference of a high-end device. I’ve not personally used it but have read reports of good experience with it by the OpenWrt forum user 16F48, for example.
October 6th, 2021: The guide was completely updated to make it consistent with the current stable release, namely OpenWrt 21.02. In brief, most of the changes had to do with the new network syntax and increased hardware requirements. More specifically, OpenWrt 21.02 drops the use of ifname and make a more clear distinction between layer 2 and layer 3 configurations in the /etc/config/network file. In addition, the minimum requirements to run OpenWrt are now 8MB of flash memory and 64MB of RAM. The latter change prompted me to use a new TP-Link router for the examples, namely the TL-WDR4300, instead of the old WR1043ND (v1). This new router is still a low-end device, which makes very affordable and easy to find worldwide, but contrary to the WR1043ND, it is actually a dual-band router. This was an opportunity to illustrate wireless segmentation for mesh vs. non-mesh communication, which is something I think is almost required in most use cases, so the new guide makes use of it by default. I also took this opportunity to update many, many other things. To mention two main ones: (a) at the end of the OpenWrt installation and initial configuration section, there’s now a description of how to build custom images that contain all the required mesh packages; and (b) the section Bonus content: Moving from OpenWrt 19 to 21 was update to help users who followed the earlier version of this guide to transition to the new release. This was a big one and took a few days to get it done. Hope you find it useful!
September 16th, 2021: Updated the information about OpenWrt 21 in the section Bonus content: Moving from OpenWrt 19 to 21. In brief, DSA support is still very limited and OpenWrt has officially started rolling out version 21 with the release of OpenWrt 21.02. I’m currently testing the new version and network configuration on a few devices and once I get everything running as well as it was in version 19, I will update the entire article to reflect the new (and current) configuration. It is, of course, still possible to download and use the latest OpenWrt 19 images, which should be just fine for a long time still. However, if you want to make use of OpenWrt 21, then read the aforementioned bonus section for guidance on the syntax changes and updated hardware requirements.
July 6th, 2021: Added information about transitioning from OpenWrt 19 (current stable release) to OpenWrt 21 (next stable release) to a new section called Bonus content: Moving from OpenWrt 19 to 21. In brief, the next stable release includes changes to the network configuration syntax that are incompatible with this guide. Once the release version 21 becomes the current stable, however, I will update the main guide to reflect those changes. In the meantime, I added a few references to the OpenWrt forum that should help anyone interested in using version 21 instead of 19. Thanks to Steve for testing and sharing his batman-adv configuration running on OpenWrt 21.
Feb 17th, 2021: Per a reader’s suggestion (Joshua), I added a vi cheat table that has a summary of the main commands, and in the Mesh node basic config section, I included additional instructions on how to copy and paste the configuration files from one mesh node to another using scp. (Alternatively, it’s also possible to do so using Luci’s backup/restore option.)
Jan 9th, 2021, Update #2: Added instructions on how to automatically upgrade all installed packages with a single command. This information is in Updating and installing packages.
Jan 9th, 2021, Update #1: Added a new section about hardware-specific configurations that are sometimes required for enabling the mesh point mode of operation.
Dec 7th, 2020: Publication of the original guide
top
Introduction
In this tutorial, we will learn how to create mesh networks (IEEE 802.11s) using OpenWrt and the layer-2 implementation of the Better Approach to Mobile Adhoc Networking, called batman-adv. All the software mentioned here is free and open-source, as opposed to commercial alternatives (UniFi Mesh or Google’s Nest Wifi).
This is not meant to be an exhaustive presentation of any of the covered topics. If you have suggestions on how to improve this guide, feel free to get in touch with me. I’m always eager to learn new things and share them. Also, I plan on updating this article every once in a while to best reflect my knowledge about the topics covered here and to add information provided by the readers. Check the changelog for updates.
top
Why am I writing this guide?
Even though the concept of mesh networking has been around for quite some time now, the documentation of its implementation is still scarce/nichey, proprietary, or outdated. I don’t feel qualified to speculate on why this is so but I find it odd because many of the radio devices found in popular wireless routers actually support mesh networking–but the original firmware rarely supports it.
My intention with this tutorial is to help closing the gap between concept and implementation of mesh networking using up-to-date software that anyone can download and install on cheap, commonly available hardware–primarily consumer wireless routers (from old to new, single- or multi-band) but the principles should be extendable to any cellphones, laptops, PCs or servers running Linux. The content is partially based on my own experience and builds upon the work of other, much more talented individuals who shared their knowledge on the Web. More specifically, the content is notably influenced by the following:
top
Objectives
- Get familiar with
/etc/config/ files in OpenWrt devices (namely, wireless, network, dhcp, firewall) to quickly and permanently configure mesh nodes.
- Edit files directly from the terminal using the default text editor
vi.
- Configure OpenWrt devices to play one of three possible roles in the network: (a) mesh node, (b) mesh + bridge node, or (c) mesh + gateway node.
- Install and configure the Kernel module
batman-adv on an OpenWrt device using the opkg package manager.
- Use
batctl to test, debug, and monitor connectivity within the mesh.
- Use two radios to segment mesh (5Ghz) from non-mesh (2.4Ghz) wireless communication.
- Add encryption to the mesh network with the package
wpad-mesh-wolfssl.
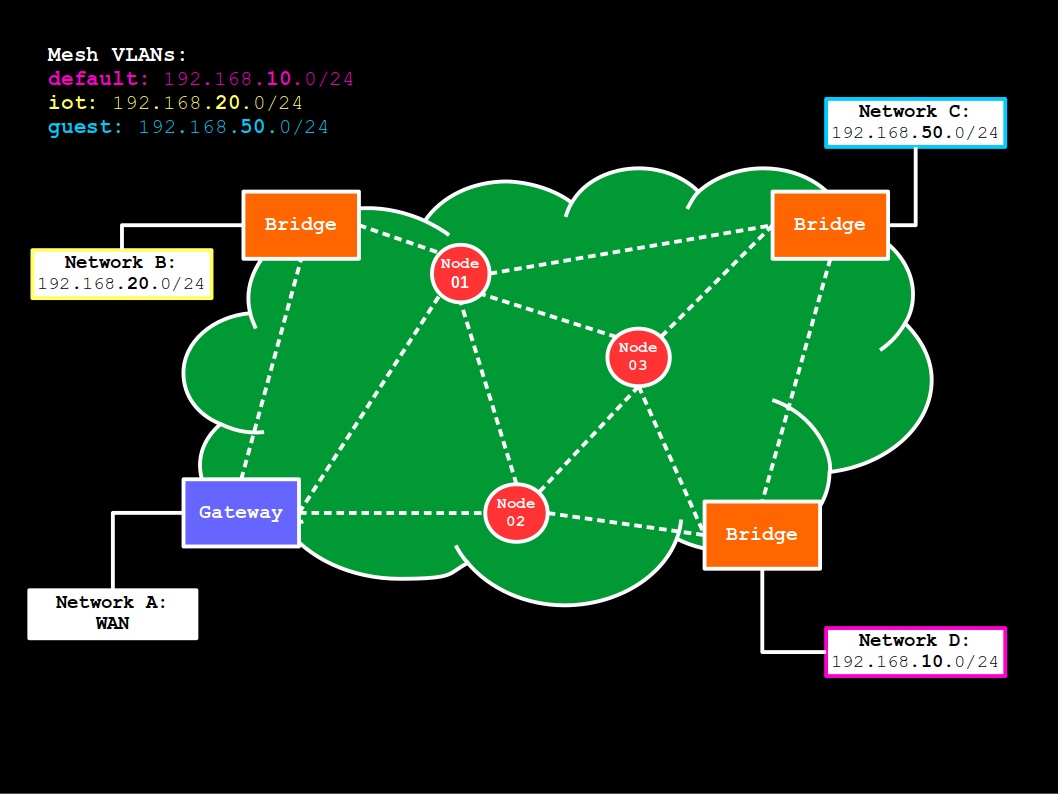
- Use VLANs to create
default, iot, and guest networks within the mesh using batman-adv.
top
Outline
From this point forward, the article is divided into four main parts:
- Concepts and documentation: Optional for advanced users. Brief introduction to just enough network concepts to allow the implementation of simple mesh networks. When appropriate, a link to the relevant OpenWrt documentation was also provided.
- Hardware: Optional for everyone. A few notes about the hardware used in the examples and recommendations for those who are planning on buying new/used devices for their mesh project.
- Software: Optional for everyone. A few notes about the software used in the examples.
- Implementation: Required. Step-by-step procedure to configure mesh nodes, bridges, and gateways. It goes from flashing OpenWrt to configuring VLANs with
batman-adv. You probably came here for this part.
top
Concepts and documentation
Main network definitions
- Mesh node: Any network device that is connected to the mesh network and that helps routing data to (and from) mesh clients. Here, however, if a mesh node acts as a bridge or gateway, it will always be referred by the latter role, even though by definition, mesh bridges and mesh gateways are also mesh nodes.
In addition, even though it’s possible to route mesh traffic via cable, in this tutorial, all mesh nodes are also wireless devices, meaning that they have access to a radio with mesh point (802.11s) capabilities.
-
Bridge: A network device that joins any two or more network interfaces (e.g., LAN Ethernet and wireless) into a single network. Here, when a device is referred to as a bridge, it means that in addition to being a mesh node, the only other thing it does is bridge interfaces. But of course, a gateway device, such as a router with a built-in modem, or a firewall appliance, may also work as a bridge for multiple interfaces. The distinction in the examples is just used to highlight its main role in the network. Therefore, a mesh bridge in this tutorial is a mesh node that simply bridges the mesh network with a WiFi access point for non-mesh clients, for example, or its LAN ports.
- Gateway: A network device that translates traffic from one network (LAN) to another (WAN) and here, acts as both a firewall and DHCP server. (If there’s more than one DHCP server in the same network, they assign IPs to different ranges, such as
.1-100, .101-200, and so on.)
-
DNS: In brief, a system for translating domain names (e.g., cgomesu.com) into IP addresses (185.199.108.153, 185.199.109.153, 185.199.110.153, 185.199.111.153). DNS filtering systems, such as PiHole, work by catching such requests–usually sent through port 53–and checking if the domain is blacklisted or not. In this tutorial, we will always use an external DNS server, such as 1.1.1.1 (Cloudflare) or 8.8.8.8 (Google), but if you have your own DNS resolver, feel free to use it instead when configuring your mesh network but then make sure the mesh network/VLAN has access to its address.
- DHCP: An IP management system that dynamically assigns layer-3 addresses for devices connected to a network. For instance, it might dynamically assign IPs between
192.168.1.0 and 192.168.1.255 (i.e., 192.168.1.0/24) to any devices connected to LAN. Of note, because this is a network layer protocol, it uses IP addresses, whereas batman-adv uses MAC addresses because it works at the data link layer (and therefore, batman-adv actually doesn’t need DHCP and IPs to discover and manage mesh clients but we’re going to use them to make it more intuitive and easier to integrate mesh with non-mesh clients).
- Firewall: A network system that monitors and controls network traffic, such as specifying rules for incoming WAN traffic (e.g.,
deny all), outgoing LAN traffic (accept all), geoblocking and IP filtering systems, intrusion prevention/detection systems (Suricata), and so on. OpenSense and pfSense are examples of dedicated firewall software. If a mesh node is acting as a mesh gateway, it’s imperative to configure the firewall or your mesh network will likely end up without access to external networks (e.g., WAN) and their services (e.g., DNS servers).
- VLAN: A virtual LAN that is partitioned and isolated in a network at the layer-2 level. They are often followed by an integer to differentiate each other (e.g., VLAN 1, VLAN 50) and used to better manage network clients that belong to different groups (e.g., administrators, IoT devices, security cameras, guests).
Network topologies
Mesh networks
What are mesh networks?
Where can I learn more about mesh networking?
Routing protocols
There are dozens of algorithms for routing packets in a mesh network. A few notable ones are the Optimized Link State Routing (OLSR) and the Hybrid Wireless Mesh Protocol (HWMP).
In this tutorial, however, we will cover only one of them, called Better Approach to Mobile Adhoc Networking (B.A.T.M.A.N.), because it has long been incorporated into the Linux Kernel and is thus easily enabled on Linux devices. It is also a fairly well-documented algorithm that has been continuously improved over the years. Another noteworthy feature of batman-adv is its lack of reliance on layer-3 protocols for managing mesh clients because it works at the layer-2 and its ability to create VLANs. Think of it as if it were a big, smart, virtual switch, in which its VLANs are port-based segmentations. If you want an interface to use a particular mesh VLAN, just “plug it” into the approriate port of the batX switch (e.g., bridge guest and bat0.2 to give the guest network access to the bat0 VLAN ID #2).
batman-adv
As mentioned before, B.A.T.M.A.N. has gone through multiple changes over the years, which means that there are actually multiple versions of the algorithm. I’ve had a good experience with B.A.T.M.A.N. IV and therefore, the examples here make use of it. However, you are free to try whatever version you want and even run them in parallel to each other, by assigning a different batX interface to each version of the algorithm (versions are chosen with option routing_algo in the /etc/config/network config file for each enabled batX interface).
Config-wise, there’s very little to do because the default settings should work very well in most environments. One exception is when you have multiple gateways in the network to provide high availability, for example, and you might want to let each mesh node know about them and their speeds to better route the mesh traffic. This requires setting option gw_mode to server or client, for example. Many other tweaks that are not covered here are described in their wiki.
batctl
Another very cool feature of B.A.T.M.A.N. is the ability to test, debug, monitor, and set settings with the package batctl. A few noteworthy options:
- Ping mesh node/client with its MAC address
f0:f0:00:00:00:00
batctl p f0:f0:00:00:00:00
tcpdump for all mesh traffic in the bat0 interface
- Prints useful stats for all mesh traffic, such as sent and received bytes
- Shows the neighboring mesh nodes
- Displays the gateway servers (
option gw_mode 'server') in the mesh network
It goes without saying that if you want to dive deep into batman-adv, you should take a good look at batctl, too.
top
Hardware
Unless otherwise specified, all mesh nodes used in the various implementations had the following hardware:
- Device: TP-Link TL-WDR4300 v1.0 - v1.7
- SoC: Atheros AR9344
- WLAN Hardware: Dual-band (Atheros AR9344, Atheros AR9580)
- CPU:
560 Mhz
- Flash memory:
8 MB
- RAM:
128 MB
This is a low-end, Atheros-based dual-band router that satisfies the minimum hardware requirements imposed by OpenWrt 21–namely, at least 8MB of flash memory and 64MB of RAM. However, the general ideas presented here should apply to any wireless device that meets the following criteria:
- Compatible with the latest OpenWRT version. Refer to their Hardware List;
-
Has access to a radio that supports the mesh point (802.11s) mode of operation. If you already have OpenWrt installed on a wireless device, you can type iw list and search for mesh point under Supported interface modes, or simply check if the following command outputs * mesh point below the name of a detected radio (e.g., phy0, phy1):
iw list | grep -ix "^wiphy.*\|^.*mesh point$"
If it does, then the associated radio can be configured as a mesh point.
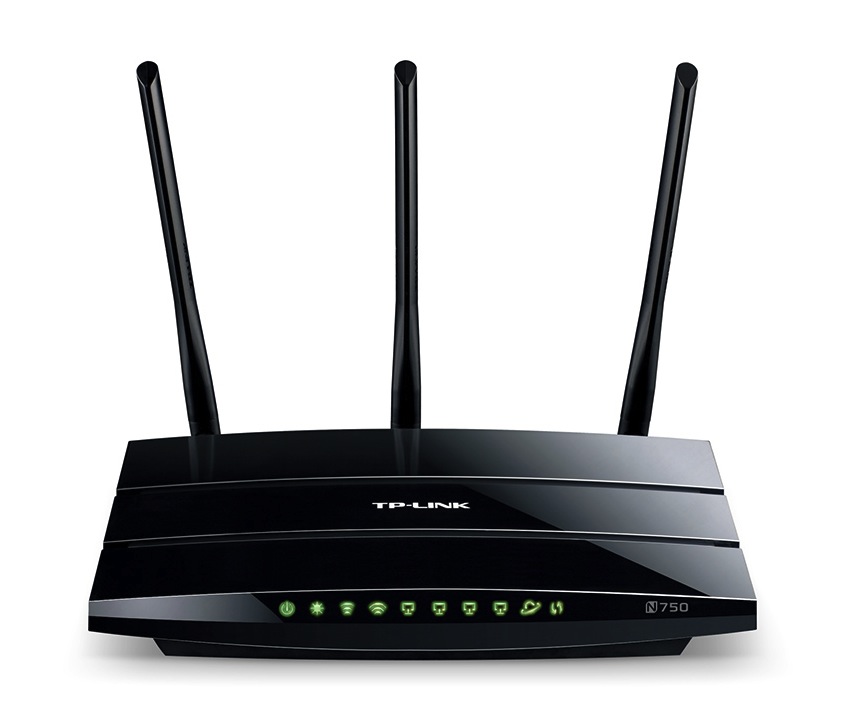
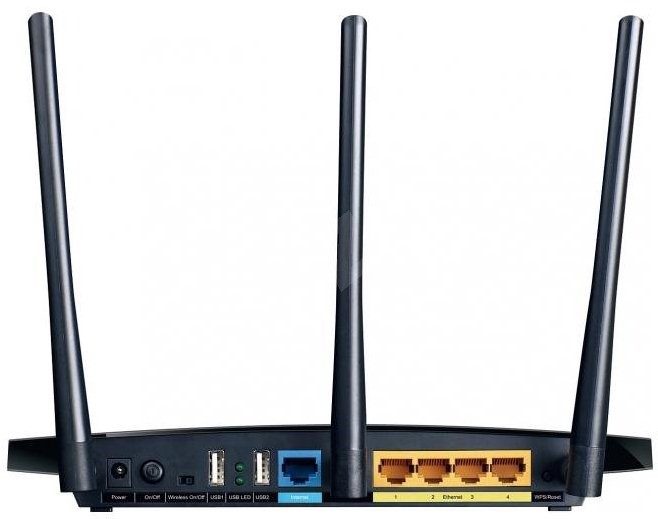
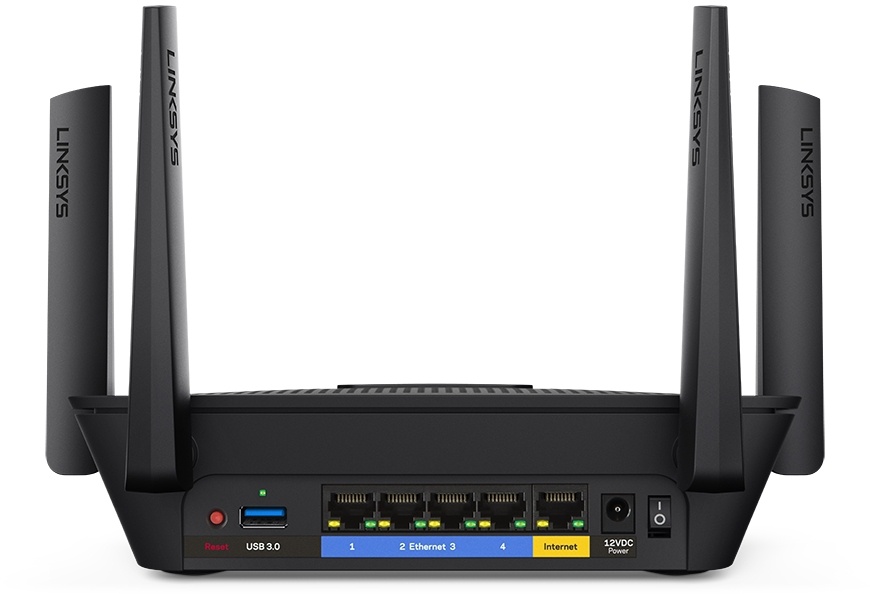
Now, if you’re looking for devices to buy and experiment on, my suggestion is to look for high-end dual-band wireless routers to allow a better segmentation of the wireless networks. If you can afford spending more for a mesh node, look for tri-band devices. Netgear and Linksys have solid options that are compatible with OpenWrt. For example, the Linksys EA8300 tri-band wireless router would make for a good high-end mesh node:
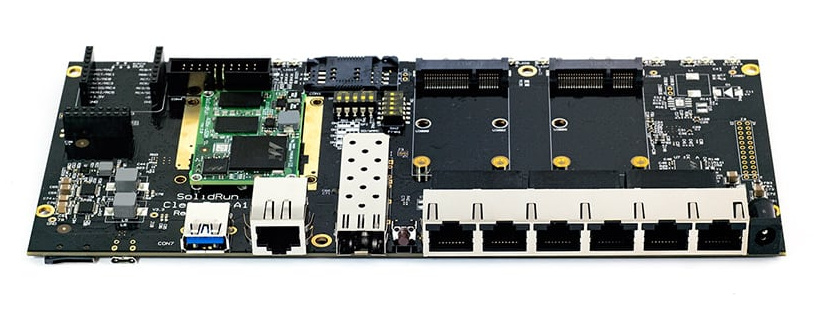
For single-board computer (SBC) fans like me, you can run OpenWrt with most of them and then use a combination of on-board wireless and USB adapter to create a powerful mesh node. ClearFog boards with one or two mini PCIe wireless cards would make very good candidates for such a project, for example:
Of course, you can install OpenWrt on bare metal x86-64 machines (e.g., standard PC or server running Intel/AMD), which will give you lots of options to put together an impressive mesh device. However, if you just want your work/home laptops/PCs to be part of the mesh (i.e., become a mesh node), there are better alternatives than installing OpenWrt as its OS. For example, you can run OpenWrt with a virtual machine or as a docker container. Naturally, it’s also possible to configure batman-adv on Linux distributions other than OpenWrt, such as Arch, Debian, and Ubuntu. See Getting started with batman-adv on any Linux device.
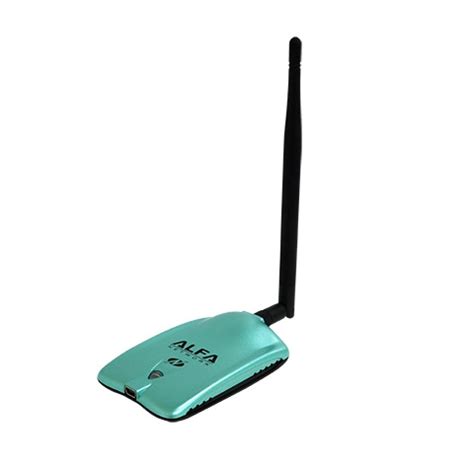
As mentioned before, even if the existing/on-board radio of your SBC/laptop/PC/server does not support the mesh point mode of operation, you can always buy a compatible PCIe card or USB adapter to turn your device into a mesh node and then use the other radio for another purpose. For example, many Alfa Network adapters can operate in mesh point mode, like the cheap AWUS036NH:
All that said, most home users will be just fine with a cheapo, used, old, and single-band router. For a brand reference, TP-Link has good and affordable devices that can be used in a mesh networking project without issues. If you’re new to this, start from here (small, simple) and think about efficiency over power. You don’t need to drive a Lamborghini to get a snack at the grocery store. For additional resources, skip to the section called Useful hardware resources down below.
Hardware-specific configurations
Every once in a while, users run into hardware that is capable of operating in mesh point mode but the default OpenWrt firmware uses a module for the wireless adapter that is loaded with incompatible parameters. Here is a list of a few of the known ones and their solution.
ath9k modules
If your device uses the ath9k module, there’s a chance that you’ll need to enable the nohwcrypt parameter of the module to use the mesh with encryption. First, however, try without changing the default module parameters. After rulling out possible typos in the network and wireless configuration files, try the following:
- Edit the
/etc/modules.d/ath9k file and add nohwcrypt=1 to it. If there’s something in the file, use a whitespace to separate parameters.
- Save the file, and reboot your device.
- Once the device comes back, check if
nohwcrypt is now enabled by typing
cat /sys/module/ath9k/parameters/nohwcrypt
If nohwcrypt is enabled, the output will be 1; otherwise, it will be 0.
- Check your mesh configuration once again and add encryption to your wireless mesh stanza.
-
Known affected devices:
| brand |
model |
version |
OpenWrt release |
| TP-Link |
WR-1043-ND |
1.8 |
19.07 |
ath10k modules
I’ve noticed that radio devices that use the ath10k module and more specifically, the ones using ath10k-firmware-qca988x-ct, are not able to operate in mesh point mode by default. If you check the syslog (logread), you’ll notice that there will be a few messages stating that the ath10k module must be loaded with rawmode=1 to allow mesh. However, I’ve tried that before without much success. Instead, my current recommendation to get mesh point working with any of the QCA988x hardware is the following (Internet connection required to download packages via opkg):
- Check which
ath module is installed via opkg:
opkg list-installed | grep -i ath
which should show at least one ath*-firmware-qca988* and another kmod-ath* packages installed.
- Try official alternatives to them:
- For the
ath*-firmware-qca988* alternatives, check the OpenWrt Firmware index for similar ones and favor the ones that match your hardware (e.g, QCA9887) before trying the more generic ones (e.g., QCA988x).
- For the
kmod-ath* alternatives, check OpenWrt Kernel Modules index.
- Of note, if the installed modules are Candela Tech (contain the suffix
*-ct), then (a) remove the -ct packages and (b) install compatible non-ct ones. For the TP-Link Archer C7, for instance, you can replace the -ct module as follows:
opkg update
opkg remove ath10k-firmware-qca988x-ct kmod-ath10k-ct
opkg install ath10k-firmware-qca988x kmod-ath10k
- Reboot your device and then check the status of your mesh network afterwards. If that does not work, check
logread again and if possible, try another module until you find a good one.
-
Known affected devices:
| brand |
model |
version |
OpenWrt release |
| AVM |
FRITZ!WLAN Repeater 1750E |
- |
21.02 |
| GL.iNet |
GL-AR750 |
- |
21.02 |
| TP-Link |
Archer C7 |
2.0, 4.0, 5.0 |
19.07, 21.02, 22.03 |
| TP-Link |
Archer C7 US |
2.0 |
19.07, 21.02 |
Useful hardware resources
These are a few resources that I’ve used in the past that you might find useful when looking for mesh compatible devices:
- OpenWrt:
- Linux Wireless wiki:
- The wiki has a list of existing Linux wireless drivers that mention whether it supports
mesh point or not. To search for specific devices, my recommendation is to (a) open the page of a driver that supports mesh (e.g., ath10k), then (b) look for supported devices under it, and finally, (c) go to OpenWrt’s Extended Table of Hardware and in WLAN Hardware, enter a supported device found on the Linux Wireless wiki (e.g., QCA9880). This will create a filter to show only devices that contain the given hardware and should provide you a starting point for further research.
top
Software
Unless otherwise specified, all mesh nodes were running the following software:
- Operating System:
- Firmware: OpenWrt
21.02.0, r16279-5cc0535800
- Linux kernel:
5.4.143
- Packages mentioned in the tutorial:
To find out the version of all installed packages, type
or if you prefer to filter the output, use grep. For example, the following will show the version of all installed packages containing bat (e.g., batctl, kmod-batman-adv):
opkg list-installed | grep bat
Huge differences in firmware, kernel, or package versions might make the implementation of a mesh network a little bit different than the way it was explained here. Of note, devices running the batman-adv version 2019.0-2 and older are certainly incompatible with the instructions found in this tutorial, the reason being that the module was modified after then to better integrate with the network interface daemon. Fortunately, the implementation using old modules is just a simple as with the latest one. Check what the B.A.T.M.A.N. wiki has to say about it. However, it’s worth mentioning that with old batman modules, changes to /etc/config/network will likely require a reboot instead of simply reloading /etc/init.d/network.
Also, I’ve noticed that when installing kmod-batman-adv, the package manager will install a minimal version of batctl, called batctl-tiny, that lacks some of the options mentioned here (e.g., batctl n and batnctl o). However, if you install batctl first and then kmod-batman-adv, the package manager will preserve batctl-default, which has most of the batctl features. In this tutorial, however, we will use the batctl-full package that contains all features referred to in the batctl manual.
Finally, the installation of wpad-mesh-wolfssl will conflict with the already installed wpad-basic-wolfssl package (or any other wpad-basic* package, for that matter). This means you have to remove the latter before installing the former. To remove the wpad-basic-wolfssl or any other conflicting wpad-basic package, simply type
VI text editor
The default text editor in a standard OpenWrt image is vi, which is an old, screen oriented editor that most modern users will find counterintuitive to use. Fortunately, once you get the hang of it, vi becomes very easy to use and it becomes a very convenient way of editing config files. Here’s all that you need to know about using vi in a terminal:
You can open a file by adding the filename as an argument to vi, as follows
and if the file does not exist, vi will create one with that name.
By default, vi will start in command mode. Such a mode let’s you navigate the file with the arrow keys and use the delete button to delete characters. (Also, in command mode, you can type dd to delete entire lines, which is very useful if you need to delete lots of things quickly.)
However, if you need to type characters and have more flexibility to edit the file, you need to tell vi to enter insert mode. To enter insert mode, type (no need to hit return/enter afterwards)
and at the bottom of the screen, you will see that it now shows a I to indicate that vi is in insert mode. You can now type freely and even paste multiple things at once in insert mode.
When you’re done, press the button Esc to go back into command mode. Notice that at the bottom of the screen, now there’s a - where the I was, which tells you you’re in command mode once again.
In command mode, you can then write changes to the file by typing (followed by return/enter)
Now you’ve saved the file. To quit, type
Alternatively, you can write and quit by simply typing :wq.
vi has other commands as well but honestly, that’s pretty much all that you need to know about vi in order to use in the examples covered here. Give it a try!
VI cheat table
| mode |
key/command |
action |
| command |
i key |
Enter insert mode |
| insert |
Esc key |
Return to command mode |
| command |
dd (or hold d key) |
Erase entire row |
| command |
:w + Enter/Return |
Write to file |
| command |
:q + Enter/Return |
Quit to terminal |
| command |
:q! + Enter/Return |
Quit without saving changes |
| command |
:wq + Enter/Return |
Write to file and quit |
Alternatives to VI
Now, if you still don’t like to use vi, you can always transfer files from your laptop/PC to OpenWrt via sftp, for example, or utilities like scp.
top
Implementation
In this section, we will see how to configure four mesh nodes in three different network topologies. More specifically:
- Gateway-Bridge: A mesh network in which one node plays the role of a mesh gateway and another, of a bridge, while the remaining are just mesh nodes. This is a very typical scenario for a home or small office, for example.
- Bridge-Bridge: Two nodes play the role of a bridge, therefore making the mesh network transparent to the external (non-mesh) networks.
- Gateway-Gateway: Two nodes play the role of a gateway to provide high-availability to mesh clients/nodes.
In all such cases, we will use the 5Ghz radio exclusively for mesh wireless traffic, while the more widely compatible 2.4Ghz radio, as well as Ethernet connections, will be left available for non-mesh wireless traffic:
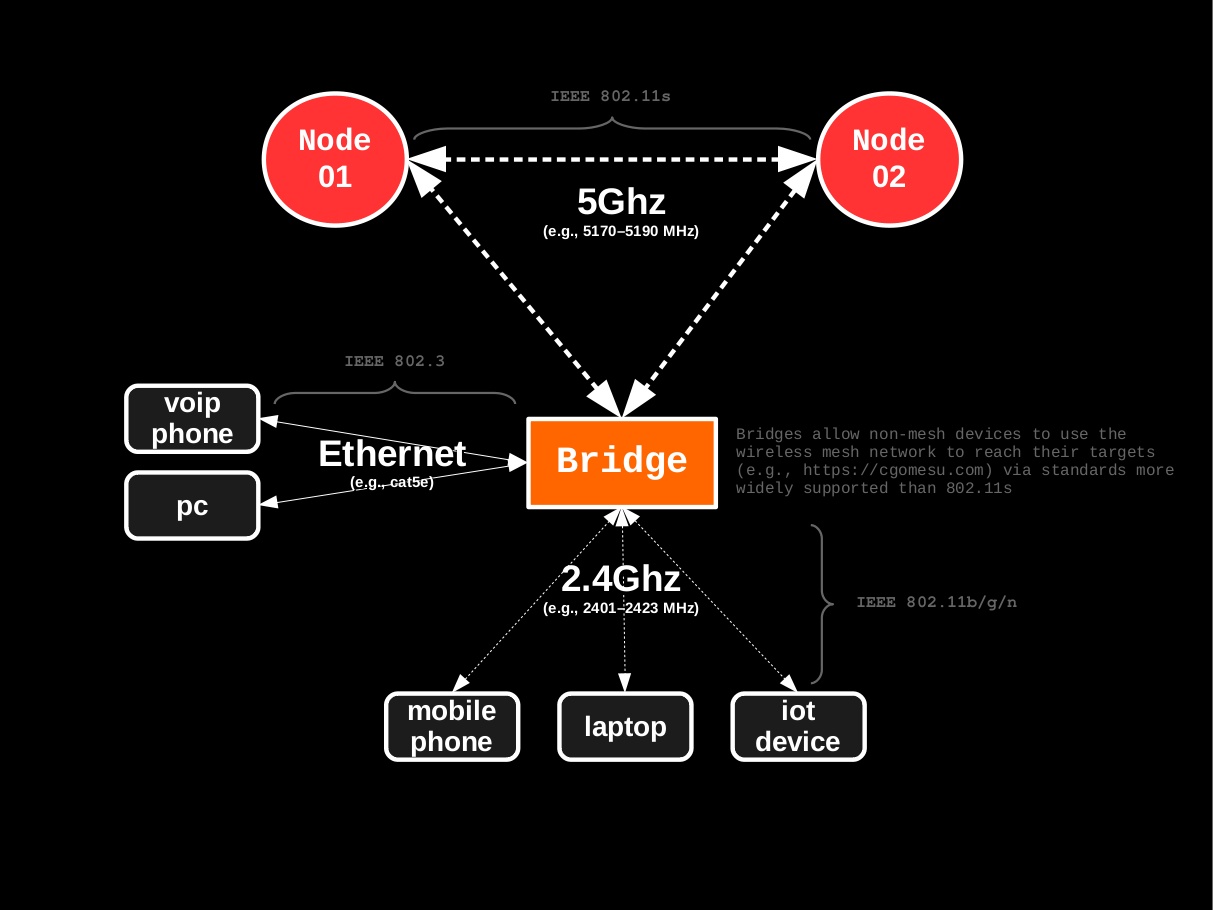
Segmentation of mesh vs. non-mesh traffic is not a requirement but an option that greatly improves performance. If your mesh devices do not support dual-band, simply assign the same radio for both mesh and non-mesh wireless interfaces.
First, however, we will start with the aspects that are common to all topologies, such as planning the mesh network, and the installation and basic configuration of OpenWrt mesh nodes. Then, we will move to the specifics of each of the aforementioned mesh network topologies. Finally, we end the section with a slightly more complex scenario to illustrate how to create mesh VLANs with batman-adv and a very brief introduction to using batman-adv on other Linux distros.
Even though the examples show static nodes, none of the mesh nodes need to be static. The mesh network and its components can be partially or totally mobile. For example, if some of your nodes are mobile units (e.g., vehicles, drones, robots, cellphones, laptops), they can leave and join the mesh, recreate the mesh elsewhere, join a completely different mesh, and so on. The routing algorithm (batman-adv) will automatically (and seamlessly) take care of changes to the network topology. (But of course, if there’s a single gateway and it does not reach any node, the network is bound to stop working as intended without proper configuration to handle such scenarios.)

Planning
Just like any other type of network, deploying a mesh network–especially over large areas, with dozens of nodes–requires a fair deal of planning; Otherwise, you are bound to experience, for instance, bottlenecks, uneven access point signal quality, and unstable WAN connectivity across the mesh. Also, features like high availability go well beyond the configuration and topology of a mesh network (e.g., power source, whre your WAN connections are coming from, and the hardware you are using all play important roles when it comes to high availability). Mesh networks are very, very easy to scale but planning is key.
Eli the Computer Guy has an old video about mesh networks that goes into things like high availability and bottlenecks. If that matters to you, take a look. The relevant content starts at 03:30 and ends at 17:30, approximately.
The examples in this tutorial are simple by design–they were created to illustrate different scenarios in a way that makes it easy to understand what is going on. The idea is to use the examples as templates for more complex implementations.
OpenWrt installation and initial configuration
Now that you have the hardware, the first thing to do is to install OpenWrt. Flashing a default OpenWrt image onto a compatible device is a very easy and safe procedure because it’s been tested multiple times. (For extra safety precautions, you might want to search the web for your-device + openwrt to see if there’s any indexed forum post or comment regarding installation issues and bugs, for example.)
If you’re new to all this, the folks at OpenWrt were kind enough to provide a plethora of instructions on how to install and uninstall OpenWrt and even put together an installation checklist. At the very least, do the following:
- Look for your device’s model and version in the Table of Hardware and open its Device Page (e.g., TP-Link TL-WDR4300);
- Double check that the model and version match your device’s model and version in the Supported Versions table;
- In the Installation table, you will find a column called Firmware OpenWrt Install URL and another one called Firmware OpenWrt Upgrade URL. If your device is still running the original firmware, then download the binary from the Firmware OpenWrt Install URL column; otherwise, download the binary from the Firmware OpenWrt Upgrade URL column. Both files should have a
.bin extension;
- Regardless of the binary file downloaded, verify its checksum afterwards;
- Disconnect your laptop/PC from any access point or switch, and connect your laptop/PC directly to the device’s Ethernet port.
- Open your device’s web UI, go to its Settings and/or find the Firmware Upgrade option. Then, select the downloaded OpenWrt binary, and let it do its thing. Once it’s done, the device will reboot with OpenWrt installed.
- You should now be able to reach your new OpenWrt device at
192.168.1.1 if connected to a LAN port. (Remember that all wireless interfaces are disabled by default, so you can only reach it via cable.)
If you followed these steps and successfully flashed the default OpenWrt firmware onto your device, then go ahead and skip to the Initial configuration section. The remaining part of this section is meant for advanced users who want to customize their image files.
If you’re an experienced user, you can use OpenWrt’s Image Builder to create a customized image that contains all the necessary packages and configuration files by default. This can save you a lot of time by letting you skip either partially or completely the remaining configuration instructions, depending on the level of specification of the make image build command.
To build a custom image file, first install the dependencies for your Linux distribution. Afterwards, follow these steps:
- Find the target for your device in the device’s OpenWrt page. For instance, for the TP-Link TL-WDR4300 v1, the target is ath79/generic;
- Navigate to the root of the available targets for the latest version of the OpenWrt 21.02 release (e.g.,
21.02.0);
- Navigate to the root of your device’s target (e.g., for the TL-WDR4300, that would be ath79 > generic);
- Go to the Supplementary Files table at the bottom;
-
Download the image builder .tar.xz file (e.g., openwrt-imagebuilder-21.02.0-ath79-generic.Linux-x86_64.tar.xz) and check its hash afterwards:
sha256sum openwrt-imagebuilder-*.tar.xz
6354c0380a8cdb2c6a7f43449a7f6b3d04c4148478752a90f2af575ee182d2bb openwrt-imagebuilder-21.02.0-ath79-generic.Linux-x86_64.tar.xz
-
If everything looks good, extract the image builder:
tar -xvf openwrt-imagebuilder-*.tar.xz
-
Enter the image builder directory to start using make and then search for your device’s PROFILE name (e.g., tplink_tl-wdr4300-v1), as follows:
 cd openwrt-imagebuilder-*
 make info
 tplink_tl-wdr4300-v1:
   TP-Link TL-WDR4300 v1
   Packages: kmod-usb2 kmod-usb-ledtrig-usbport
   hasImageMetadata: 1
   SupportedDevices: tplink,tl-wdr4300-v1 tl-wdr4300
For long lists, you might want to filter the output via grep. For example, to show only entries that contain wdr4300, run make info | grep -i wdr4300.
-
Build customized images for your device’s profile. (See below for a table with a list of specific packages to add and to remove if you want to enable batman mesh support by default.) For example, to build images for the TL-WDR4300 (v1) without pppoe and IPv6 support and with a minimal LuCI and batman-adv mesh support, run the following make image command:
 make image PROFILE=tplink_tl-wdr4300-v1 \
   PACKAGES="uhttpd uhttpd-mod-ubus libiwinfo-lua luci-base luci-app-firewall luci-mod-admin-full luci-theme-bootstrap \
   -ppp -ppp-mod-pppoe \
   -ip6tables -odhcp6c -kmod-ipv6 -kmod-ip6tables -odhcpd-ipv6only \
   -wpad-basic-wolfssl wpad-mesh-wolfssl \
   batctl-full kmod-batman-adv" \
   CONFIG_IPV6=n
Notice that the prefix - is meant to inform that the package should be removed from the default image of the chosen PROFILE. In addition, the inclusion of CONFIG_IPV6=n is optional and only used here to completely disable the IPv6 configuration in the example. Other build configuration variables are also optional and can be modified by adding them to the make image command. For more detailed information, run make help.
This will prompt your system to start downloading the required packages and then start building the firmware. Be patient because this operation can take several minutes.
-
Once the builder is done without any errors, navigate to the subdirectory ./bin/targets/<target> that contains the built image files, in which <target> is the device’s target. For the TL-WDR4300, for instance, the target is ath79/generic, which means the built files are at ./bin/targets/ath79/generic and you can navigate to it from the image builder root directory as follows:
cd ./bin/targets/ath79/generic
Of note, the *.manifest file contains a list of installed packages, which is useful if you need to double check which packages a given image contains by default. The profiles.json file contains even more detailed information about the built image but it is in json format. If you have jq installed, however, you can parse it via cat profiles.json | jq . to get a more readable version.
-
Personally, I like to copy all generated files to a location outside the image builder. To create a new location for the built images in your user’s Downloads directory, do as follows (suggested structure is openwrt-custom-images/<release>/<device>):
mkdir -p ~/Downloads/openwrt-custom-images/21.02/tl-wdr4300_v1
Then copy all generated files to the new directory outside the image builder:
cp ./* ~/Downloads/openwrt-custom-images/21.02/tl-wdr4300_v1/
Now you can safely go back to the root of the image builder directory and run make clean to delete all generated files. This is good practice if building multiple images with different features.
- From this part forward, the procedure is the same as outlined before for the default installation.
Lastly, to save additional firmware space and RAM, follow the OpenWrt recommendation and at the end of the package list, add the following to enable batman-adv and include support for mesh encryption (e.g., use sae to authenticate mesh nodes):
| action |
package |
| remove mesh encryption conflict |
-wpad-basic-wolfssl |
| add mesh encryption |
wpad-mesh-wolfssl |
| add the full batctl |
batctl-full |
| add batman-adv |
kmod-batman-adv |
Initial configuration
As mentioned before, we will not use the web UI in this tutorial, even if the OpenWrt image you’re using has LuCI installed by default. Instead, we will access our device and configure it using only SSH. So, open a terminal and ssh into your OpenWrt device, as follows
in which 192.168.1.1 is your OpenWrt device’s IP address (that’s usually the case after a fresh install but if it’s different, use the proper IP then). Because this is the first time using the system, you’ll need to set a password for the root user. You can do that by typing
and following the instructions. At this point, it’s good practice to label this device (e.g., node01) and take note of its MAC address. To find out the latter, type
and keep a record of the device’s name and its MAC address–if there are multiple different addresses, take note of all of them and their interface.
(Optional. Configure key-based authentication and disable password login. Reboot and check that ssh access methods are correctly configured.)
From this point forward, we will start editing files using vi. If you’ve not read the section about how to use vi yet, this is a good time to do so.
Default config for the hardware
Regardless of the hardware, before doing anything related to the mesh network, always take your time and study the default configuration found in /etc/config/. For reference, I usually go over the following:
- How many Ethernet ports?
- Are they labeled either LAN or WAN or there’s both?
- In
/etc/config/network, how is the router handling multiple Ethernet ports? If there’s both LAN and WAN, how is the router separating LAN from WAN?
- If there is both LAN and WAN, how is the firewall handling them in
/etc/config/firewall? (Probably two zones, LAN and WAN, with LAN->WAN accept all but WAN->LAN deny all?)
- In
/etc/config/dhcp, how is the device handling IP addresses? (Is there a DHCP server for LAN?)
And finally, look at the wireless settings (/etc/config/wireless):
- How many radio devices and their names? (e.g.,
radio0)
- Configuration-wise, what is the device using by default vs. what is it capable of? (
iw list)
- Is the radio enabled or disabled? (Keep/add
option disabled 1 to disable it before configuration; to re-enable, simply comment this line out or set the value to 0.)
- Are there pre-configured wireless access points being broadcast? If yes, which
option network is it using by default? (Likely lan or whatever the LAN interface is being called in /etc/config/network.)
For example, many wireless routers have LAN and WAN ports which are handled by a switch configuration with VLANs enabled to separate LAN from WAN. Take note of it; understand what is going on in the config files; play with them; then, continue. Also, take this opportunity to go over the Device Page to check if there’s any warnings or special configuration notes.
This understanding is instrumental to the way the device will be configured to play different roles in the mesh network and a good grasp of the device’s default settings will greatly reward you later on.
Updating and installing packages
(Only experienced users: If you used a default image, this is a good opportunity to remove unnecessary packages. See the OpenWrt FAQ for a reference of safe to remove packages, for example. If this is your first time playing with mesh, leave any unmentioned pkg alone until you get everything working as intended.)
In order to update and install packages, you need to give your device temporary access to the Internet. More often than not, if you have an existing network with access to the Internet on-site, then just connect the device to a router/switch via cable. If that doesn’t work, go ahead and configure your device to act like a dumb access point first. You can check that the device has access to the Internet by pinging google.com or 8.8.8.8, as follows
If it all looks good, it’s time to update the package list, as follows
Optional. Upgrade all installed packages. Type opkg list-upgradable to find which packages can be upgraded and then opkg upgrade PKG, in which PKG is the package name. If opkg list-upgradable run into memory issues, try commenting out a few lines in /etc/opkg/distfeeds.conf and try again. Alternatively, it’s possible to use the following command to automatically upgrade all packages at once, per the opkg openwrt wiki examples:
opkg list-upgradable | cut -f 1 -d ' ' | xargs opkg upgrade
Be careful with mass upgrades though, especially if you’re running a device with limited memory. You might end up even bricking your device.
Now, let’s install the mesh-related packages and remove conflicting packages. First, remove wpad-basic-wolfssl with
opkg remove wpad-basic-wolfssl
then install batctl-full, batman-adv, and wpad-mesh-wolfssl with
opkg install batctl-full kmod-batman-adv wpad-mesh-wolfssl
It is up to you whether to install wpad-mesh-wolfssl or wpad-mesh-openssl. For a detailed description of the main differences, take a look at the wolfSSL documentation. In brief, wolfSSL was built for embedded systems–such as most consumer routers–and it is lighter and more frequently patched than OpenSSL. OpenSSL is much older and more general purpose.
Make sure there are no error messages and if there are, troubleshoot them before proceeding.
Remove the connection that gave your device temporary access to the Internet. Then, reboot (type reboot in the terminal) and restart the SSH session with your laptop/PC still connected to the device via cable.
Depending on your hardware, you might run into issues while trying to make one or multiple radios operate in mesh point mode, owing to loaded modules and their default parameter values. Keep a close look at your device’s syslog file (run logread to output it to the terminal) for kernel related errors. In addition, take a look at the section Hardware-specific configurations for any comments related to the module used by your OpenWrt device.
Mesh node basic config
It is time to configure the basics of our mesh network and nodes. To do so, we will edit multiple files in /etc/config/ but first, let’s find out the capabilities of the detected radios in our wireless device, as follows
which will output something like this
Wiphy phy1
        wiphy index: 1
        max # scan SSIDs: 4
        max scan IEs length: 2261 bytes
        max # sched scan SSIDs: 0
        max # match sets: 0
        Retry short limit: 7
        Retry long limit: 4
        Coverage class: 0 (up to 0m)
        Device supports AP-side u-APSD.
        Device supports T-DLS.
        Available Antennas: TX 0x7 RX 0x7
        Configured Antennas: TX 0x7 RX 0x7
        Supported interface modes:
                 * IBSS
                 * managed
                 * AP
                 * AP/VLAN
                 * monitor
                 * mesh point
                 * P2P-client
                 * P2P-GO
                 * outside context of a BSS
        Band 2:
                Capabilities: 0x11ef
                        RX LDPC
                        HT20/HT40
                        SM Power Save disabled
                        RX HT20 SGI
                        RX HT40 SGI
                        TX STBC
                        RX STBC 1-stream
                        Max AMSDU length: 3839 bytes
                        DSSS/CCK HT40
                Maximum RX AMPDU length 65535 bytes (exponent: 0x003)
                Minimum RX AMPDU time spacing: 8 usec (0x06)
                HT TX/RX MCS rate indexes supported: 0-23
                Frequencies:
                        * 5180 MHz [36] (17.0 dBm)
                        * 5200 MHz [40] (17.0 dBm)
                        * 5220 MHz [44] (17.0 dBm)
                        * 5240 MHz [48] (17.0 dBm)
                        * 5260 MHz [52] (21.0 dBm) (radar detection)
                        * 5280 MHz [56] (21.0 dBm) (radar detection)
                        * 5300 MHz [60] (21.0 dBm) (radar detection)
                        * 5320 MHz [64] (21.0 dBm) (radar detection)
                        * 5500 MHz [100] (21.0 dBm) (radar detection)
                        * 5520 MHz [104] (21.0 dBm) (radar detection)
                        * 5540 MHz [108] (21.0 dBm) (radar detection)
                        * 5560 MHz [112] (21.0 dBm) (radar detection)
                        * 5580 MHz [116] (21.0 dBm) (radar detection)
                        * 5600 MHz [120] (21.0 dBm) (radar detection)
                        * 5620 MHz [124] (21.0 dBm) (radar detection)
                        * 5640 MHz [128] (21.0 dBm) (radar detection)
                        * 5660 MHz [132] (21.0 dBm) (radar detection)
                        * 5680 MHz [136] (21.0 dBm) (radar detection)
                        * 5700 MHz [140] (21.0 dBm) (radar detection)
                        * 5745 MHz [149] (21.0 dBm)
                        * 5765 MHz [153] (21.0 dBm)
                        * 5785 MHz [157] (21.0 dBm)
                        * 5805 MHz [161] (21.0 dBm)
                        * 5825 MHz [165] (21.0 dBm)
        valid interface combinations:
                 * #{ managed } <= 2048, #{ AP, mesh point } <= 8, #{ P2P-client, P2P-GO } <= 1, #{ IBSS } <= 1,
                   total <= 2048, #channels <= 1, STA/AP BI must match, radar detect widths: { 20 MHz (no HT), 20 MHz, 40 MHz }

        HT Capability overrides:
                 * MCS: ff ff ff ff ff ff ff ff ff ff
                 * maximum A-MSDU length
                 * supported channel width
                 * short GI for 40 MHz
                 * max A-MPDU length exponent
                 * min MPDU start spacing
        max # scan plans: 1
        max scan plan interval: -1
        max scan plan iterations: 0
        Supported extended features:
                * [ RRM ]: RRM
                * [ CQM_RSSI_LIST ]: multiple CQM_RSSI_THOLD records
                * [ CONTROL_PORT_OVER_NL80211 ]: control port over nl80211
                * [ TXQS ]: FQ-CoDel-enabled intermediate TXQs
                * [ AIRTIME_FAIRNESS ]: airtime fairness scheduling
                * [ SCAN_RANDOM_SN ]: use random sequence numbers in scans
                * [ SCAN_MIN_PREQ_CONTENT ]: use probe request with only rate IEs in scans
                * [ CAN_REPLACE_PTK0 ]: can safely replace PTK 0 when rekeying
                * [ CONTROL_PORT_NO_PREAUTH ]: disable pre-auth over nl80211 control port support
                * [ DEL_IBSS_STA ]: deletion of IBSS station support
                * [ MULTICAST_REGISTRATIONS ]: mgmt frame registration for multicast
                * [ SCAN_FREQ_KHZ ]: scan on kHz frequency support
                * [ CONTROL_PORT_OVER_NL80211_TX_STATUS ]: tx status for nl80211 control port support
Wiphy phy0
        wiphy index: 0
        max # scan SSIDs: 4
        max scan IEs length: 2257 bytes
        max # sched scan SSIDs: 0
        max # match sets: 0
        Retry short limit: 7
        Retry long limit: 4
        Coverage class: 0 (up to 0m)
        Device supports AP-side u-APSD.
        Device supports T-DLS.
        Available Antennas: TX 0x3 RX 0x3
        Configured Antennas: TX 0x3 RX 0x3
        Supported interface modes:
                 * IBSS
                 * managed
                 * AP
                 * AP/VLAN
                 * monitor
                 * mesh point
                 * P2P-client
                 * P2P-GO
                 * outside context of a BSS
        Band 1:
                Capabilities: 0x11ef
                        RX LDPC
                        HT20/HT40
                        SM Power Save disabled
                        RX HT20 SGI
                        RX HT40 SGI
                        TX STBC
                        RX STBC 1-stream
                        Max AMSDU length: 3839 bytes
                        DSSS/CCK HT40
                Maximum RX AMPDU length 65535 bytes (exponent: 0x003)
                Minimum RX AMPDU time spacing: 8 usec (0x06)
                HT TX/RX MCS rate indexes supported: 0-15
                Frequencies:
                        * 2412 MHz [1] (20.0 dBm)
                        * 2417 MHz [2] (20.0 dBm)
                        * 2422 MHz [3] (20.0 dBm)
                        * 2427 MHz [4] (20.0 dBm)
                        * 2432 MHz [5] (20.0 dBm)
                        * 2437 MHz [6] (20.0 dBm)
                        * 2442 MHz [7] (20.0 dBm)
                        * 2447 MHz [8] (20.0 dBm)
                        * 2452 MHz [9] (20.0 dBm)
                        * 2457 MHz [10] (20.0 dBm)
                        * 2462 MHz [11] (20.0 dBm)
                        * 2467 MHz [12] (20.0 dBm)
                        * 2472 MHz [13] (20.0 dBm)
                        * 2484 MHz [14] (disabled)
        valid interface combinations:
                 * #{ managed } <= 2048, #{ AP, mesh point } <= 8, #{ P2P-client, P2P-GO } <= 1, #{ IBSS } <= 1,
                   total <= 2048, #channels <= 1, STA/AP BI must match, radar detect widths: { 20 MHz (no HT), 20 MHz, 40 MHz }

        HT Capability overrides:
                 * MCS: ff ff ff ff ff ff ff ff ff ff
                 * maximum A-MSDU length
                 * supported channel width
                 * short GI for 40 MHz
                 * max A-MPDU length exponent
                 * min MPDU start spacing
        max # scan plans: 1
        max scan plan interval: -1
        max scan plan iterations: 0
        Supported extended features:
                * [ RRM ]: RRM
                * [ CQM_RSSI_LIST ]: multiple CQM_RSSI_THOLD records
                * [ CONTROL_PORT_OVER_NL80211 ]: control port over nl80211
                * [ TXQS ]: FQ-CoDel-enabled intermediate TXQs
                * [ AIRTIME_FAIRNESS ]: airtime fairness scheduling
                * [ SCAN_RANDOM_SN ]: use random sequence numbers in scans
                * [ SCAN_MIN_PREQ_CONTENT ]: use probe request with only rate IEs in scans
                * [ CAN_REPLACE_PTK0 ]: can safely replace PTK 0 when rekeying
                * [ CONTROL_PORT_NO_PREAUTH ]: disable pre-auth over nl80211 control port support
                * [ DEL_IBSS_STA ]: deletion of IBSS station support
                * [ MULTICAST_REGISTRATIONS ]: mgmt frame registration for multicast
                * [ SCAN_FREQ_KHZ ]: scan on kHz frequency support
                * [ CONTROL_PORT_OVER_NL80211_TX_STATUS ]: tx status for nl80211 control port support
Here, we are particularly interested in learning the following:
- How many radios there are (
phy0, phy1);
- The supported modes of operation of each radio, and more specifically, that the device is indeed able to operate in
mesh point mode, as shown under Supported interface modes:;
- The total number of bands. In this example, each radio can use only one band but one uses
2.4GHz frequencies (phy0, Band 1), while the other uses 5GHz frequencies (phy1, Band 2);
- For each band, the acceptable channels, as shown under
Frequencies:.
With such information, we can now configure our radio devices in /etc/config/wireless, as follows
and then edit each config wifi-device stanza accordingly. In the TL-WDR4300, there’s two default config wifi-device stanzas–namely, one for the 2.4GHz radio (called radio0) and another for the 5GHz radio (radio1). After changing and adding a few additional options, mine usually look like the following:
config wifi-device 'radio0'
        option type 'mac80211'
        option channel '1'
        #option txpower '20'  ##uncomment and edit to override default transmission power in dBm
        option hwmode '11g'
        option path 'platform/ahb/18100000.wmac'
        #option htmode 'HT20'  ##uncomment and edit to override default high throughput mode
        option country 'BR'  ##must match your country code
        option disabled '1'  ##change to 0 to enable it

config wifi-device 'radio1'
        option type 'mac80211'
        option channel '153'  ##all nodes must use the same channel
        #option txpower '21'  ##uncomment and edit to override default transmission power in dBm
        option hwmode '11a'
        option path 'pci0000:00/0000:00:00.0'
        #option htmode 'HT20'  ##uncomment and edit to override default high throughput mode
        option country 'BR'  ##must match your country code
        option disabled '0'  ##change to 1 to disable it
The comments in this and other config files are just for educational purpose. Feel free to remove them in your device’s config files.
In this guide, radio1 (5GHz) will be used for the mesh traffic under the channel 153, which means all other mesh nodes must use the same channel. However, radio0 (2.4GHz) will at times be used to create standard wireless access points (WAPs; 802.11b/g/n) for non-mesh clients, which means that none of the other nodes need to use the same channel with this radio. In fact, it is strongly advised that 2.4GHz WAPs in close proximity should use different channels–namely, channels 1 (2401–2423MHz frequency range), 6 (2426–2448MHz), or 11 (2451–2473MHz) because those are non-overlapping channels and therefore, do not interfere with each other. Because only mesh bridges will make use of radio0, the configuration indicates that it should be disabled by default.
The segmentation between mesh and non-mesh wireless communication adopted in this guide is best summarized by the following illustration:
In addition, for HT20/HT40 devices, stick to HT20 if you are deploying the mesh in a crowded area, such as an apartment building; otherwise, the interference might make higher high-throughput (HT) actually less performant. Finally, remember to edit the country code before enabling the radio and follow country regulations when overriding the default transmission power (option txpower). More often than not, you should actually decrease the txpower rather than increase it. (For related material, see OpenWrt’s articles on Exceeding transmit power limits and Other transmit power issues.)
Comment out or delete any config wifi-iface automatically generated after a fresh install by adding a # at the beginning of each line or typing dd, as follows
#config wifi-iface 'default_radio0'
#        option device 'radio0'
#        option network 'lan'
#        option mode 'ap'
#        option ssid 'OpenWrt'
#        option encryption 'none'
Then, at the end of the file, let’s add a wifi-iface for the wireless mesh, called wmesh, as follows
config wifi-iface 'wmesh'
        option device 'radio1'  ##must match the name of a wifi-device
        option network 'mesh'  ##mesh stanza in /etc/config/network
        option mode 'mesh'  ##use 802.11s mode
        option mesh_id 'MeshCloud'  ##mesh "ssid"
        option encryption 'sae'  ##https://openwrt.org/docs/guide-user/network/wifi/basic#encryption_modes
        option key 'MeshPassword123'  ##password in plain text
        option mesh_fwding '0'  ##let batman-adv handle routing
        option mesh_ttl '1'  ##time to live in the mesh
        option mcast_rate '24000'  ##routes with a lower throughput rate won't be visible
        option disabled '0'  ##change to 1 to disable it
Because all mesh nodes must operate on the same channel, use the same authentication, etc., multiple config options are often dictated by the “lowest common denominator” across all mesh nodes–that is, the best possible configuration that will work with all nodes, not just the ones with the best hardware and software available. For example, not all devices will necessarily be able to use SAE because it’s very new and therefore, won’t be able to connect to mesh networks that use it. Instead, you might want to set encryption to something like psk2+aes, which should be good enough for most devices out there. So, keep that in mind when configuring your mesh nodes.
Save the file and exit it.
Now we need to configure /etc/config/network to allow wmesh to use batman-adv. To do so, edit the network file, as follows
and let’s add an interface called bat0 at the bottom of the file, as follows:
config interface 'bat0'
        option proto 'batadv'
        option routing_algo 'BATMAN_IV'
        option aggregated_ogms '1'
        option ap_isolation '0'
        option bonding '0'
        option bridge_loop_avoidance '1'
        option distributed_arp_table '1'
        option fragmentation '1'
        option gw_mode 'off'
        #option gw_sel_class '20'
        #option gw_bandwidth '10000/2000'
        option hop_penalty '30'
        option isolation_mark '0x00000000/0x00000000'
        option log_level '0'
        option multicast_mode '1'
        option multicast_fanout '16'
        option network_coding '0'
        option orig_interval '1000'
The bat0 stanza has options with default values to facilitate fine-tuning later on. The specifics about each option is derived from the official batctl manual. For more details, refer to the Protocol Documentation and more specifically, the Tweaking section.
In very nichey cases of highly mobile nodes, it is recommended to disable aggregated_ogms and lower orig_interval.
Then, at the bottom of the /etc/config/network file, let’s add an actual network interface to transport batman-adv packets, which in our case will be the network used by wmesh in the /etc/config/wireless config file, namely mesh, as follows:
config interface 'mesh'
        option proto 'batadv_hardif'
        option master 'bat0'
        option mtu '1536'
The maximum transmission unit (MTU) size should be anything between 1500 (usual size for Ethernet connections) and 2304 (usual size for WLAN connections). However, because batman-adv adds its own header to packets traveling through the wireless mesh network, it is suggested to set a minimum of 1528 instead. For a more detailed discussion, see Fragmentation in the official batman-adv wiki.
Save the file and exit.
Next, let’s reboot the device (type reboot in the terminal) and once it comes back online, ssh into it once again because we want to check that our batman-adv interfaces are up. To do so, type
and if the config is right, you should now see bat0 and wlan1 in the output. Similarly, we can use batctl to show us all active mesh interfaces, as follows
If it all looks good, exit the ssh session, disconnect your laptop/PC from the wireless device (but keep it running nearby), and go ahead and configure at least one other node. This can be done manually just like you’ve just configured the current node. However, if your other mesh nodes are identical to the one you have already configured–that is, it is the same brand, model, and it is running the same OpenWrt version–then you can simply copy the modified files and then paste them on the /etc/config/ directory of the new device. To copy all such files from the configured device to your laptop/PC current directory, you can use scp, as follows:
scp -r root@192.168.1.1:/etc/config ./
which should create a config dir on your laptop/PC that has all the config files from the already configured device. Then, once connected to another default OpenWrt device, it’s just a matter of doing the reverse operation, as follows:
scp -o StrictHostKeyChecking=no -o UserKnownHostsFile=/dev/null \
  -r ./config/* root@192.168.1.1:/etc/config/
Because we are starting SSH sessions with different machines that have the same IP address (192.168.1.1), we can include -o StrictHostKeyChecking=no -o UserKnownHostsFile=/dev/null to disable checking the known_hosts file and redirect discovery of the new key to /dev/null instead of your user’s known_hosts. Alternatively, you can manually edit or delete your user’s known_hosts file, which is usually found at ~/.ssh/known_hosts.
Afterwards, ssh into one of the configured mesh nodes and type
which will show a table with the interfaces (wlan1), MAC address of the neighboring mesh nodes, and when each of them was last seen. Copy the MAC address (e.g., f0:f0:00:00:00:01) from each neighboring mesh node and ping them through the mesh (using batctl p) to see if they are all replying, as follows (press Ctrl+C to stop)
batctl p f0:f0:00:00:00:01
which should output something like the following if everything is working fine
PING f0:f0:00:00:00:01 (f0:f0:00:00:00:01) 20(48) bytes of data
20 bytes from f0:f0:00:00:00:01 icmp_seq=1 ttl=50 time=3.01 ms
20 bytes from f0:f0:00:00:00:01 icmp_seq=2 ttl=50 time=1.71 ms
20 bytes from f0:f0:00:00:00:01 icmp_seq=3 ttl=50 time=1.10 ms
--- f0:f0:00:00:00:01 ping statistics ---
3 packets transmitted, 3 received, 0% packet loss
rtt min/avg/max/mdev = 1.103/1.942/3.008/0.794 ms
Pat yourself on the back because you have successfully configured multiple mesh nodes!
Go ahead and configure all your mesh nodes the same way as before and only then move on to bridges, gateways, and VLAN configs, as described next.
Troubleshooting mesh issues
These are a few tips in case you run into issues when configuring gateways and bridges.
To test node to node connectivity, connect to a mesh node and use
in which MAC is another node’s MAC address. If the node does not reply, there’s an issue with batman-adv or its configuration. Try rebooting both nodes before doing anything else.
A more powerful tool to see what is going on in the mesh network is the tcpdump utility for batman-adv. To use it, connect to a mesh node and type
in which batX is a batman-adv interface (usually bat0 but if you have more than one, then bat1, etc.). This is quite useful when configuring VLANs because it will show the VLAN ID of each client as well. In addition, it is possible to specify the VLAN ID in the td argument to constraint the output to one particular VLAN (e.g., batctl td bat0.1). Depending on the scale of your mesh network, you might need to filter the output because things can get wild with tcpdump really fast.
For more details, see the batctl manual or type batctl -h for cli usage information. Keep in mind that while many options can be set via batctl, those changes are ephemeral–that is, they won’t survive a reboot. To make permanent changes, you need to add/edit the respective option in the /etc/config/network file and batX stanza.
It is worth mentioning that if you’ve been following my suggestion to name and take note of each device’s MAC address, you can now create a file called bat-hosts in /etc/ that contains pairs of MAC address and name, as follows:
f0:f0:00:00:00:00 node01
f0:f1:00:00:00:00 node02
f0:f2:00:00:00:00 node03
f0:f3:00:00:00:00 node04
This makes it much easier to identify the mesh nodes when issuing a command like batctl n and other debug tables. As far as I’m aware, however, you have to create and update such file in each node because such information will just be available to nodes that have a bat-hosts file.
Finally, as mentioned before, keep an eye on your device’s syslog for errors. Module related issues are often associated with logged kernel errors (see the section Hardware-specific configurations) and wpa_supplicant has multiple mesh-specific error codes to help you debug connectivity issues. The syslog can be inspected via logread, as follows:
For usage information, type logread -h.
Configuring common mesh networks
Here, we will see how to turn one or two of our configured mesh nodes into either a mesh bridge or a mesh gateway. To avoid repetition, the configuration of bridges and gateways is described in more detail in the first example, and only a few small differences and observations are highlighted afterwards. In addition, only IPv4 addresses and configurations were used but nothing prohibits the use of IPv6 in a mesh network.
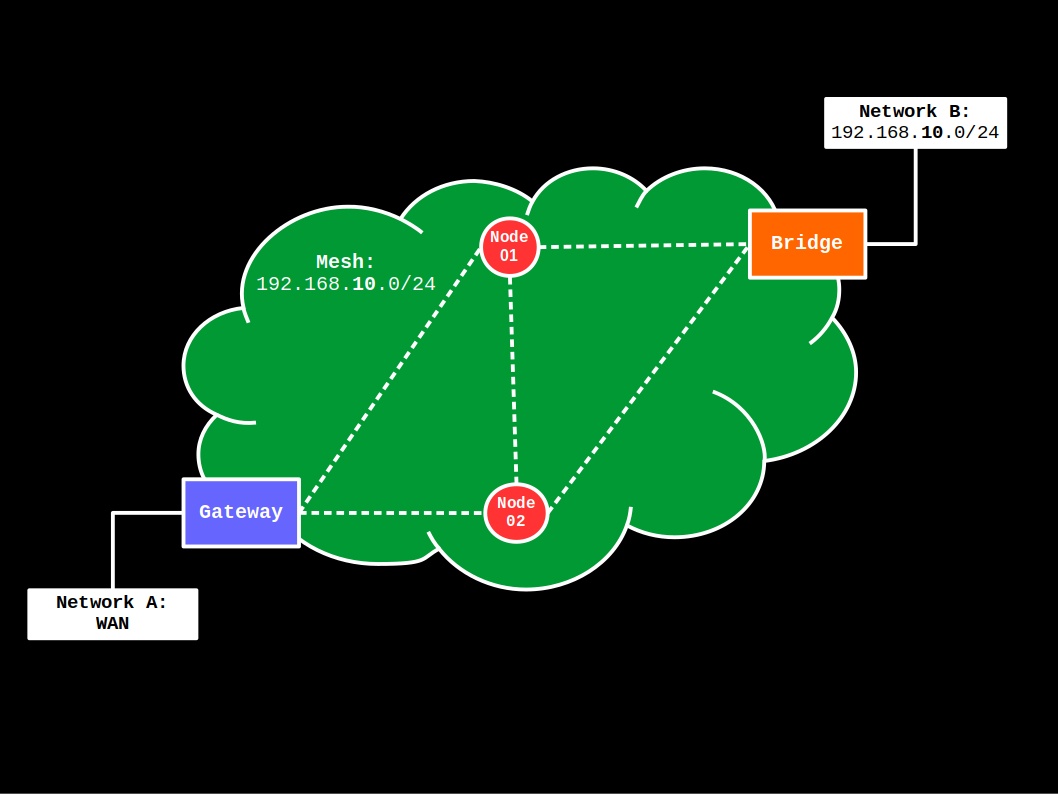
Gateway-Bridge
This first example applies to the following topology:
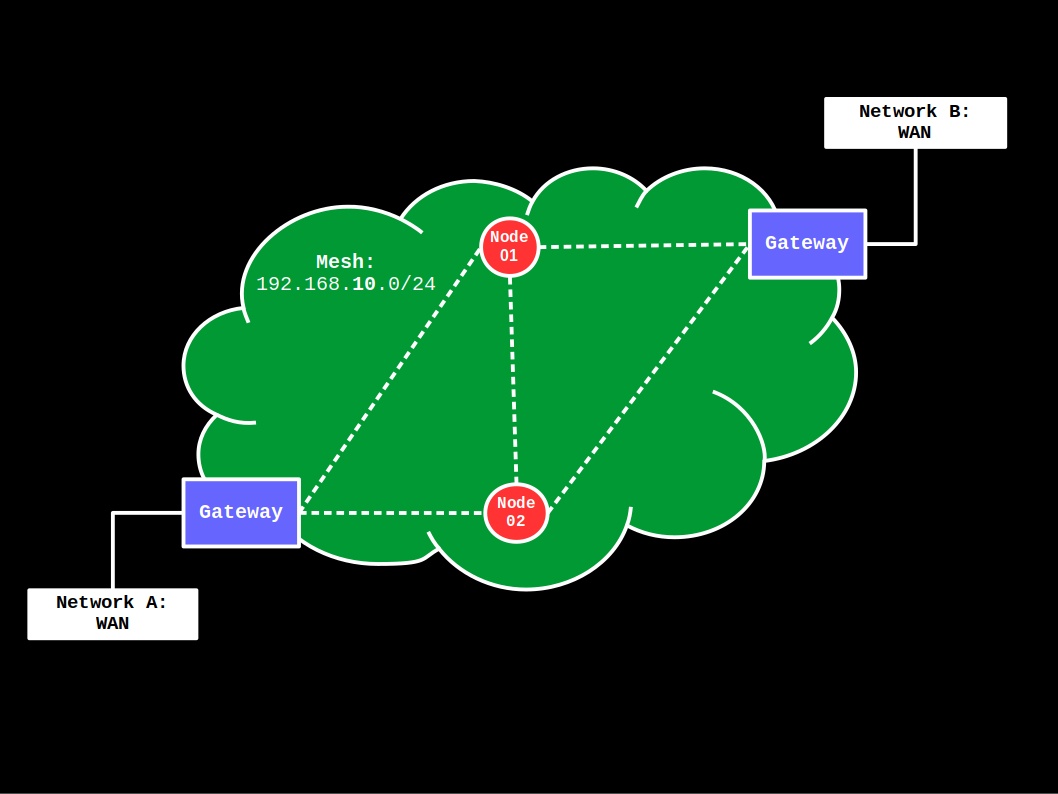
More specifically, the mesh has access to the WAN (Network A) via a gateway device and has a single, private network defined in the 192.168.10.0/24 IP range, which is used by both the mesh network devices and the Network B, non-mesh devices. The latter is enabled by a bridge device that works as an access point for non-mesh clients.
First, let’s configure our mesh gateway.
Mesh gateway configuration
Get one of the pre-configured mesh nodes that has at the very least two Ethernet ports, a LAN port and a WAN port. (This, of course, is not required for a gateway device because there are multiple ways to connect to WAN but having separate physical ports makes the explanation much simpler to follow. If that is not your case, just adapt the default configuration for your device accordingly.)
If you’ve configured this node as a dumb access point to temporarily give it access to the Internet while updating and installing packages, undo the configuration before proceeding because we will use both the firewall and dhcp config files in the gateway configuration.
Connect your laptop/PC to the mesh node via cable using the LAN port–this way, the mesh node’s IP address should still be 192.168.1.1. Then, ssh into the mesh node and let’s take a look at the /etc/config/network, as follows
At the beginning of the file, there should a bunch of config interface for loopback, lan, and wan, for example, as well as a default config device for the lan bridge, called br-lan, and. At the end, of course, there should be the mesh interfaces we previously created for the mesh node, namely bat0 and mesh. There are at least two options at this point:
- Create an entirely new local network for
bat0, called default, at the expense of additional dhcp and firewall configuration;
- Or use the original
lan network by simply bridging bat0 at the config device br-lan stanza, as follows:
 config device
         option name 'br-lan'
         option type 'bridge'
         list ports 'eth0.1'  ##edit according to your device
         list ports 'bat0'
While the latter option is much easier than the former, we will choose the first here (i.e., create a new local network from the ground up) because it makes this tutorial compatible with multiple devices (switched or switchless) and it allows us to keep the original lan (192.168.1.0/24) as a management/debugging network. (Later on, we will see how to bridge the original lan with any bat0 VLAN, for example, so the original lan becomes accessible to the mesh as well. For now, keep it simple.)
At the bottom of the /etc/config/network file, let’s add the following two stanzas:
config device
        option name 'br-default'
        option type 'bridge'
        list ports 'bat0'

config interface 'default'
        option device 'br-default'
        option proto 'static'
        option ipaddr '192.168.10.1'  ##static address on the new 192.168.10.0/24 network pool
        option netmask '255.255.255.0'
        list dns '1.1.1.1'  ##comment out to enable cloudflare dns
        list dns '8.8.8.8'  ##comment out to disable google dns
The first stanza (config device) creates a bridge (layer 2) for the default network, while the second stanza (config interface 'default') creates the proper default network (layer 3) at the 192.168.10.0/24 pool, then sets a static IP address for this device at 192.168.10.1 and broadcasts to any client that they should use the external DNS servers 1.1.1.1 or 8.8.8.8.
Save the file and exit it.
Next, let’s edit the /etc/config/dhcp config to run a DHCP server on the new interface, as follows
and at the end of the file, add the following
config dhcp 'default'
        option interface 'default'
        option start '50'  ##start leasing at addr 192.168.10.50
        option limit '100'  ##max leases, so for 100, leased addr goes from .50 to .149
        option leasetime '6h'
        option ra 'server'
Save the file and exit it.
Finally, let’s edit the /etc/config/firewall config. Many things that can be done at the firewall level and for this reason, it’s often the most overwhelming part of the configuration. Fortunately, in our case, all that we need to do here is simply copy the original lan config for the new default. That is, anything that has lan we will
- copy the related config;
- paste it immediately below the equivalent
lan config;
- and then change
lan for default in the new config.
Start by editing the firewall config file with vi, as follows
then the first set of configs we will add (immediately below the equivalent lan config) is the zone settings, namely
config zone
        option name     default
        list network    'default'
        option input    ACCEPT
        option output   ACCEPT
        option forward  ACCEPT
the second set of configs will be for the forwarding settings, namely
config forwarding
        option src   default
        option dest  wan
and that is it!
Optional. At the end of the firewall config file, there’s a bunch of examples that you could use as template for more avdanced usage of this device’s firewall. Feel free to play around with them once you get everything up and running.
Save the file and exit it.
Optional. Because we’re not going to use IPv6, I suggest (a) disabling odhcpd altogether (run /etc/init.d/odhcpd stop && /etc/init.d/odhcpd disable) and (b) comment out any related IPv6 configuration in the files we just edited as well (e.g., remove configuration and references to wan6).
Reboot the device and connect the WAN cable to the device’s WAN Ethernet port.
Once the device comes back online, ssh into it. Then, let’s check the new configuration. First, type
and as before, there should be bat0 and wlan1 interfaces, but now, your gateway device should have the static IP 192.168.10.1 in the new 192.168.10.0/24 network under br-default.
Similarly, because we preserved the original lan configuration, the device will continue to have the static IP 192.168.1.1 in the 192.168.1.0/24 network under br-lan. This means it should always be reachable at its original IP address with an Ethernet cable directly connected to one of its LAN Ethernet ports.
If you don’t see the static IP on the new network, then review the files we have just configured because there’s likely a misconfiguration. Don’t expect to get things working until you fix this issue.
Mesh bridge configuration
The configuration of a mesh bridge is much simpler than of a mesh gateway because contrary to the gateway config, our mesh bridge doesn’t require the use of a DHCP server and firewall. In fact, both services will be disabled in a mesh bridge and instead, the ony thing we will do is join interfaces to make them look like a single one to any connected device.
As before, get one of the other pre-configured mesh nodes and to start things off, we will configure it as a dumb access point. Follow the instructions in the OpenWrt documentation, except for the following when configuring the original lan interface:
- Add
bat0 to a new list ports entry in the bridge stanza used by the lan interface, namely br-lan;
- Set a static IP for the device on the
192.168.10.0/24 network, such as 192.168.10.10, pointing to our configured gateway at 192.168.10.1;
- After all is done, rename every
lan entry for default to make it consistent with the gateway configuration. This, of course, is optional.
Once done, the configuration of the original lan interface and its br-lan bridge, which are now called default and br-default, respectively, should look something like this:
config device
        option name 'br-default'
        option type 'bridge'
        list ports 'eth0.1'
        list ports 'bat0'

config interface 'default'
        option device 'br-default'
        option proto 'static'
        option ipaddr '192.168.10.10'
        option netmask '255.255.255.0'
        option gateway '192.168.10.1'
        option dns '192.168.10.1'
After applying this configuration, it will let any non-mesh clients to join the mesh via Ethernet cable–that is, by connecting a cable to one of the LAN ports of the mesh bridge device. As long as the gateway is reachable, everything should work like a standard network, you could use the device’s own switch or connect the device to a switch and manage things there, and so on.
Save the file and exit it.
Similarly, you can create a wireless access point (WAP) for non-mesh clients, and the instructions in the dumb access point documentation will work just fine because it uses a network that is bridged with our mesh–namely, the original lan. To avoid confusion, make sure to use a different SSID for the WAP(s) than the mesh_id used for the mesh. In addition, use a different radio for the WAP(s) and set them to operate on different channels. If that is not possible, that is probably okay for most home users but keep in mind that node hoping will start affecting performance quite noticeably.
(Optional.) To illustrate, let’s create a simple 2.4GHz WAP for your home devices that will make use of the default network. This can be done by editing the /etc/config/wireless file as follows:
-
In the 2.4GHz radio stanza (radio0), set option disabled to '0' to enable it:
 config wifi-device 'radio0'
         option type 'mac80211'
         option channel '1'
         #option txpower '20'
         option hwmode '11g'
         option path 'platform/ahb/18100000.wmac'
         #option htmode 'HT20'
         option country 'BR'
         option disabled '0'
-
At the bottom of the file, create a new config wifi-interface 'whome' stanza that configures an access point (option mode 'ap') that will make use of the default network. It should look similar to the following one when done:
 config wifi-iface 'whome'
         option device 'radio0'
         option network 'default'
         option mode 'ap'
         option ssid 'HomeWAP'  ##edit it
         option encryption 'psk2+aes'  ##https://openwrt.org/docs/guide-user/network/wifi/basic#encryption_modes
         option key 'MyStrongPassword123'  ##edit it
         option disabled '0'
-
Save the file and exit.
Finally, in the terminal, make sure to disable dnsmasq, odhcpd, and the firewall, as follows
/etc/init.d/dnsmasq stop && /etc/init.d/dnsmasq disable
/etc/init.d/odhcpd stop && /etc/init.d/odhcpd disable
/etc/init.d/firewall stop && /etc/init.d/firewall disable
Reboot your device and on your laptop/PC, disable networking altogether to force it to get a new IP from the bridge when it comes back online–alternatively, just disconnect the Ethernet cable.
Once the bridge is back online–wait at least a minute or two to give it enough time to connect to the mesh first–re-enable networking on your laptop/PC (or reconnect the Ethernet cable) and it should receive an IP addr from our mesh gateway in the 192.168.10.0/24 network (on a Linux distro, type ip a or ip addr or ifconfig), the bridge node should now be reachable at 192.168.10.10, and you should be able to access the Internet from your laptop/PC through the mesh (try ping google.com, for example).
If something doesn’t work, review the config files mentioned here and then go over the ones for the gateway, reboot all mesh nodes (gateway first, then nodes, then bridge) and test again.
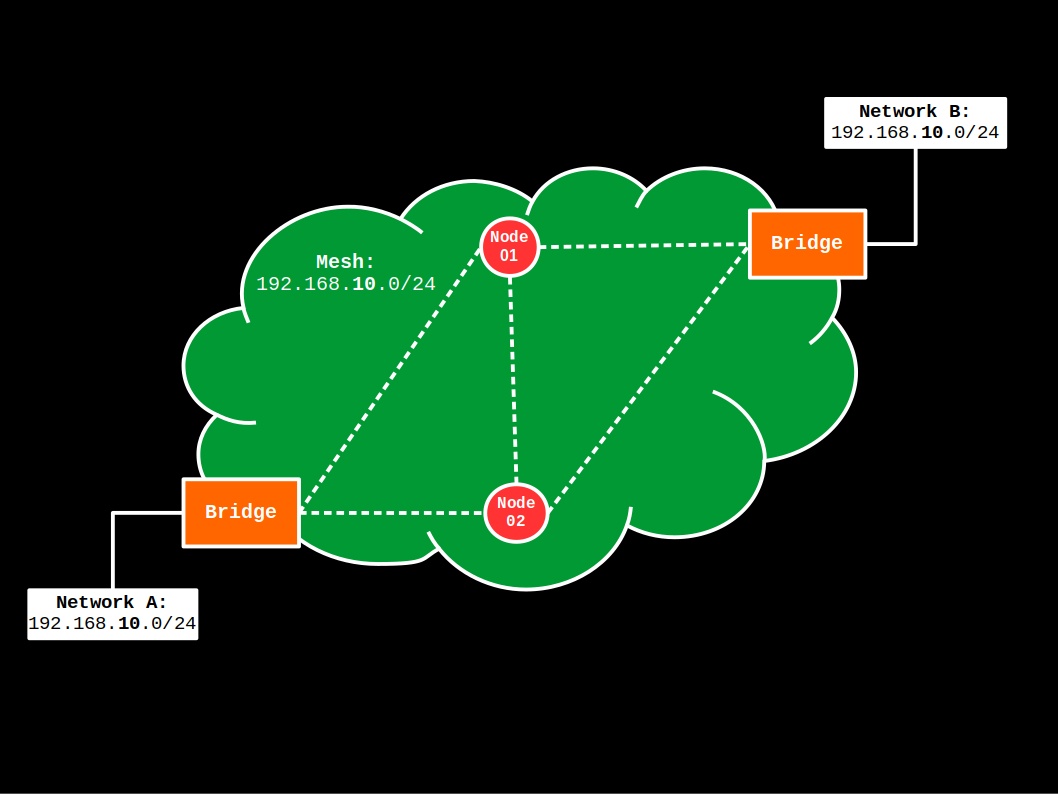
Bridge-Bridge
This second example applies to the following topology:
Contrary to the first example, there’s no mesh gateway device and as such, this topology could be used to extend an already existing private network (Networks A and B) over the wireless mesh (all defined in the 192.168.10.0/24 IP range). However, to make matters simple, we will assume that the existing network has a gateway/firewall in either Network A or B that can be found at the IP addr 192.168.10.1, and there’s a DHCP server being advertised on the network. (If your existing Networks A and B are not defined in the 192.168.10.0/24 IP range, just edit your previous config files accordingly and the mesh network will follow your existing network instead.)
Config-wise, the mesh bridges in this topology are configured exactly as in the first example, except for the following differences in the configuration of the /etc/config/network config file:
-
Each mesh bridge should have a different static IP address in the default interface, as indicated by option ipaddr. For example, the first mesh bridge will have option ipaddr '192.168.10.10', while the second mesh bridge will have option ipaddr '192.168.10.11';
-
The option gateway '192.168.10.1' in the default stanza must match an existing gateway on either Network A or B, and similarly, option dns '192.168.10.1' must point to a valid DNS resolver or forwarder;
-
As mentioned before, if your existing Networks A and B are not defined in the 192.168.10.0/24 IP range, then just edit the config file accordingly.
Gateway-Gateway
The third and final example applies to the following topology:
Specifically, there’s only one private network (mesh, defined in the 192.168.10.0/24 IP range) and notably, two mesh gateways. This provides “high availability” of the Internet connection to mesh nodes and surprisingly enough, the configuration of each mesh gateway is just like in the first example, with the following exceptions
-
Like in the bridge-bridge example, we must assign different static IP addresses to each mesh gateway. This is done by editing the /etc/config/network config file, and in the default interface configuration, add a different IP addr next to the option ipaddr option. For example, the first mesh gateway will have option ipaddr '192.168.10.1', while the second mesh gateway will have option ipaddr '192.168.10.2'.
-
Because we will now run two DHCP servers on the same network, we need to find a way of avoiding conflicts when assigning an IP address to new clients. The easiest way of doing that is by assigning different intervals to each DHCP server running on the same network. In OpenWrt, this is done by editing the /etc/config/dhcp config file, and in the default DHCP configuration, we add a different starting point next to the option start option. For example, while the DHCP server running on the first gateway will have option start '50', the DHCP server running on the second gateway will have option start '150' instead. This way, the first DHCP server leases addresses from 192.168.10.50 to .149, whereas the second leases addresses from 192.168.10.150 to .249.
-
In the bat0 interface config of the /etc/config/network config file, we can now enable the option gw_mode 'server' and specify the WAN connection speed with option gw_bandwidth '10000/2000', as follows:
 config interface 'bat0'
         option proto 'batadv'
         option routing_algo 'BATMAN_IV'
         option aggregated_ogms '1'
         option ap_isolation '0'
         option bonding '0'
         option bridge_loop_avoidance '1'
         option distributed_arp_table '1'
         option fragmentation '1'
         option gw_mode 'server'
         #option gw_sel_class '20'
         option gw_bandwidth '10000/2000'  ##download/upload in kbps
         option hop_penalty '30'
         option isolation_mark '0x00000000/0x00000000'
         option log_level '0'
         option multicast_mode '1'
         option multicast_fanout '16'
         option network_coding '0'
         option orig_interval '1000'
Similarly, now in each other mesh node (non-gateway devices), we set the option gw_mode to 'client' instead of 'off' and enable selection options, as follows:
    config interface 'bat0'
         option proto 'batadv'
         option routing_algo 'BATMAN_IV'
         option aggregated_ogms '1'
         option ap_isolation '0'
         option bonding '0'
         option bridge_loop_avoidance '1'
         option distributed_arp_table '1'
         option fragmentation '1'
         option gw_mode 'client'
         option gw_sel_class '20'  ##set to 1 for fast connection policy (BATMAN_IV)
         #option gw_bandwidth '10000/2000'
         option hop_penalty '30'
         option isolation_mark '0x00000000/0x00000000'
         option log_level '0'
         option multicast_mode '1'
         option multicast_fanout '16'
         option network_coding '0'
         option orig_interval '1000'
This way, we can make each mesh node aware of the two gateways on the network (and their speeds) to better route mesh traffic.
To learn more about how batman-adv handles multiple gateways, read the official Gateway documentation.
Mesh VLANs
You don’t need to configure VLANs in order to use batman-adv but it is one of its best features. In brief, this is a way of using our already configured wireless mesh network to route traffic to/from multiple and all networks in a secure, isolated way (as far as VLANs go). No need for additional hardware–the combination of OpenWrt and batman-adv turns even cheap wireless hardware into powerful virtual switches. It’s just a matter of tagging the additional (and virtual) networks instead of using the untagged bat0 (or similarly, in a port-based analogy, “plugging” standard interfaces into different ports of our bat0 switch). This is a fairly advanced topic but surprisingly easy to incorporate to our existing batman-adv configuration.
Consider, for example, the following network
There’s a single gateway device that provides WAN access to the mesh and Networks B, C, and D, which are all private networks defined in different IP ranges. In addition, all the Networks B, C, and D traffic should go via any mesh node in the mesh network while keeping them isolated from each other. To make it easier to remember and distinguish each private network, let’s call
- Network B by
iot network (192.168.20.0/24);
- Network C by
guest network (192.168.50.0/24);
- and Network D by
default network (192.168.10.0/24).
To implement such a mesh network with VLANs, we’re going to follow very similar steps to the first example of a gateway-bridge mesh network, except for the following:
- We will have two additional bridges in the network–that is, one for each mesh VLAN, for a total of three bridges. This is not a necessity but a matter of convenience to keep the example simple. The same bridge device can definitely bridge more than one mesh VLAN;
- In the gateway device, we will create VLAN IDs for the
iot (2), guest (5), and default (1) networks, each with a separate set of DHCP server and firewall rules;
- In each bridge device, we will join the original
lan with the VLAN ID of the mesh VLAN (bat0.1, bat0.2, bat0.5), instead of bat0.
Surprisingly enough, we don’t need to do a thing about the mesh nodes that are not gateways or bridges–that is, the mesh node basic config is both necessary and sufficient for simple mesh nodes, even when using VLANs. The only exception is if one of your mesh nodes is, for example, a laptop and you want it to use a particular mesh VLAN instead of the untagged bat0. In our case, however, the pre-configured mesh nodes are ready to route traffic of any VLAN that belongs to bat0.
As before, let’s start with the gateway configuration.
Mesh gateway with VLAN configuration
First, configure the gateway the same way as in the gateway-bridge example.
Second, instead of listing bat0 in the br-default bridge, we will change it to bat0.1 to indicate that this is the VLAN ID #1 of our bat0 interface. So, let’s start by editing the /etc/config/network configuration file, as follows:
Then edit the br-default stanza to look like this:
config device
        option name 'br-default'
        option type 'bridge'
        list ports 'bat0.1'
At this point, if you want to enable access to the default network via the Ethernet port of your gateway device, you can then add another list ports 'eth0.1' (or whatever your device uses) to the br-default bridge configuration. Afterwards, remove any configuration related to the original lan network.
Save the file.
Now, we are going to apply the same procedure we used to create the default network (and its bridge, firewall rules, and dhcp service) to the remaining two networks, namely iot and guest.
At the end of the /etc/config/network file, add a new config device and config interface for the iot network, as follows:
config device
        option name 'br-iot'
        option type 'bridge'
        list ports 'bat0.2'

config interface 'iot'
        option device 'br-iot'
        option proto 'static'
        option ipaddr '192.168.20.1'
        option netmask '255.255.255.0'
        list dns '1.1.1.1'
        list dns '8.8.8.8'
Then add another set of stanzas immediately below for the guest network:
config device
        option name 'br-guest'
        option type 'bridge'
        list ports 'bat0.5'

config interface 'guest'
        option device 'br-guest'
        option proto 'static'
        option ipaddr '192.168.50.1'
        option netmask '255.255.255.0'
        list dns '1.1.1.1'
        list dns '8.8.8.8'
Save the file and exit it.
Now, let’s edit the /etc/config/dhcp config file, as follows:
and once again, add a DHCP server config for the iot network:
config dhcp 'iot'
        option interface 'iot'
        option start 50
        option limit 100
        option leasetime '6h'
        option ra 'server'
and another one for the guest network:
config dhcp 'guest'
        option interface 'guest'
        option start 50
        option limit 100
        option leasetime '1h'
        option ra 'server'
Save the file and exit it.
Finally, let’s edit the /etc/config/firewall config file, as follows
and below each stanza for the default network, add one for the iot network:
config zone
        option name     iot
        list network    'iot'
        option input    ACCEPT  ##recommended REJECT
        option output   ACCEPT
        option forward  ACCEPT  ##recommended REJECT
config forwarding
        option src   iot
        option dest  wan  ##allows access to cloud services
and another for the guest network:
config zone
        option name     guest
        list network    'guest'
        option input    ACCEPT  ##recommended REJECT
        option output   ACCEPT
        option forward  ACCEPT  ##recommended REJECT
config forwarding
        option src   guest
        option dest  wan
Of note, it is good practice to be more restrictive with the firewall rules for the guest and iot networks. I added comments with recommendations in the configurations above but additional rules might be necessary to enable basic functionality within each of those networks. For a reference, check the OpenWrt’s guide on Guest Wi-Fi basics.
Now save the file and exit. Then, reboot the device. This will implement the changes and offer an opportunity to check if everything will work as intended after a power loss.
Once the gateway device is back online, ssh into it once again and list its IP addresses:
This should show the various new interfaces we created and the static IP address of your device in each one of them. If everything looks good, we’re done with the gateway configuration! We’re now ready to tell our bridges which VLAN ID to join with their standard interfaces.
You don’t need to use names such as default, iot, or guest. They can be whatever you find intuitive. However, whatever you choose, keep them short. Specifically, they should use less than 15 characters, owing to kernel limitations and various operations that append prefixes/suffixes to such names.
Mesh bridge with VLAN configuration
Here, we’ll also configure the bridges the same way as in the gateway-bridge example. However, each bridge device will bridge a different VLAN ID–namely, either bat0.1 or bat0.2 or bat0.5.
The configuration of the Network D (Default) bridge is by far the easiest one because it follows the exact same procedure as in the gateway-bridge example, with the following exception in the /etc/config/network file:
After making such a change, save the file and reboot your device.
Now, let’s configure the Network B (IoT) bridge. First, configure one of the mesh nodes as in the gateway-bridge example. Then, in the /etc/config/network file, do the following:
- Replace all instances of
default for iot;
- In the now
br-iot bridge stanza, replace bat0 for bat0.2;
- In the now
config interface 'iot' stanza:
- Replace
option ipaddr '192.168.10.10' for option ipaddr '192.168.20.10';
- Replace
option gateway '192.168.10.1' for option gateway '192.168.20.1';
- Replace
option dns '192.168.10.1' for option dns '192.168.20.1'.
After all is done, the updated configuration should look something like this:
config device
        option name 'br-iot'
        option type 'bridge'
        list ports 'eth0.1'
        list ports 'bat0.2'

config interface 'iot'
        option device 'br-iot'
        option proto 'static'
        option ipaddr '192.168.20.10'
        option netmask '255.255.255.0'
        option gateway '192.168.20.1'
        option dns '192.168.20.1'
Save the file and exit it.
If you created a 2.4GHz WAP that made use of your default network (e.g., whome), you can now edit it (vi /etc/config/wireless) to make use of your iot network instead (wiot). Otherwise, ignore this message.
Reboot your device.
Once it comes back on, your laptop/PC will receive an IP address from our mesh gateway in the 192.168.20.0/24 network, the bridge node should be reachable at 192.168.20.10, and you should be able to access the Internet via the IoT network (try ping google.com, for example).
If something does not work, review the config files from your gateway and then from the bridge, then reboot the gateway and the bridge, and test again.
If this configuration is working, repeat the same steps as before for the Network C bridge (Guest), with the following exceptions:
- Instead of
iot, use guest;
- Instead of
bat0.2, use bat0.5;
- Instead of
192.168.20.0/24 IP addresses, user 192.168.50.0/24 addresses when assigning static IP and pointing to the gateway.
Optional. When configuring a Guest WAP, for example, you can add option isolate 1 to the relevant stanza in the /etc/config/wireless config file to deny client-to-client connectivity without the need of re-enabling the firewall in the bridge device. If that’s not enough, re-enable the firewall and configure it according to your needs–at the bottom of the /etc/config/firewall file, there are examples you can use as template.
Getting started with batman-adv on any Linux device
OpenWrt makes using batman-adv a nearly trivial thing but you certainly don’t need OpenWrt to implement a mesh network or even to use batman-adv in your mesh. As mentioned before, batman-adv has long been added to the Linux Kernel and therefore, you should be able to configure it on pretty much any device running Linux.
Even though the specifics of configuring network interfaces and managing connections might be different across Linux distributions, the initial steps always consist of the following:
- Installing (in popular distros, this is not needed) and loading (always needed) the
batman-adv Kernel module.
lsmod will show a list of active modules, so we can grep it to check if the batman-adv module has already been loaded, as follows
then if it isn’t loaded, we add the batman-adv kmod to /etc/modules and load it with modprobe, as follows
# append batman-adv to /etc/modules
echo 'batman-adv' | sudo tee -a /etc/modules > /dev/null
# load the batman-adv module
sudo modprobe batman-adv
# check that the batman-adv module is now loaded
lsmod | grep batman
Afterwards, you can check the sysfs of each network device in /sys/class/net/ and there should be a batman_adv folder. When the batman-adv module gets configured to use a particular network device, the files batman_adv/iface_status and batman_adv/mesh_iface will change their contents to reflect that. In addition, once enabled, bat0 will show up as a new network device in /sys/class/net/ and its options (e.g., gw_mode) can be modified by echoing new values to their corresponding file in /sys/class/net/bat0/mesh/ (echo 'client' > /sys/class/net/bat0/mesh/gw_mode).
- Installing the
batctl package. On apt-based distros like Debian, you should be able to install it with the following
- Using a combination of
iw and ip to configure the network interfaces, as illustrated in the B.A.T.M.A.N. quick start guide. In our case, however, the wireless mode of operation (as in the specification of type in the iw interface creation command) is mesh (or mp), instead of adhoc (or ibss).
- Using something like wpa_supplicant to manage connections.
If you know of a program that has a GUI and is able to handle such configurations on popular Linux distros, let me know about it. As far as I know, there’s currently nothing like that and it would be so very useful.
top
Advanced features
The batman-adv routing protocol has multiple features that were not covered in the previous sections, owing to the higher level of complexity that they introduce to a mesh project. However, once you feel more comfortable with the details of the basic implementation, it is recommended to take a look at the more advanced features because they can have a significant impact on the performance of your mesh project. In this section, I described a few of the advanced features that I have used in the past and find particularly useful.
Multi-links
The examples in this guide used a single, dedicated wireless interface–namely, the 5GHz radio of a dual-band router–to build the wireless mesh network. While the concept of using a single interface for the wireless mesh network might work just fine on a small scale, performance will often degrade as the size of the mesh network increases–and so the number of required node hops to reach a mesh gateway. This decline in performance occurs partially because a single wireless interface cannot send and receive at the same time, which is the same limitation we would run into with standard wireless repeaters, for example.
Fortunately, the same batman-adv interface (e.g., bat0) can actually work on multiple (wired or wireless) interfaces, instead of either a 2.4GHz radio or a 5GHz radio or Ethernet cable. In fact, a batX interface can work with all such interfaces at the same time and is able to choose which one to transmit packets depending on either TQ (BATMAN_IV) or throughput (BATMAN_V) between nodes. This is orchestrated by a feature called multi-link. More specifically, when using standard dual-band routers, such as the TL-WDR4300, a wireless mesh node has the option to use either the 2.4GHz radio or the 5GHz radio or both for the mesh traffic (batX). Consider, for example, the following network composed of nine mesh nodes (N01 … N09):

Following the instructions in the Mesh node basic config section, we would likely end up with nodes connected to bat0 via their respective 5GHz radio on channel 153 (white lines):

If N01 were the mesh gateway, then the basic configuration (single, dedicated interface for mesh traffic) would likely prove very resonable because each other node has a direct connection to the gateway. However, had the gateway been placed anywhere at the edge of the network, nodes at the opposite side would start struggling to reach it. To remedy this situation, we can add another wireless interface to bat0. Because radio waves attenuate a lot quicker at higher frequencies, the use of alternative 2.4GHz radios allow each node to establish connections to nodes that are usually not reachable via 5GHz radios. Therefore, we can take advantage of such property to provide alternative, long-ranged routes for the bat0 mesh traffic. For example, we can configure nodes N01, N06, N07, N08 and N09 to connect to bat0 via their 2.4GHz radio on channel 6 (green lines):

We can then extrapolate this idea to connect nodes N02 and N04 via their 2.4GHz radio on channel 1 (yellow line), and similarly, connect nodes N03 and N05 on channel 11 (blue line):

The planning of multi-links can be very challenging when using dual-band (2.4GHz + 5GHz) devices because as mentioned before, 2.4GHz and 5GHz attenuate at different rates, which means that interference across nodes can become an issue with several 2.4GHz radios operating on the same channel. One alternative illustrated before is to space nodes that operate at the same channel, so that they can mostly reach each other at the edges of the coverage area provided by their respective 2.4GHz radios and channel. (Fine tunning each radio’s txpower by decreasing it to reduce unwantted overlap should help, too.)
Performance-wise, multi-links will almost always improve throughput in comparison to using a single interface, especially when used in conjunction with bonding and the throughput focused version of the batman-adv protocol, namely BATMAN_V. Naturally, however, node-to-node connections can become bottlenecked by the radios involved in the multi-link configuration–that is, you cannot expect to transfer packets via 2.4GHz at the same rate as 5GHz.
Finally, configuration-wise, the implementation of multi-links is actually very simple because nothing new needs to be compilled or even enabled at the batX level. To illustrate, let’s extend the example from the Mesh node basic config section to add a second wireless mesh interface using the 2.4GHz radio of the TL-WDR4300.
-
In /etc/config/network, let’s rename config interface 'mesh' to config interface 'mesh5g', which will be used by the 5GHz radio, and then create another config interface 'mesh2g' stanza for the 2.4GHz radio, as follows:
config interface 'mesh5g'
      option proto 'batadv_hardif'
      option master 'bat0'
      option mtu '1536'

config interface 'mesh2g'
      option proto 'batadv_hardif'
      option master 'bat0'
      option mtu '1536'
-
Then in /etc/config/wireless, let’s rename config wifi-iface 'wmesh' to config wifi-iface 'wmesh5g' and assign it to option network 'mesh5g' instead, as follows:
config wifi-iface 'wmesh5g'
      option device 'radio1'
      option network 'mesh5g'
      option mode 'mesh'
      option mesh_id 'MeshCloud'
      option encryption 'sae'
      option key 'MeshPassword123'
      option mesh_fwding '0'
      option mesh_ttl '1'
      option mcast_rate '24000'
      option disabled '0'
and similarly, add the following config wifi-iface 'wmesh2g' stanza that makes use of radio0 (2.4GHz in the TL-WDR4300) and option network 'mesh2g', as follows:
config wifi-iface 'wmesh2g'
      option device 'radio0'
      option network 'mesh2g'
      option mode 'mesh'
      option mesh_id 'MeshCloud'
      option encryption 'sae'
      option key 'MeshPassword123'
      option mesh_fwding '0'
      option mesh_ttl '1'
      option mcast_rate '24000'
      option disabled '0'
Make sure the radio0 is enabled in its stanza as well, of course.
-
Restart your device and once it comes back, check batctl if to make sure that it can now detect two interfaces, namely wlan0 and wlan1. If you can see both interfaces, then you’re all set; otherwise, check logread for related errors.
top
Bonus content: Physical computing
If your device has unused general purpose I/O pins, it’s possible to do all sorts of things with them. Check the GPIO documentation for examples of how to install new LEDs and buttons, for instance. (Your device’s OpenWrt page can be very useful as well.)
Also, if you want to change the functionality of a few of the existing LEDs on your wireless device, check the LED configuration documentation. Now that you have new mesh interfaces, you can use the LEDs to blink depending on the status of neighboring nodes, mesh gateways, or WAN connectivity through the mesh, to mention a few examples. (As mentioned before, your device’s OpenWrt page can be very useful here.)
top
Bonus content: Moving from OpenWrt 19 to 21
If you just found this guide, you can safely ignore the content in this section because the entire article has been updated to make it compatible with OpenWrt 21.02, which is now the current stable release. However, if you’re currently running OpenWrt 19.07 and want to upgrade to 21.02, then read on.
When this guide was first written, OpenWrt 19.07 was the current stable release version. However, as of September 4th, OpenWrt 19.07 transitioned to old stable and OpenWrt 21.02 is now the current stable release. For one, this means that most device pages (e.g., TP-Link Archer C7 AC1750) have been updated to link to the OpenWrt 21.02 firmware binaries.
Of course, it is still possible to download and use the latest version of the OpenWrt 19.07 binaries (19.07.8) by looking for your device’s target at releases/19.07.8/targets. However, it is generally a good idea to run the latest release version for multiple reasons, security being the main one. Nonetheless, OpenWrt 21.02 introduces new hardware requirements and changes to the network syntax that you should not overlook before making the transition. More specifically:
-
OpenWrt 21.02 introduces initial support for the Distributed Switch Architecture (DSA). Currently, however, this only applies to a very limited number of devices. If you have one of such devices, then make sure to read rmilecki’s mini tutorial for DSA network configuration because the syntax is a little bit different than the one used in this guide.
-
The hardware requirements to run OpenWrt 21.02 has increased to 8 MB of flash memory and 64 MB of RAM. In the first version of this guide, I used the TP-Link TL-WR1043ND (v1.8) as an example of mesh node hardware, which has 8MB of flash memory and 32MB of RAM. At first, I tried to use OpenWrt 21.02 with it but the system became too unstable, even after making several changes to multiple firmware images (e.g., removing LuCI altogether and adding zram support). This is what prompted me to change the device in the examples to the TP-Link TL-WDR4300, which is also a low-end router but it has 128MB of RAM instead and importantly, it is a dual-band router that allows better segmentation of mesh vs non-mesh wireless traffic.
- There is a small but important change in the configuration syntax in
/etc/config/network, namely:
- The option
ifname is now called device in all config interface stanzas;
- The option
ifname is now called ports in all config device stanzas of type bridge.
Fortunately, it seems that the old syntax (as in the first version of this guide) is still supported but if you are using LuCI, you will run into compatibility issues and will be prompted to update. To update it, take a closer look at the examples in the current version of the guide, which are now compatible with the network syntax introduced by OpenWrt 21.02.
- There many other changes in OpenWrt 21.02 but from my experience so far, none of them are as relevant as the ones mentioned before. For other highlights and additional information, please check the official OpenWrt 21.02.0 release notes.
Upgrading the firmware is as easy as it has always been: (a) go to the device’s OpenWrt page, (b) download the new *-sysupgrade.bin binary, and then (c) flash it onto your device via LuCI. If you’re only using the terminal, first SSH into your device and make sure it has enough free memory by typing:
which should output something like this:
              total        used        free      shared  buff/cache   available
Mem:          27064       16168        6004         304        4892        8368
Swap:         13308         768       12540
and if the amount of free in the Mem: row is higher than the size of the binary, then copy the new binary to the root of the /tmp/ directory via scp (or any other method) and run sysupgrade to upgrade your firmware to the latest release, as follows:
sysupgrade -v -n /tmp/*-sysupgrade.bin
Importantly, owing to changes in the network syntax, I strongly recommend to discard all configuration files when making the transition. When upgrading via LuCI, make sure to deselect the option to preserve configuration, and similarly, when upgrading via sysupgrade, add the -n argument command, as mentioned before. This, of course, means you will lose connection to the device if you are running the upgrade via a wireless connection, so make sure to use a cable for this particular operation.
If the configuration files in /etc/config/ have been extensively edited, make sure to make a backup of them before running the upgrade.
In addition, remember that the various packages supporting the use of batman-adv do not come with pre-built (default) images, which means that you won’t be able to connect to your mesh node after an upgrade if you are relying on the mesh network to reach it. If you do not want to reinstall all such packages (or cannot physically reach the nodes), check the updated section about OpenWrt installation and initial configuration, which now features instructions on how to build customized images with pre-installed mesh packages. Building your own images also means you can create default versions for all /etc/config/ files (see FILES="" usage in the make image command) but use caution with such feature to avoid (soft) bricking your device. At the very least, use only configurations you have already tested and that will work independently of any other node.
Overall, I like the clearer distinction between layers 2 and 3 introduced by the new network syntax in OpenWrt 21.02. Once you get the hang of it, the configuration looks more organized and intuitive than before, and therefore, I think it is a step forward in the right direction. Lastly, I would like to thank SteveNewcomb for testing–and letting me know about–batman-adv under the OpenWrt 21.02 release candidates.
top

Good news, everyone! You’ve reached the end of this tutorial, which means it’s time to start planning your own mesh networking project. I love to hear about different takes on the projects I post on my blog, so don’t hesitate to contact me if you just want to share or bounce a few ideas. Different perspectives give an opportunity to learn, grow, and innovate.
Other similar mesh solutions
If you find this guide overwhelming but you’re still curious about mesh networking, take a look at the following alternatives (in alphabetical order):
They have pre-configured images that will work “out of the box” with compatible devices. You might find instructive to start playing around with their software first and once comfortable, build your own configuration from a default (or customized from the source) OpenWrt image.
In addition, if you don’t feel comfortable with the CLI approach I used, take a look at OneMarcFifty’s video tutorial on how to configure OpenWrt and batman-adv using the LuCI:
Marc has many other interesting videos about OpenWrt, so make sure to check them out as well.
top
]]>
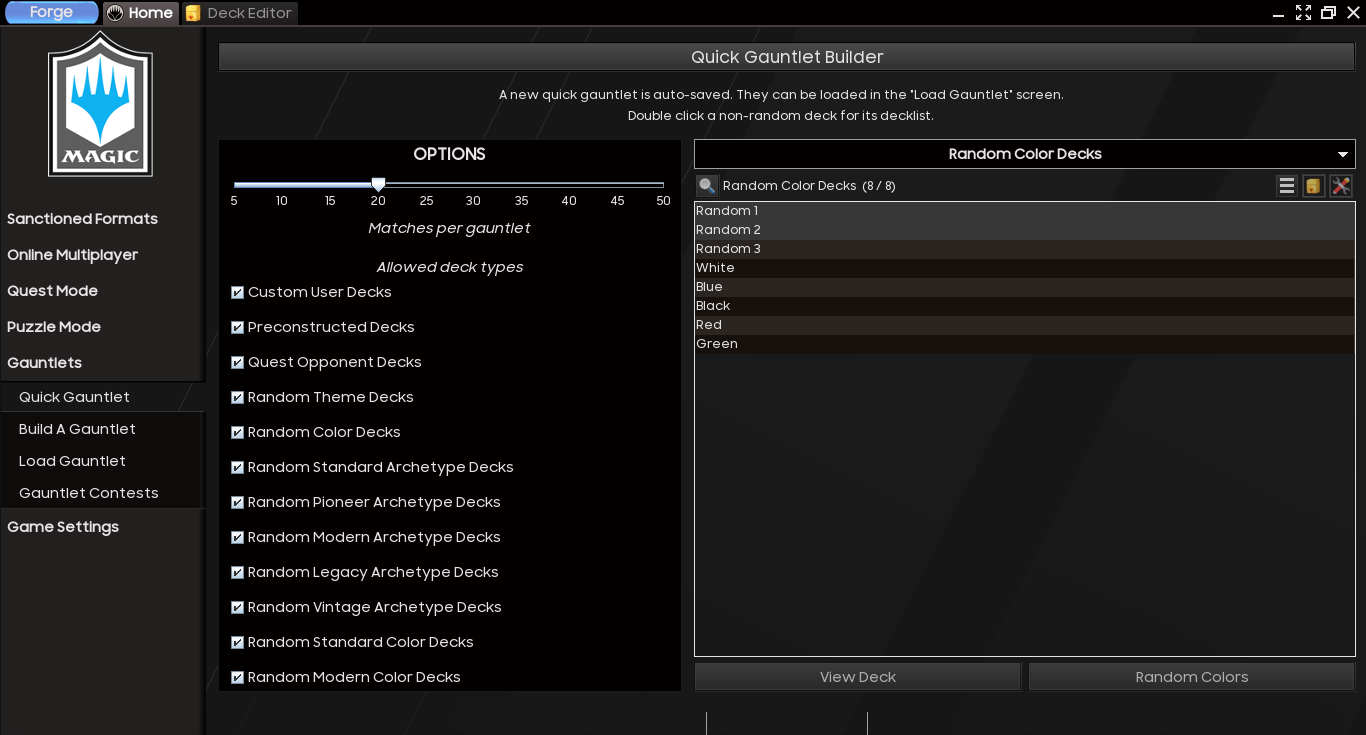
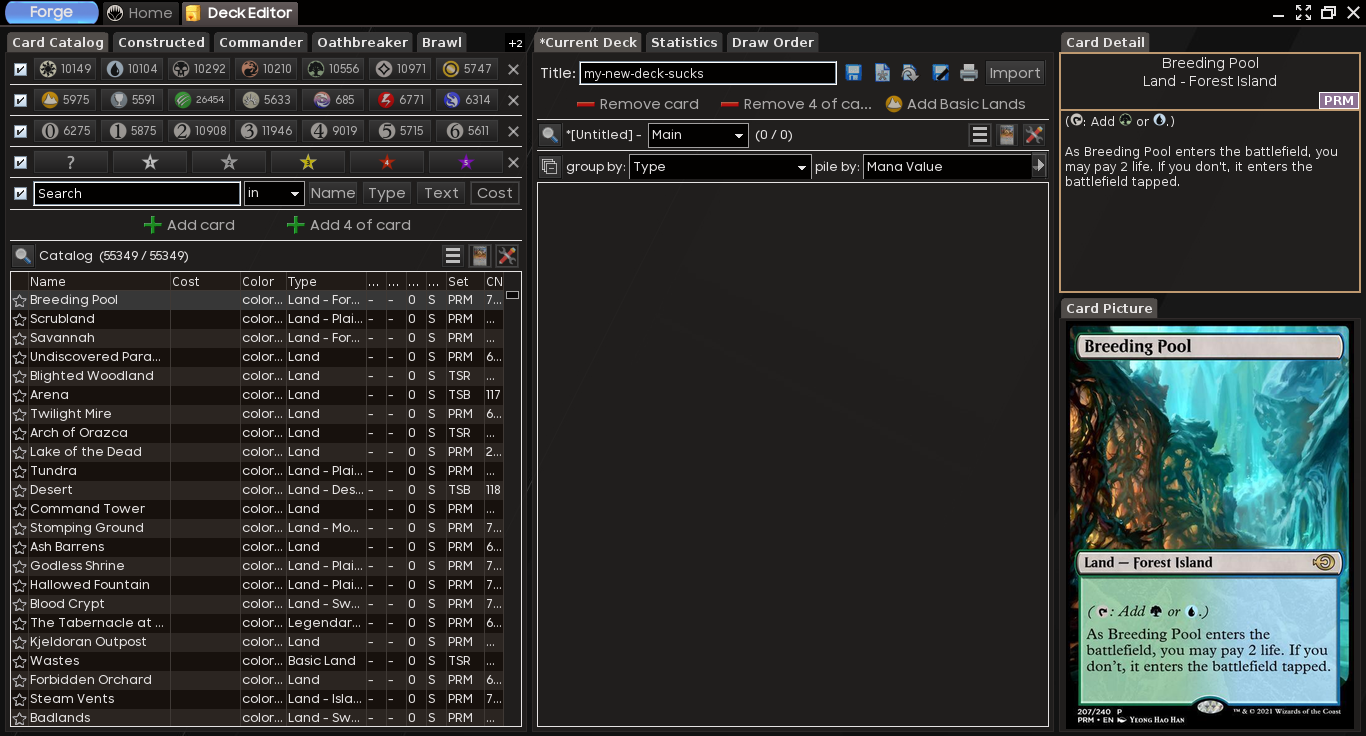
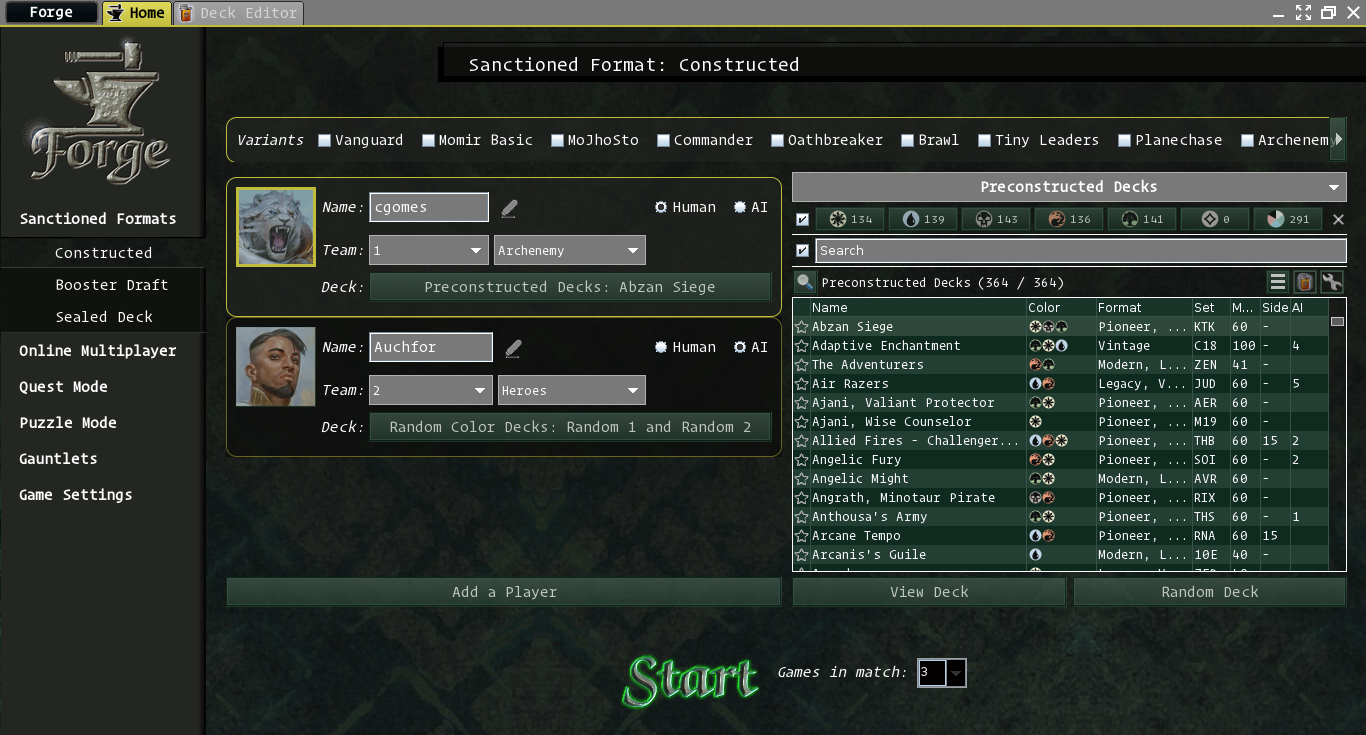


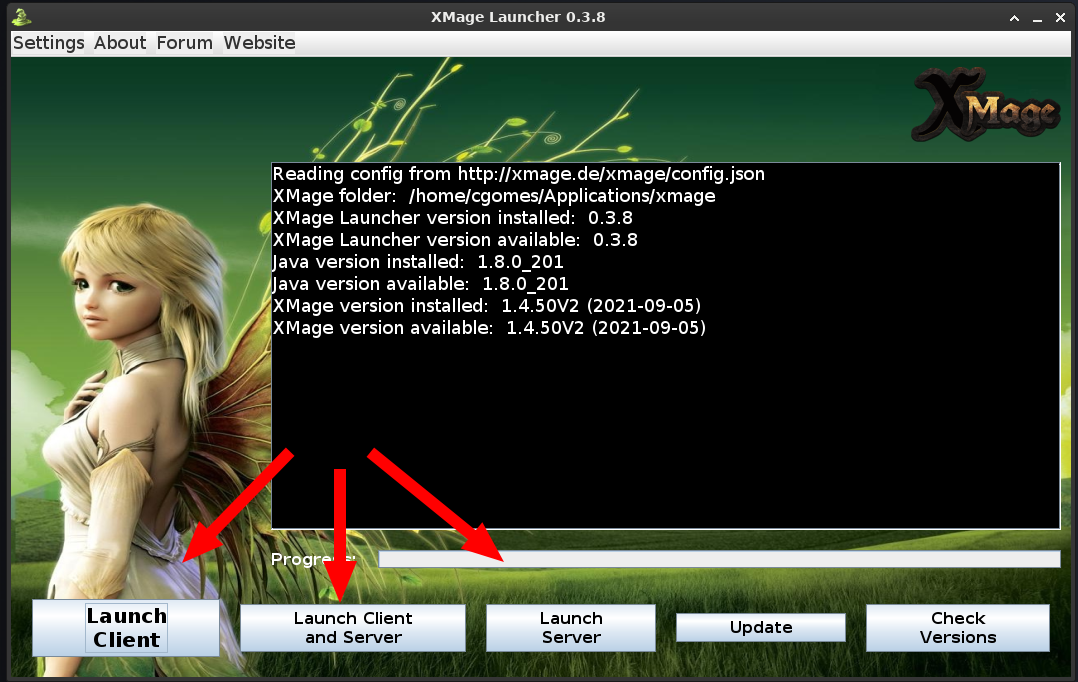
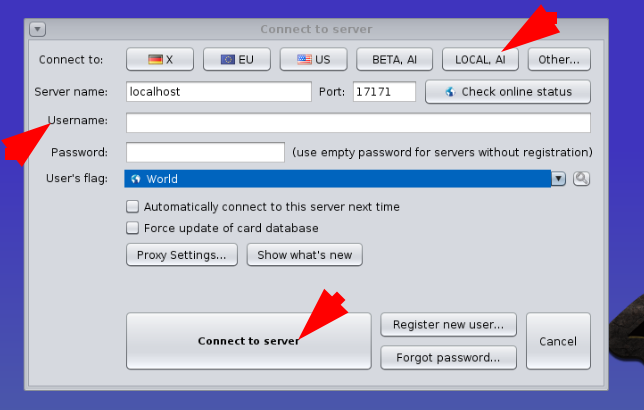
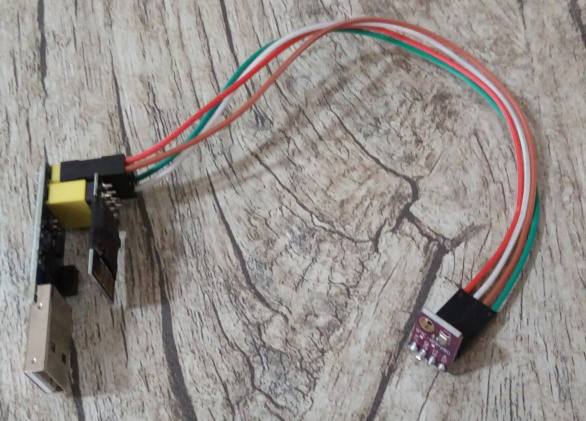
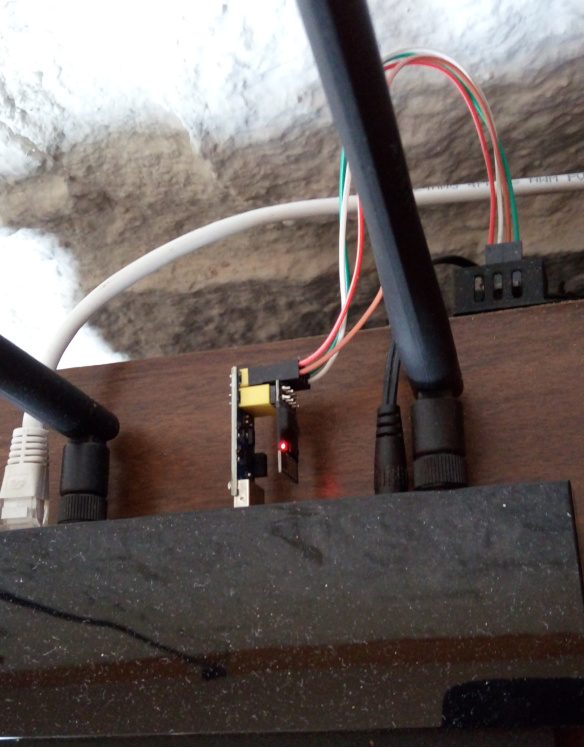
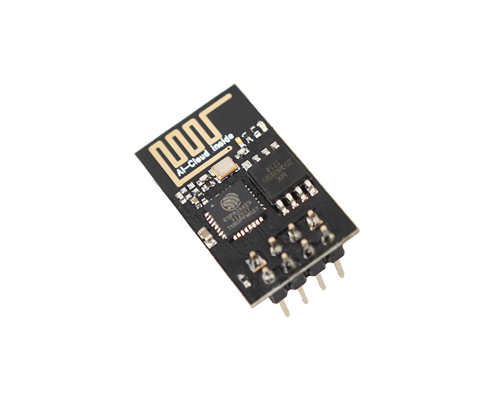
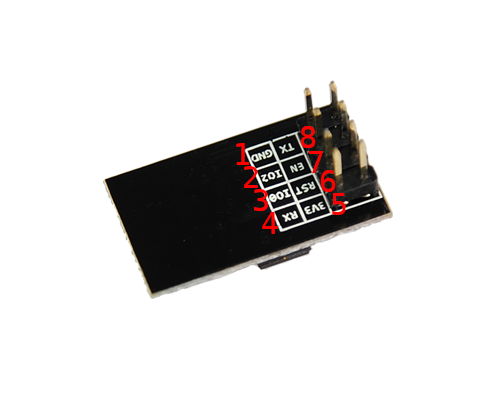
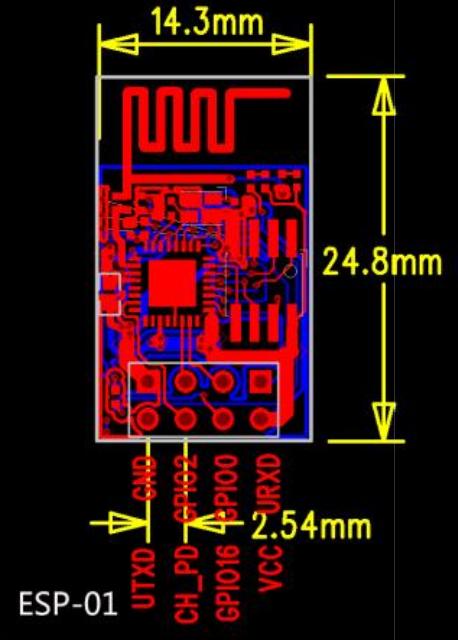
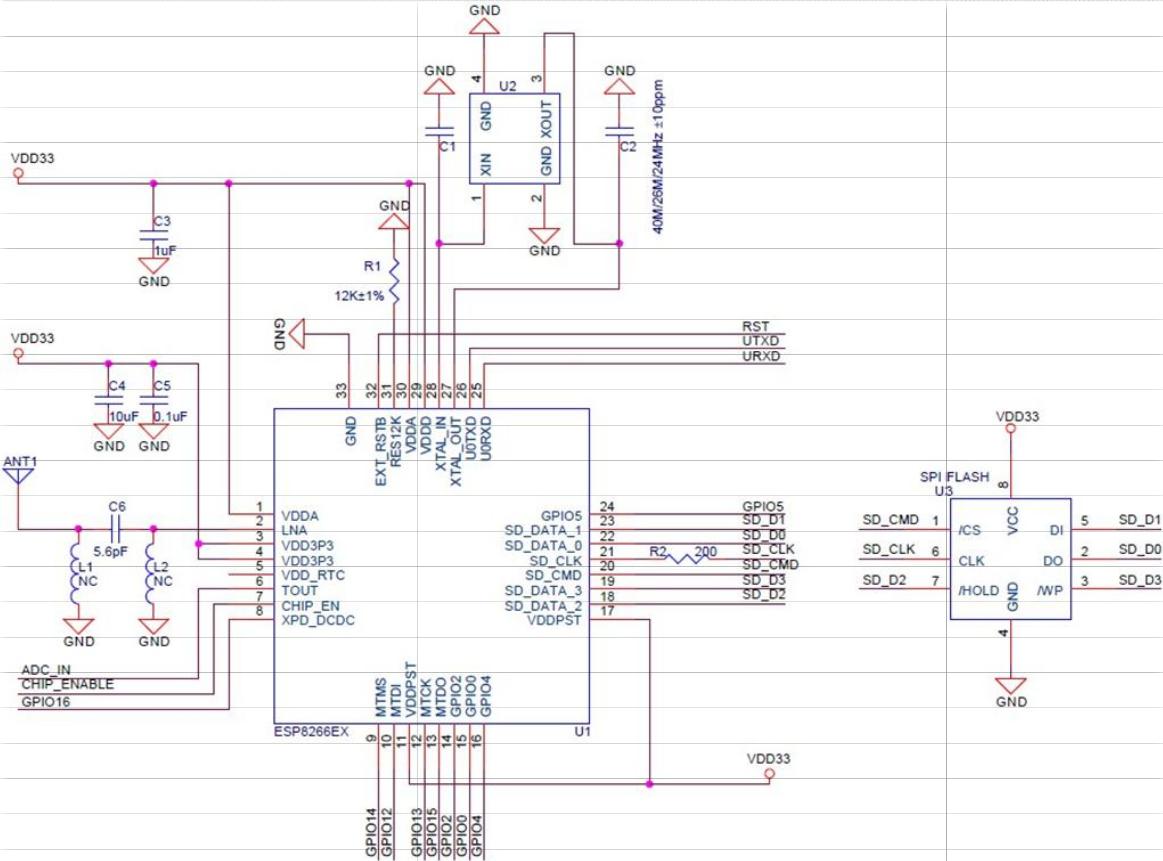
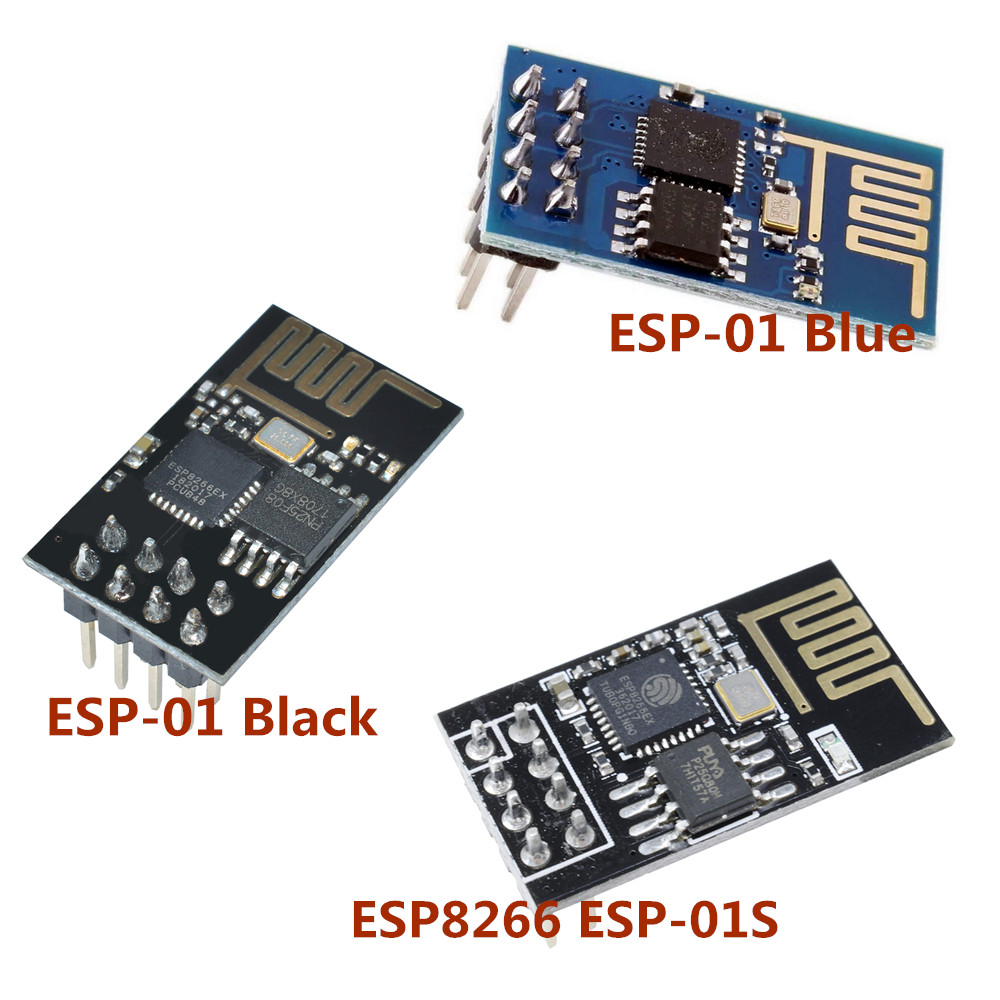
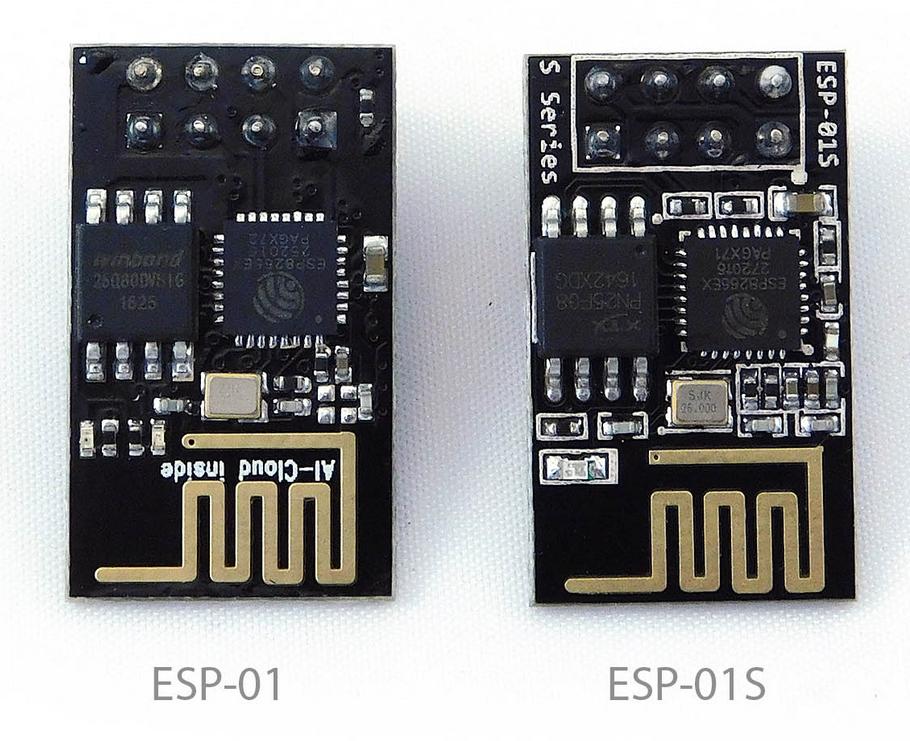

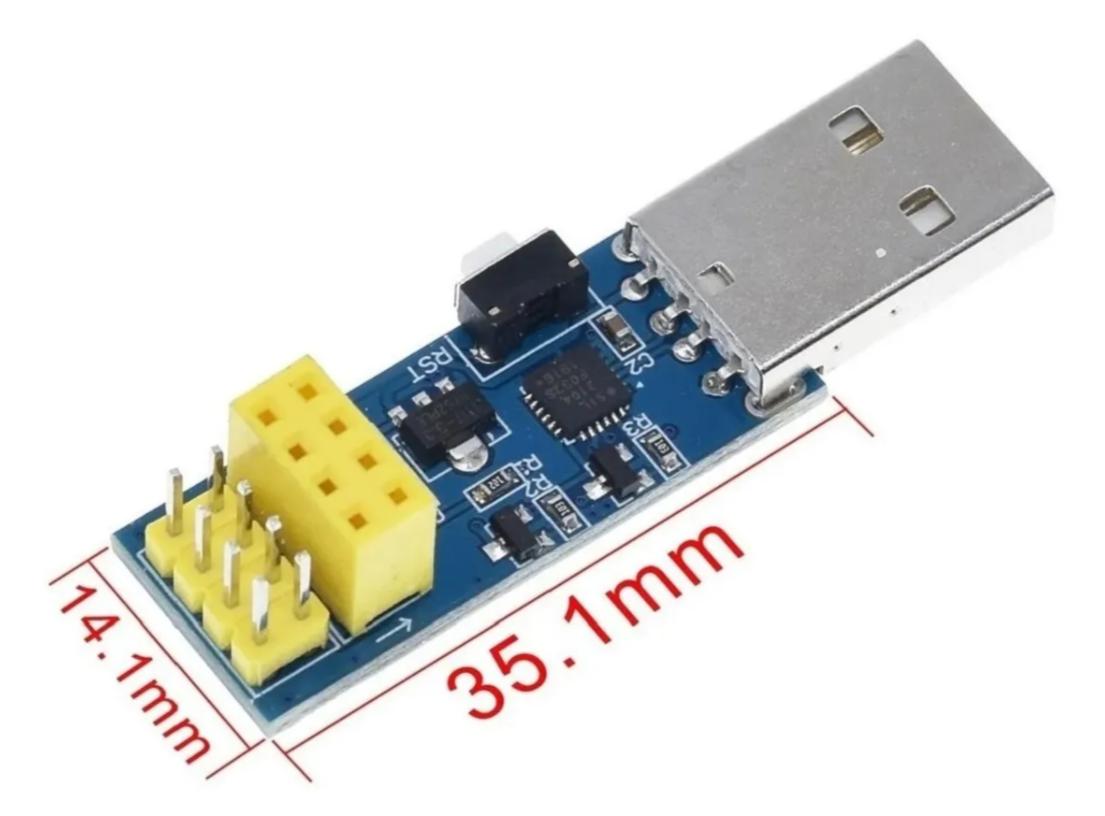
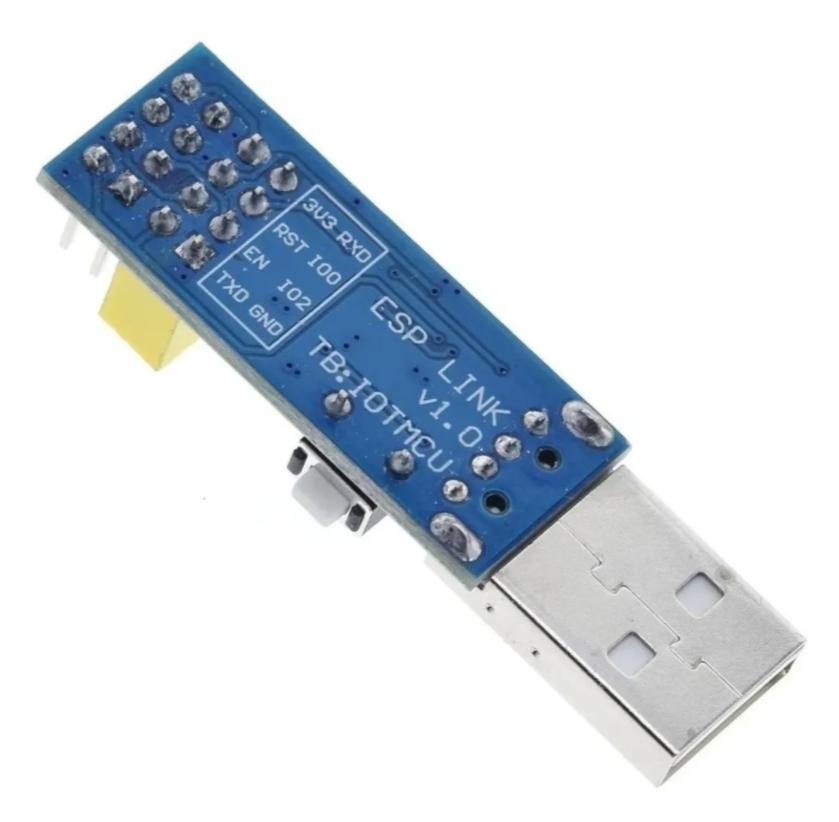


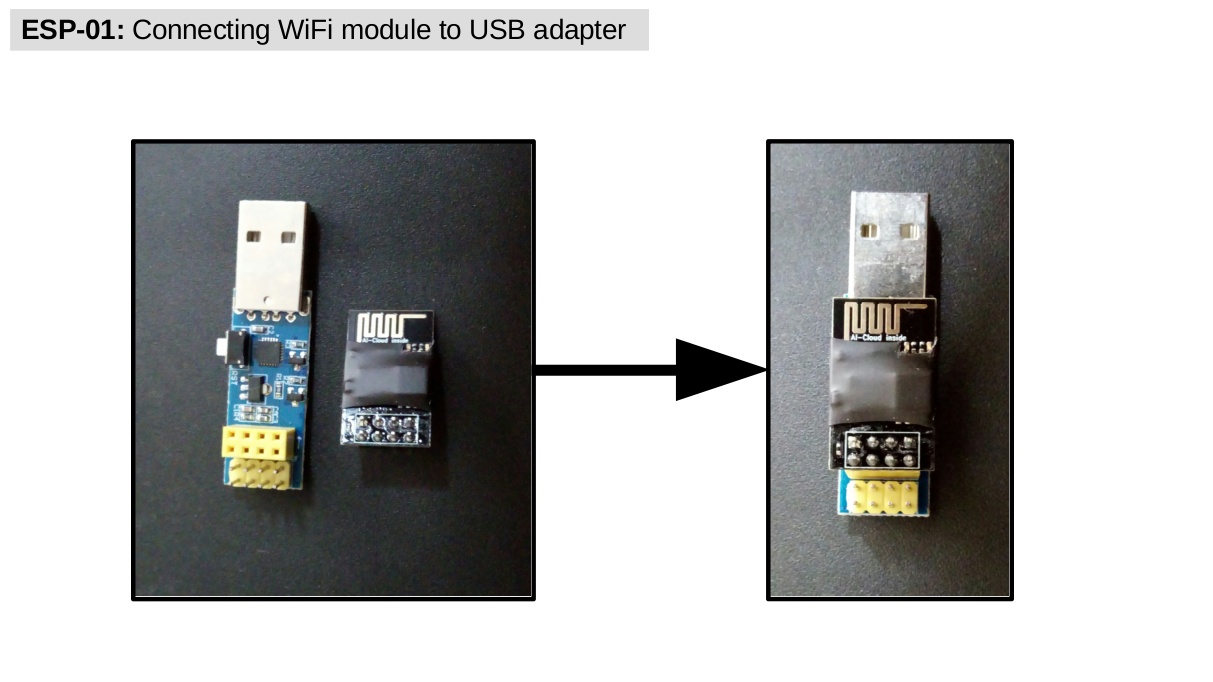
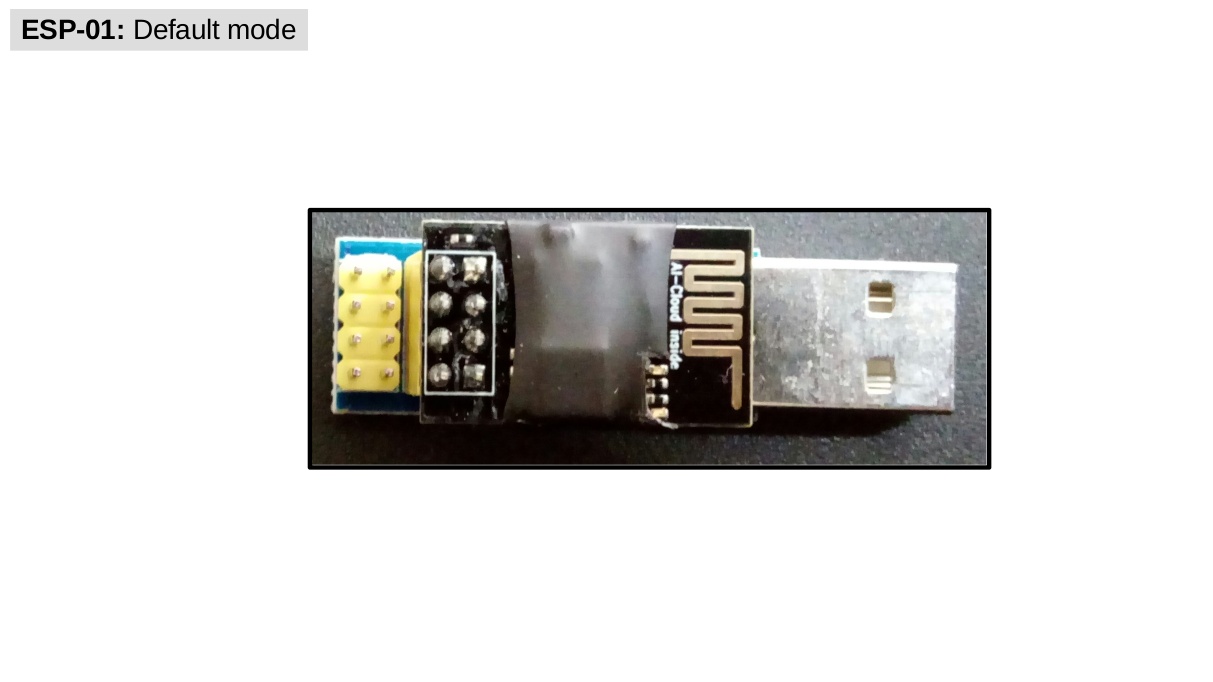
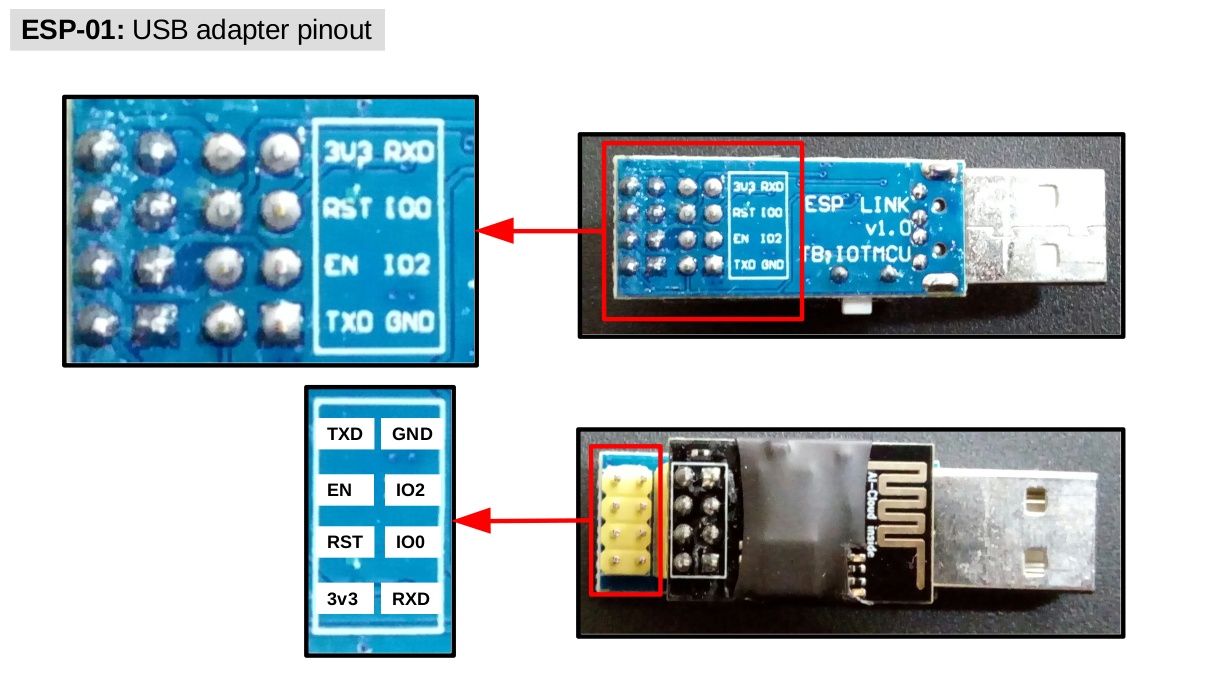
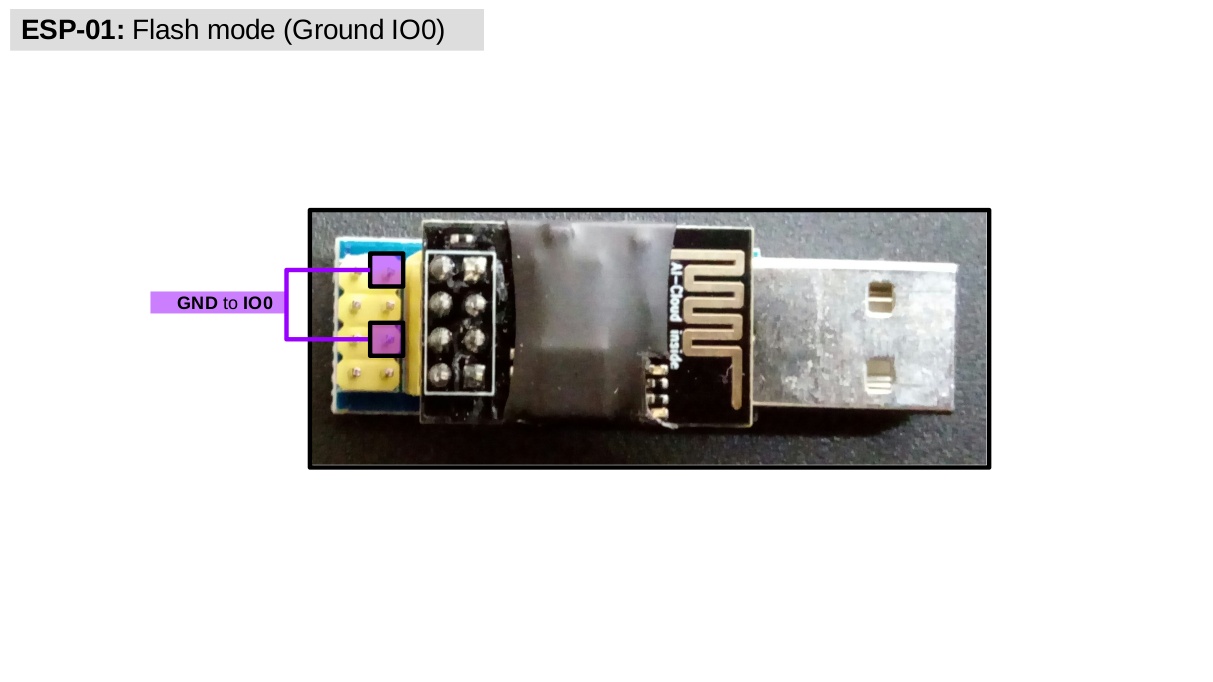
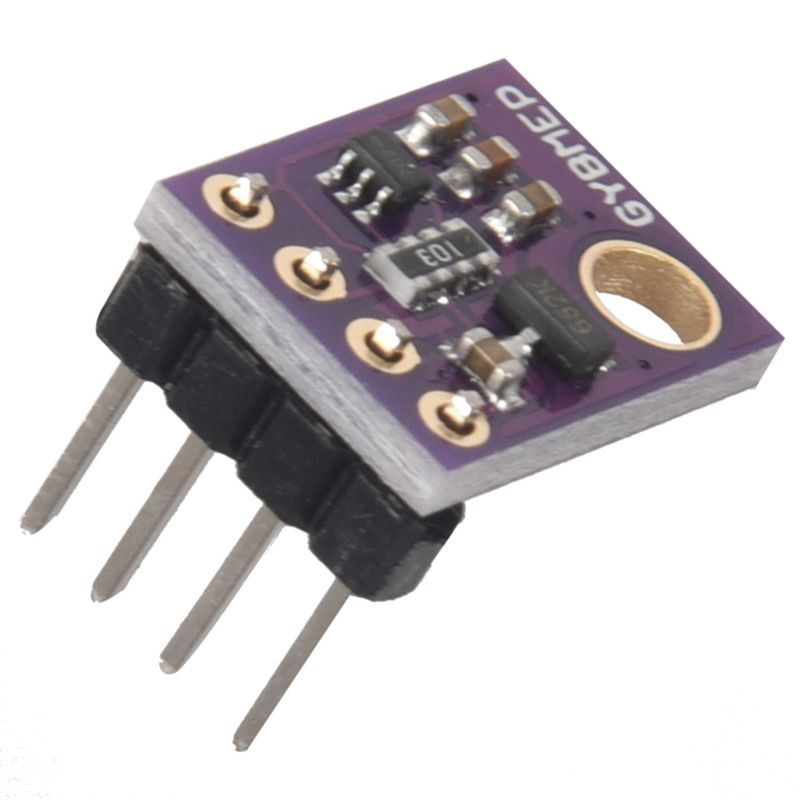
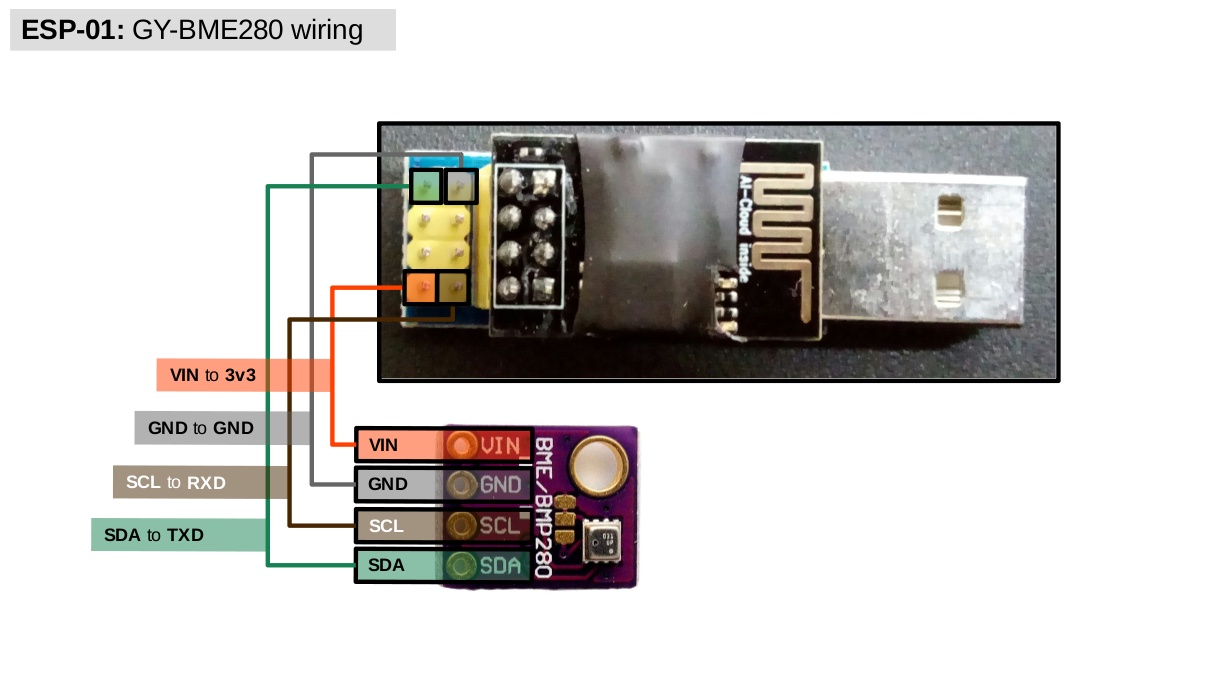
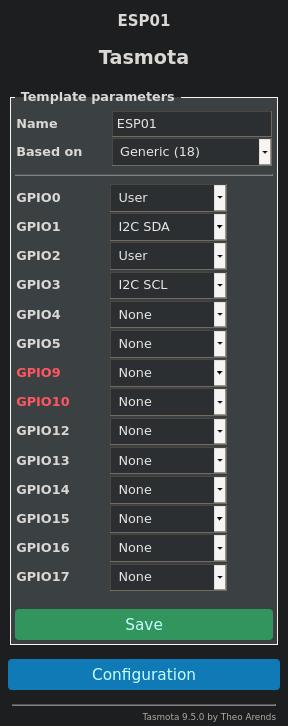
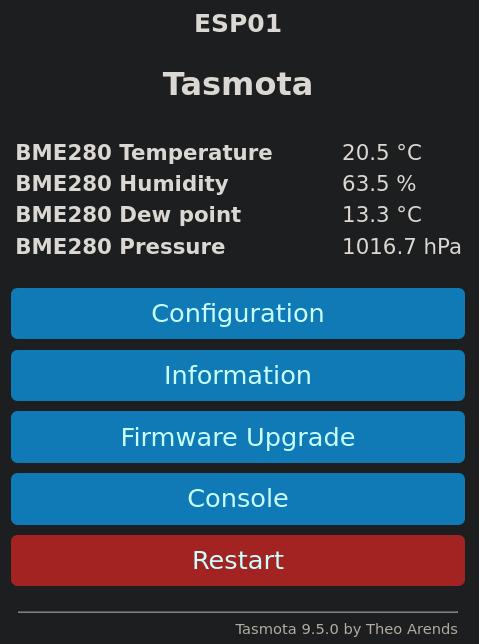

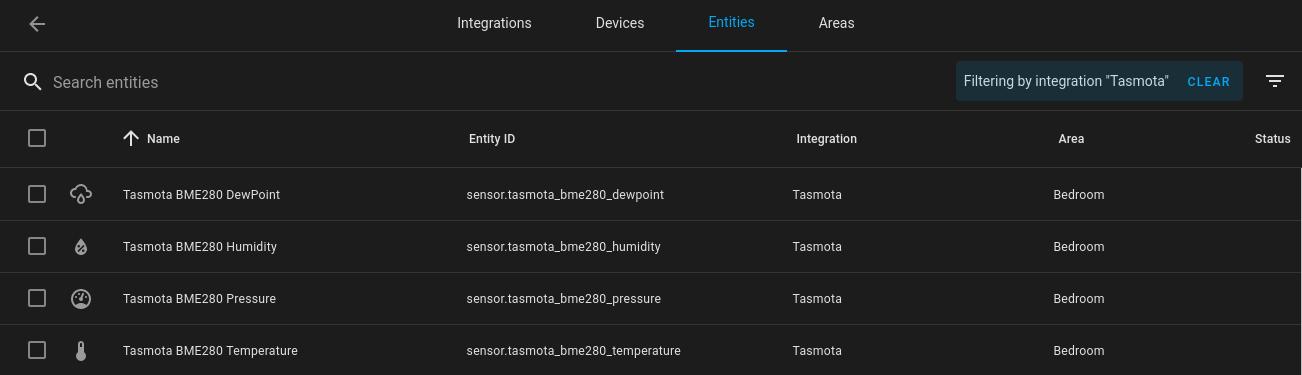
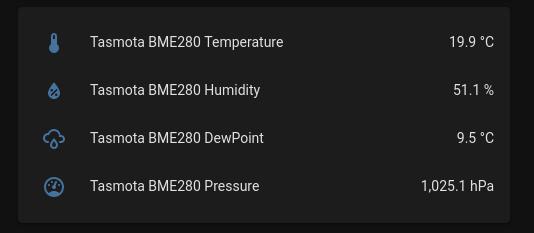
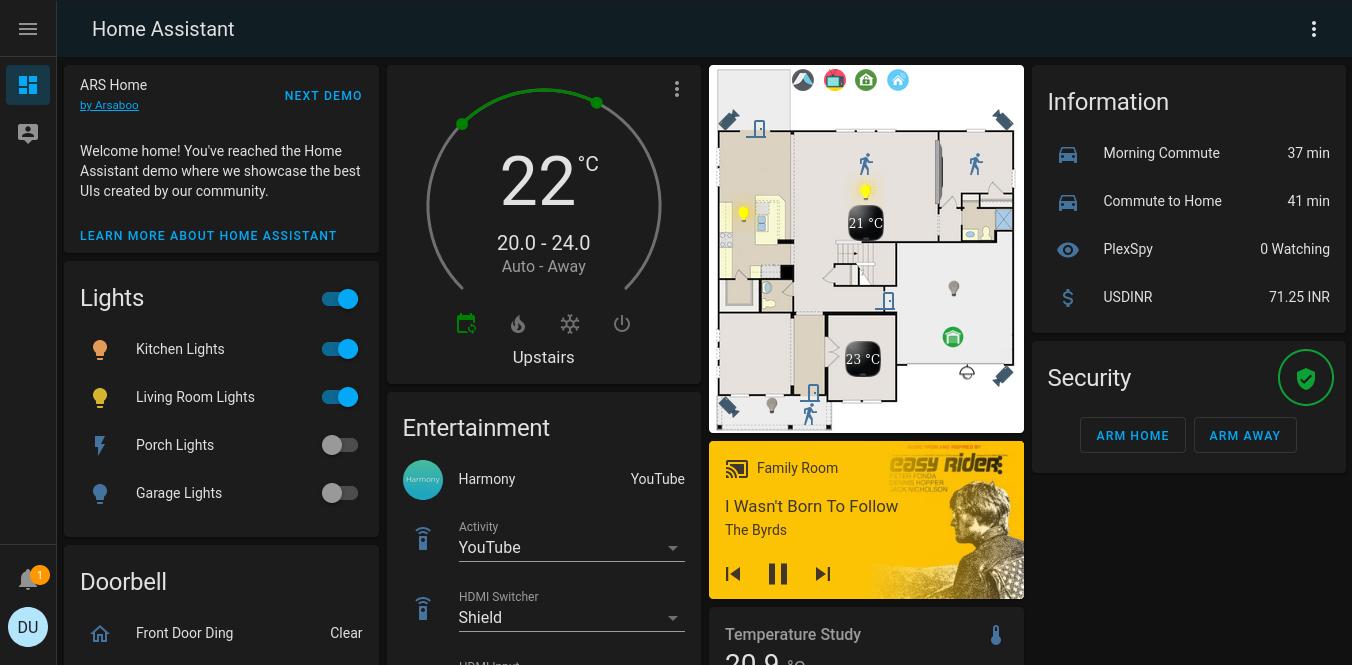


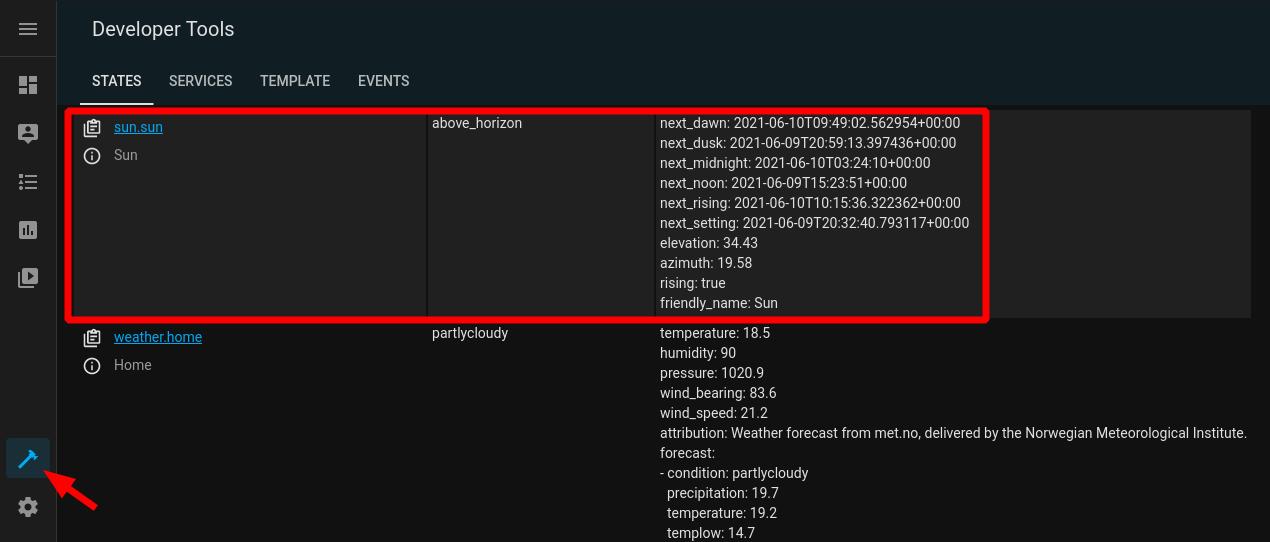
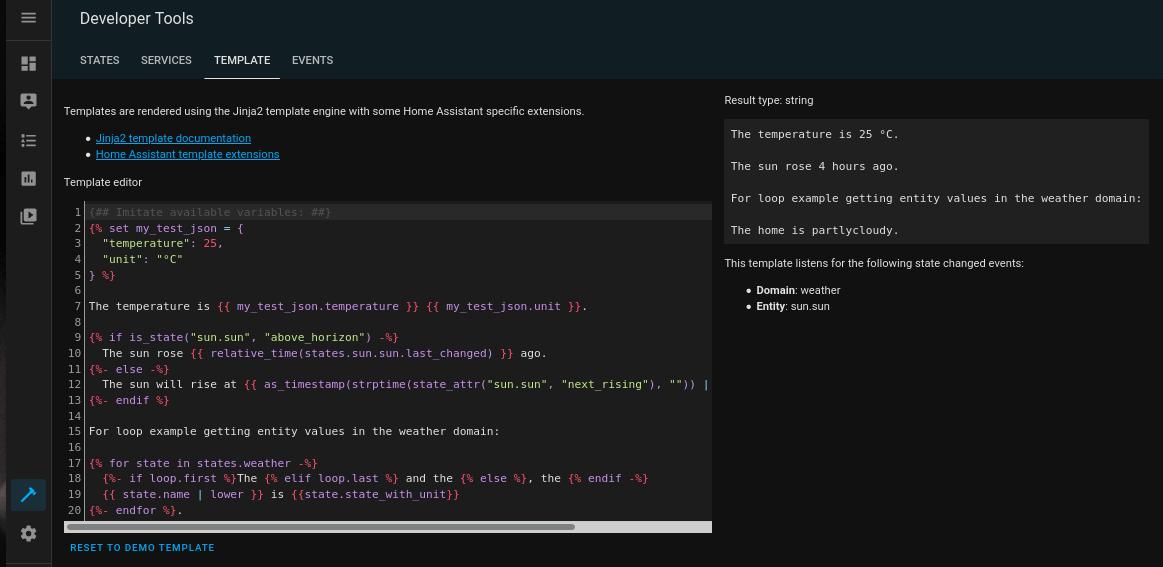

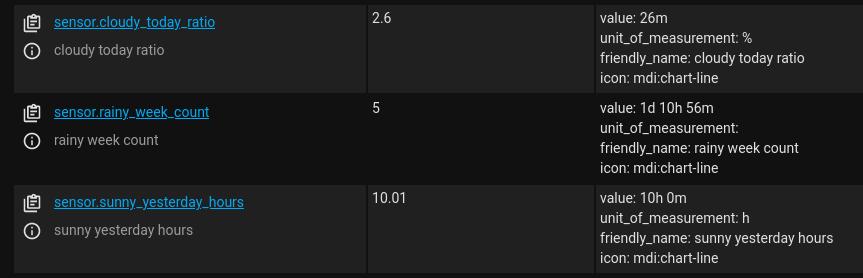
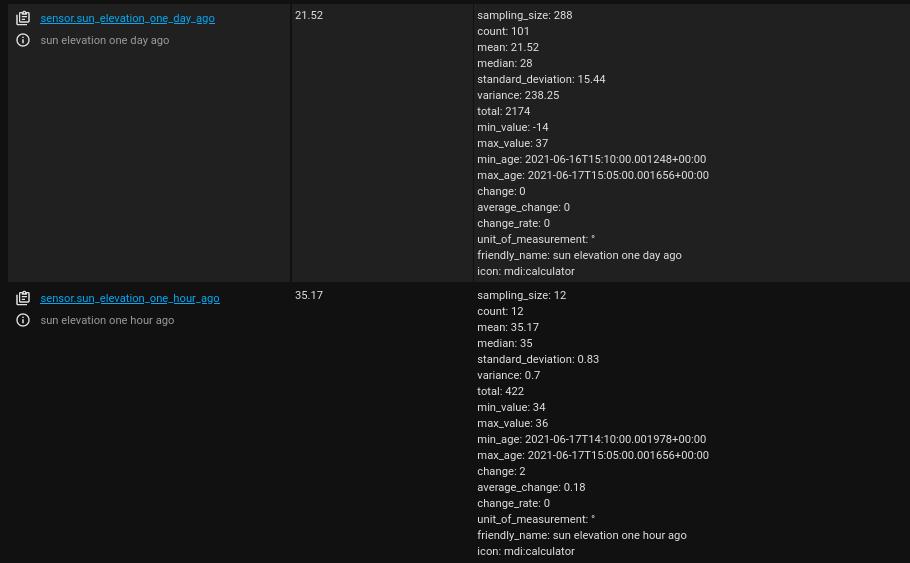


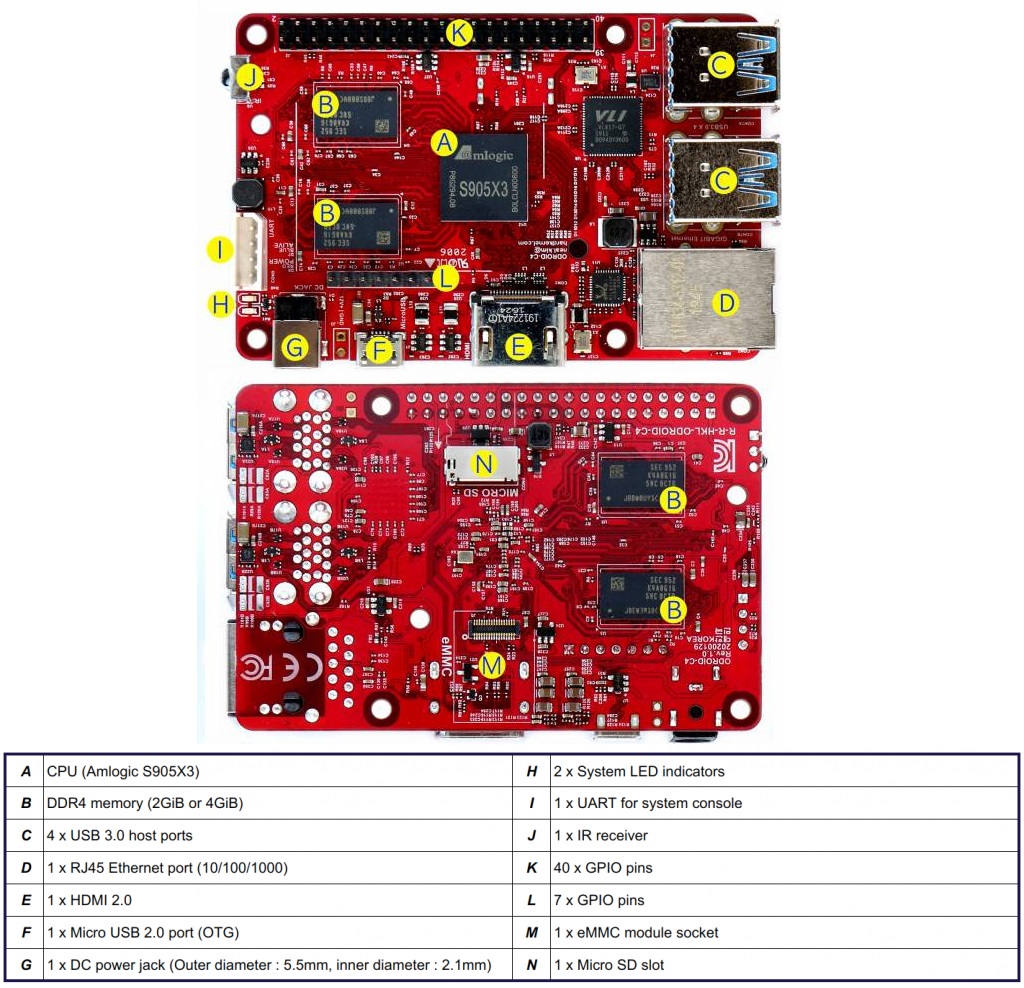
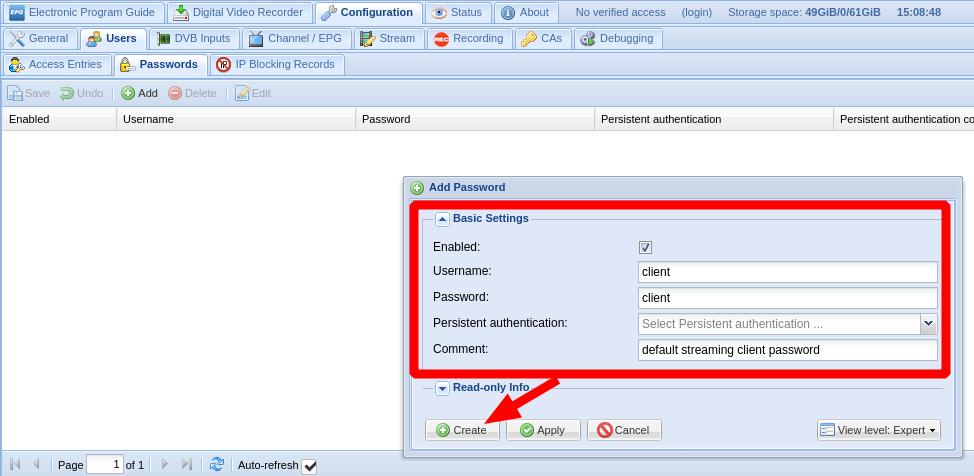
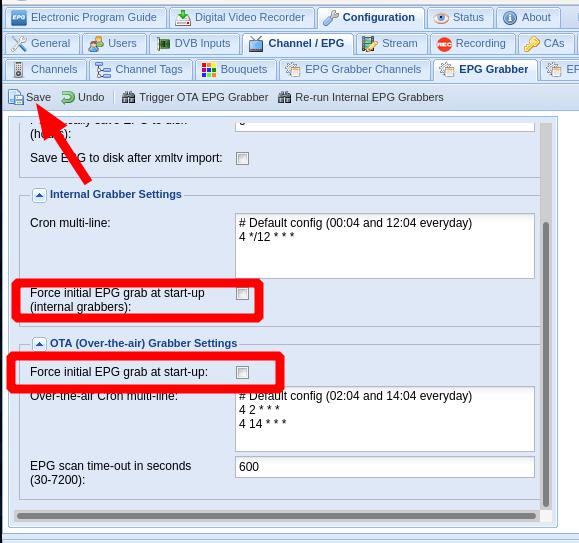
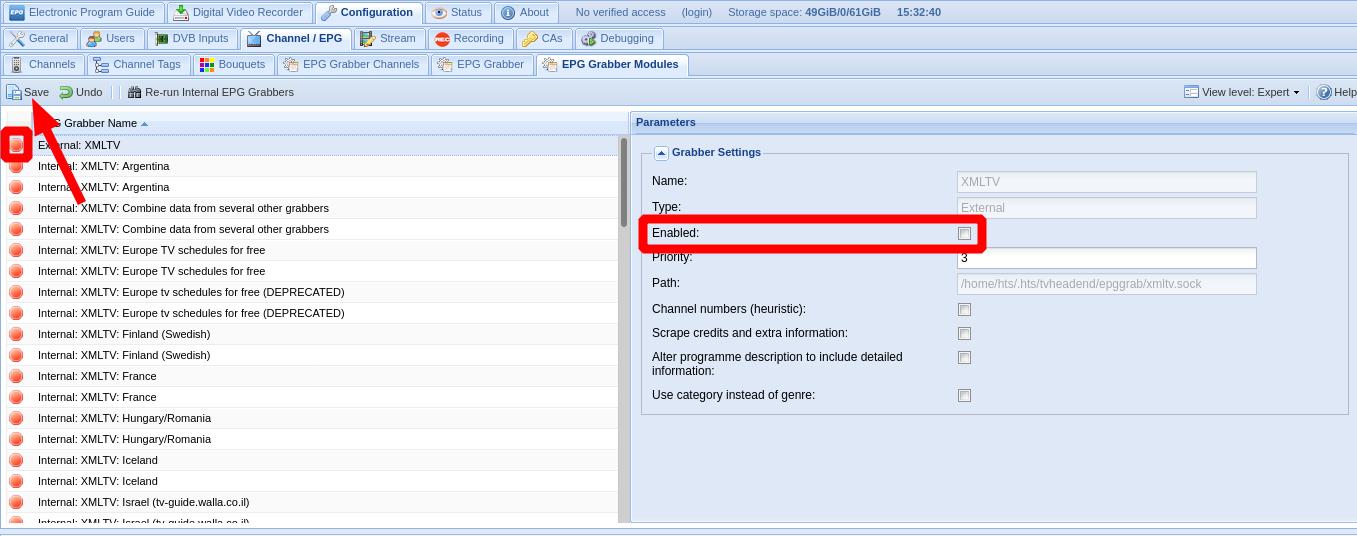


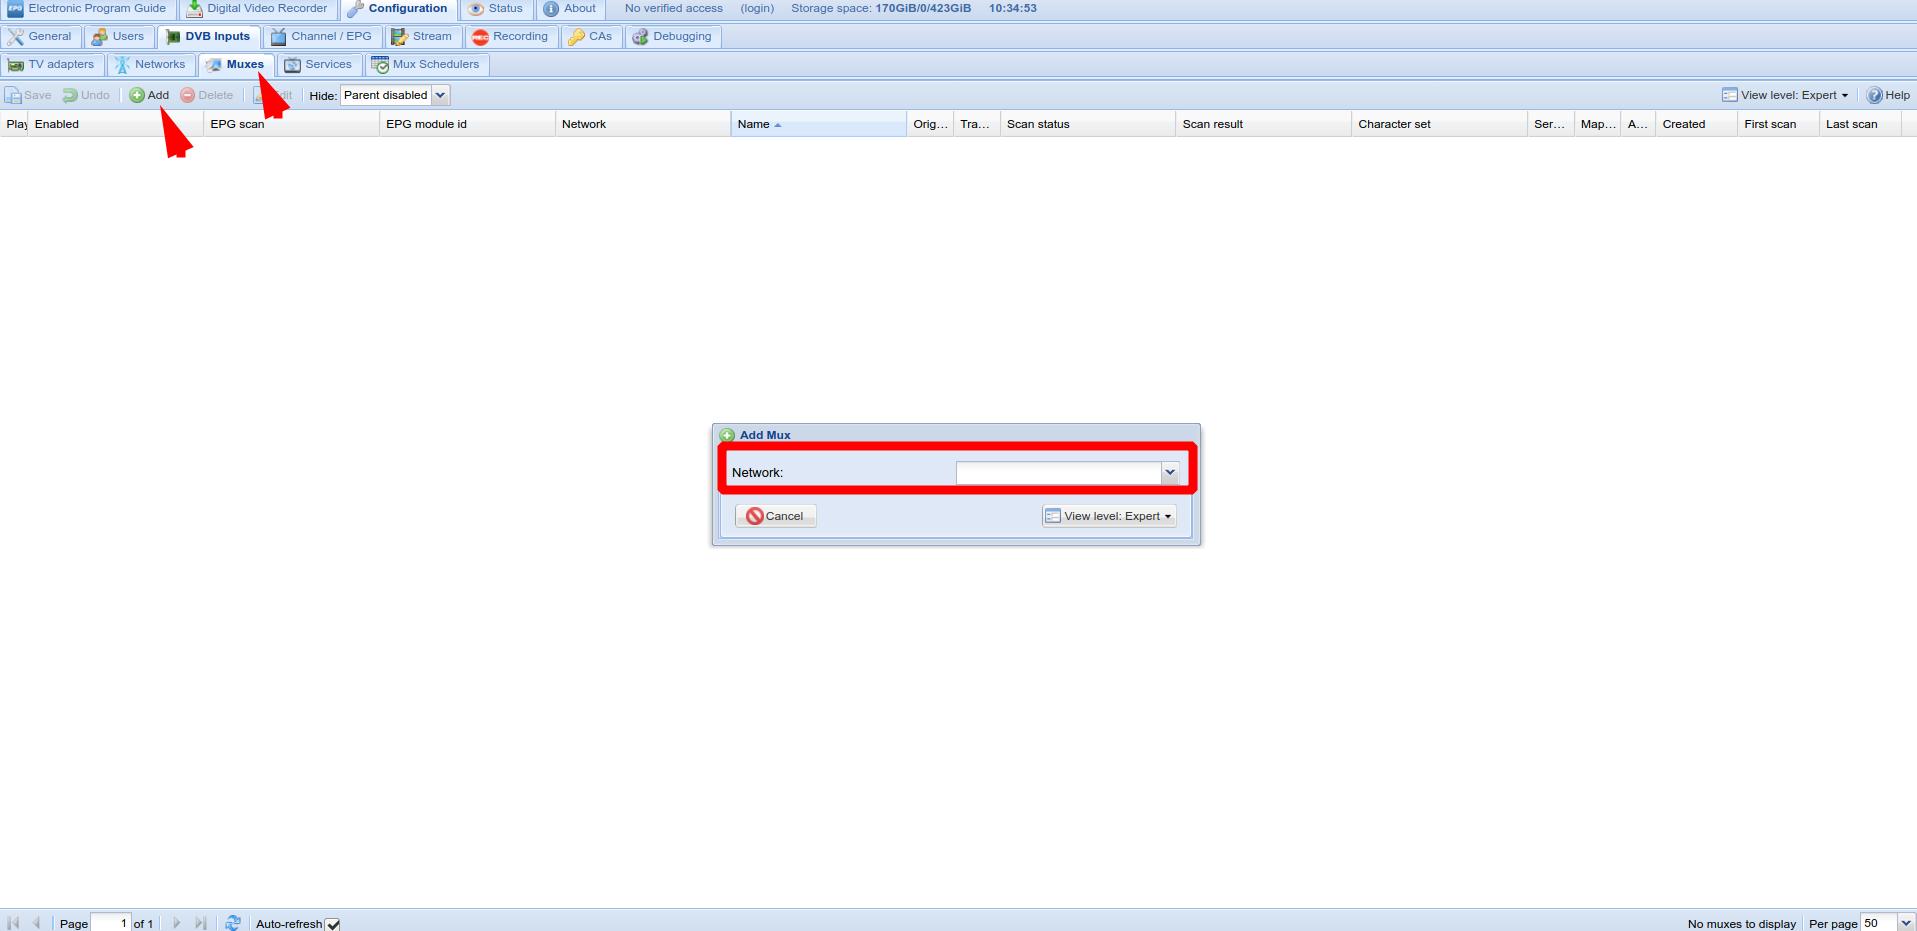
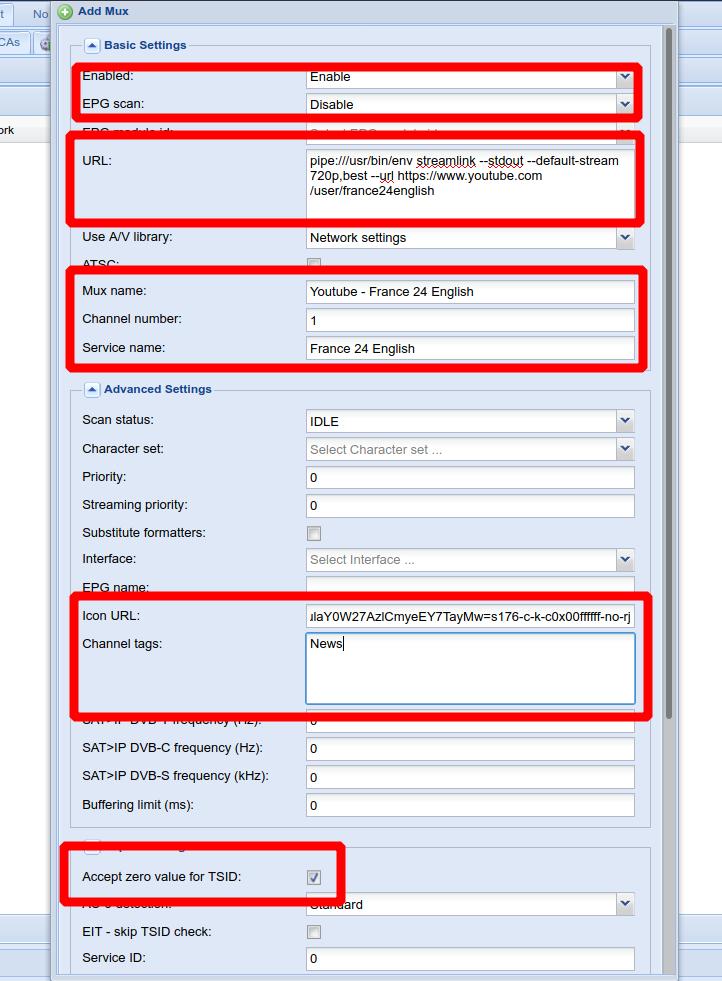

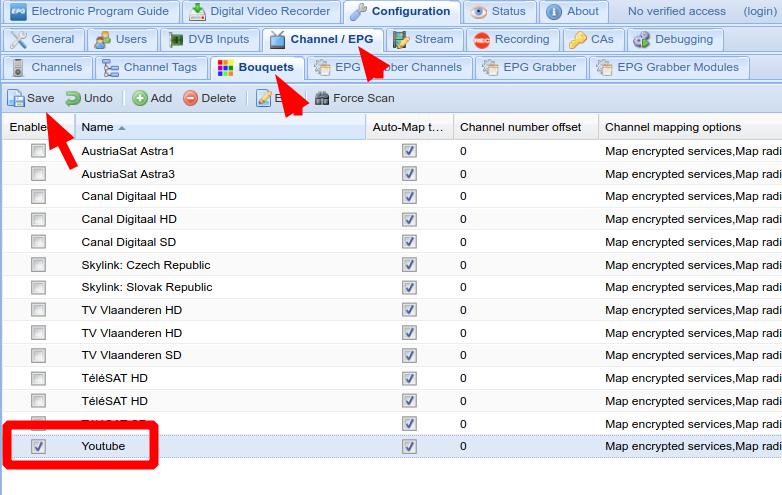

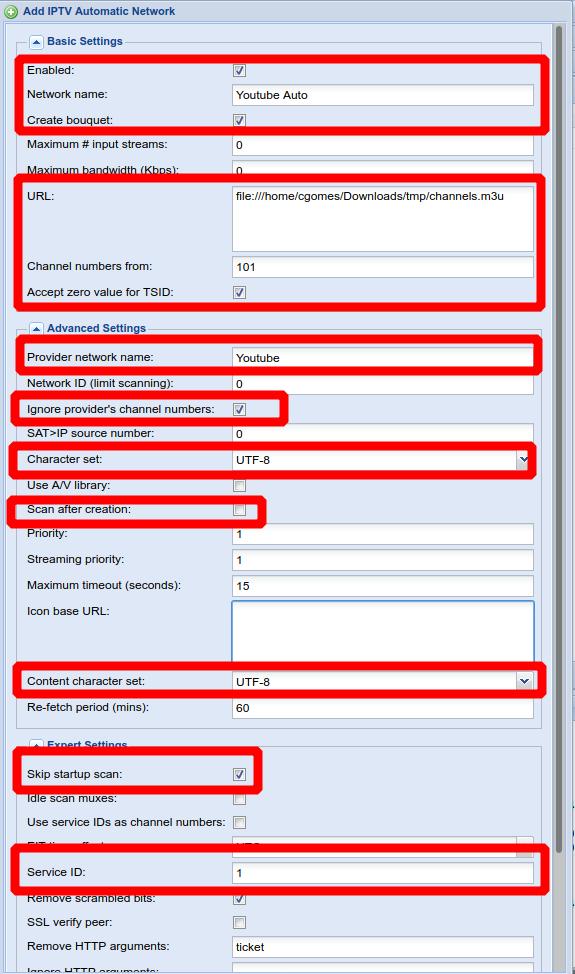
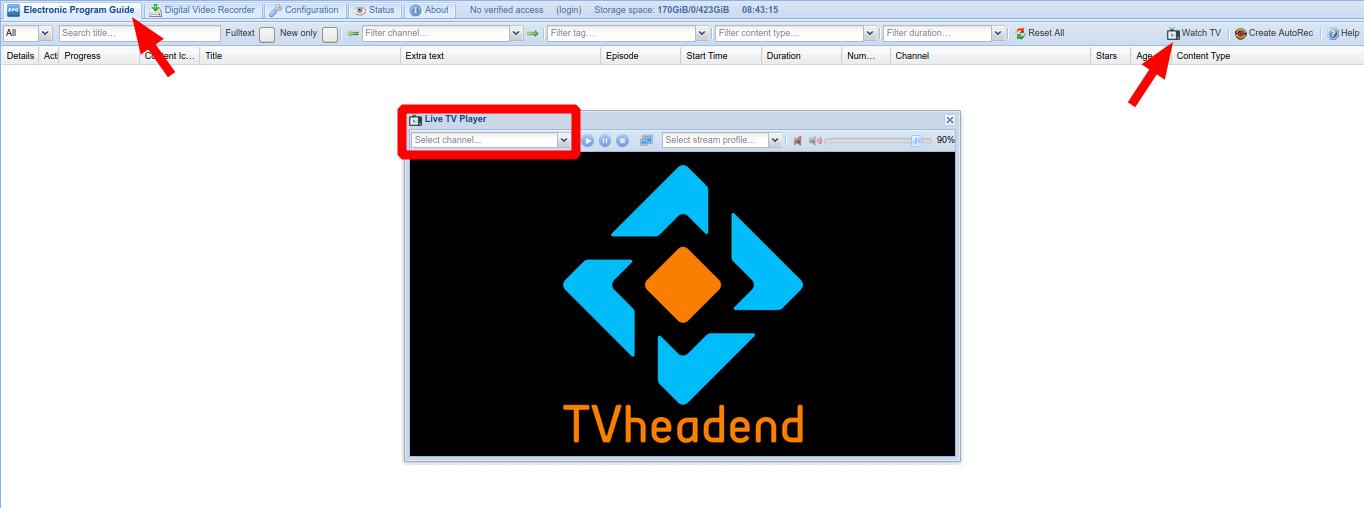
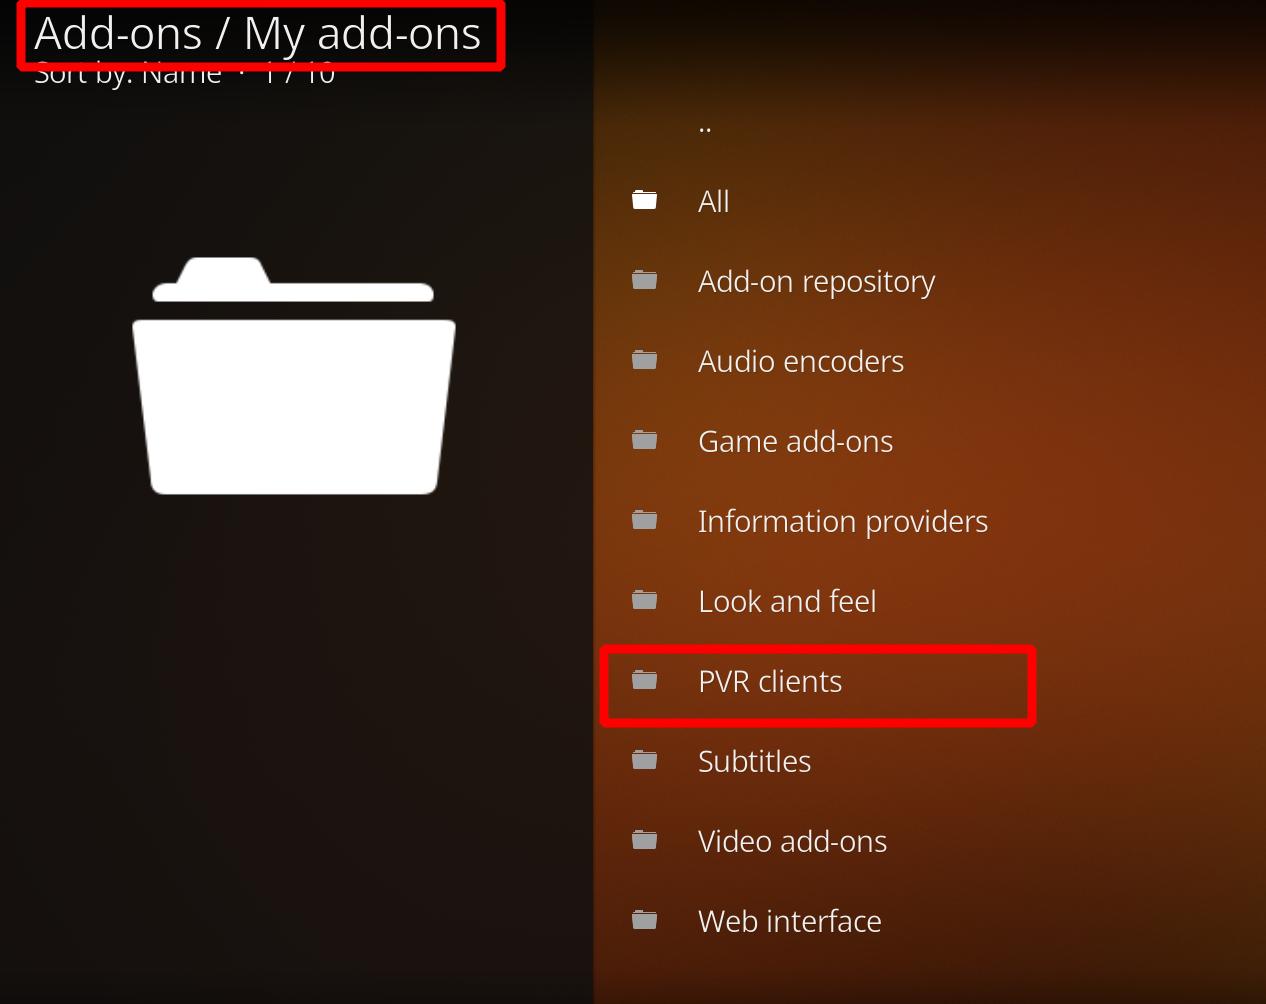


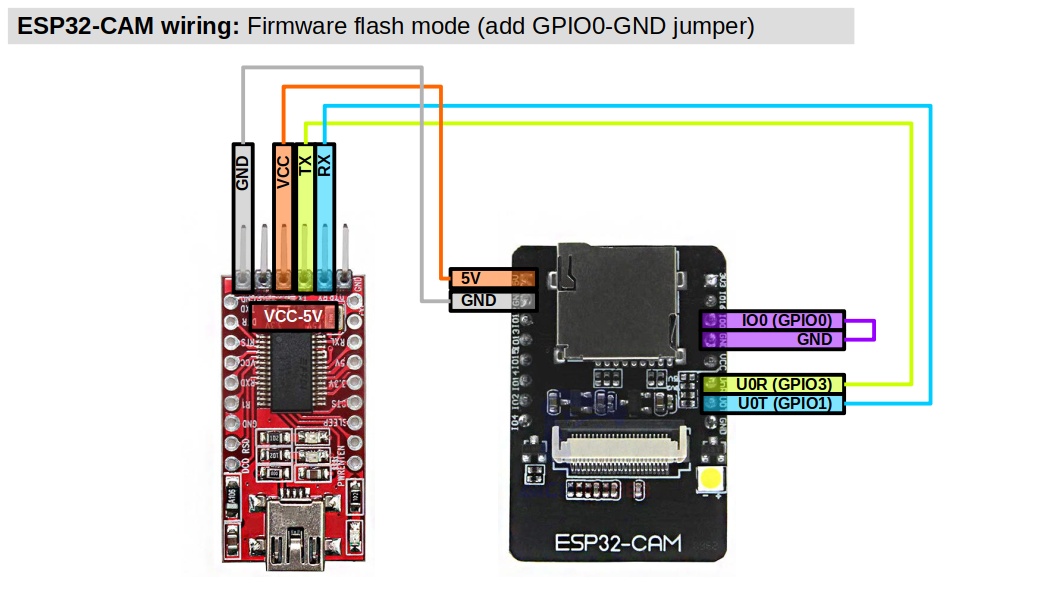
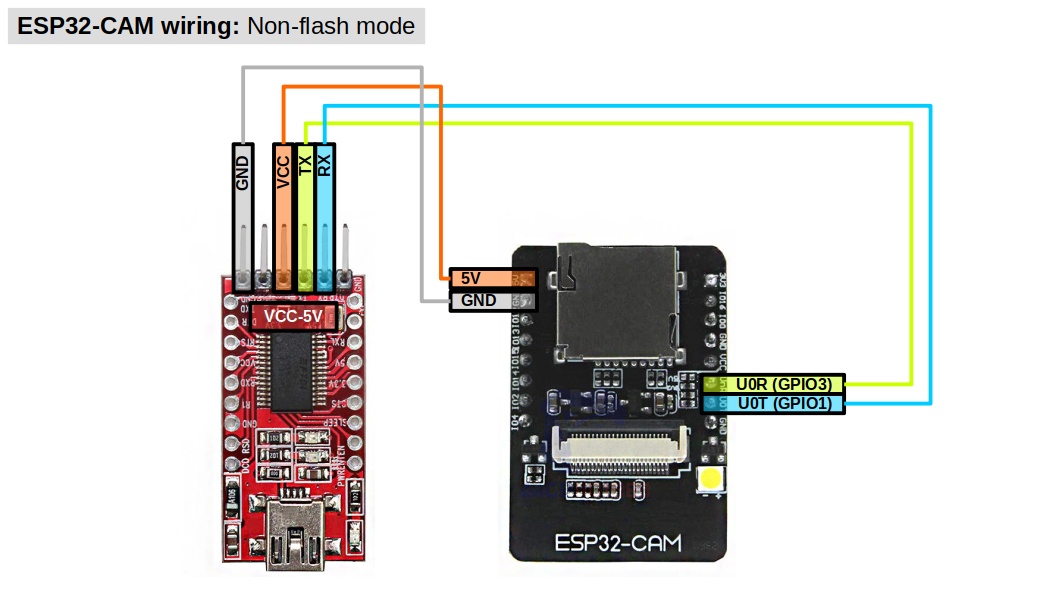

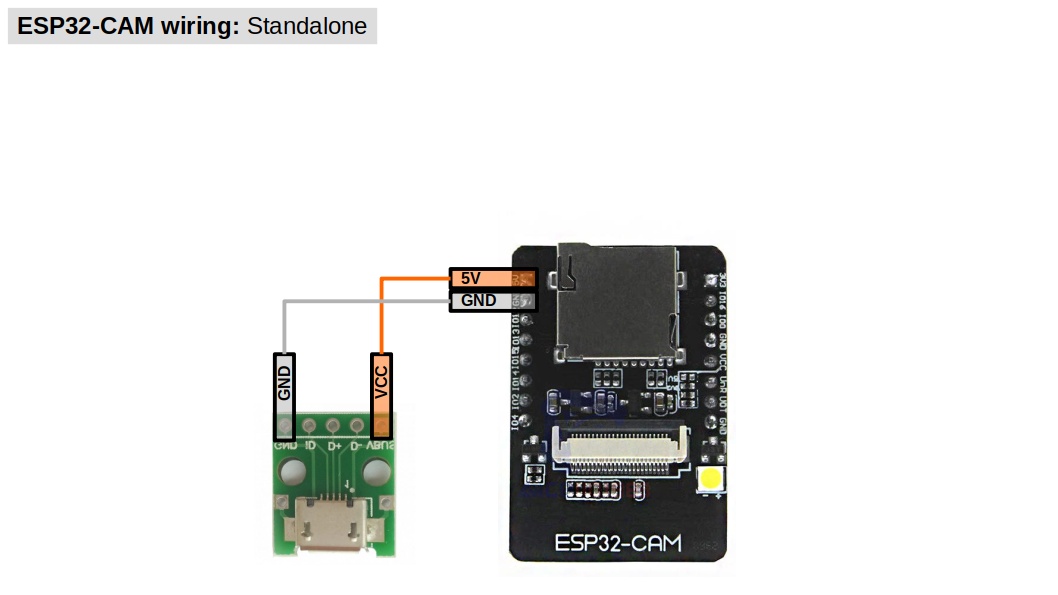
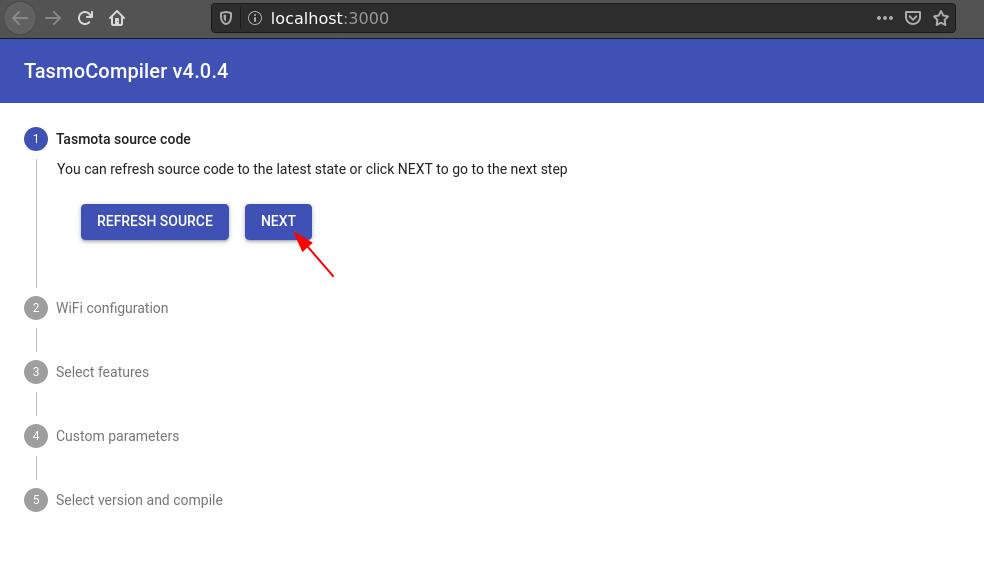
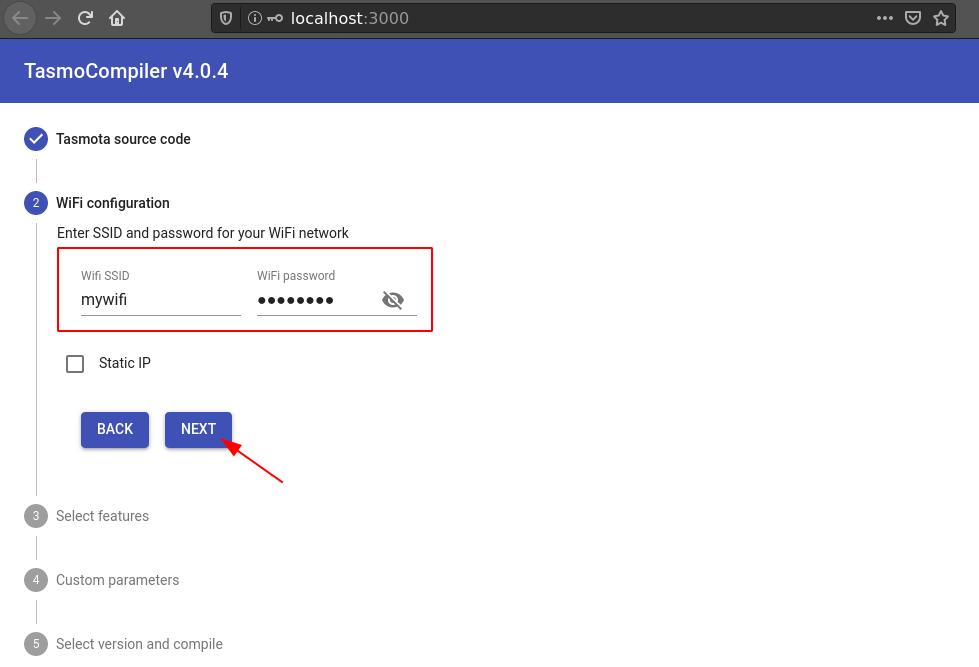
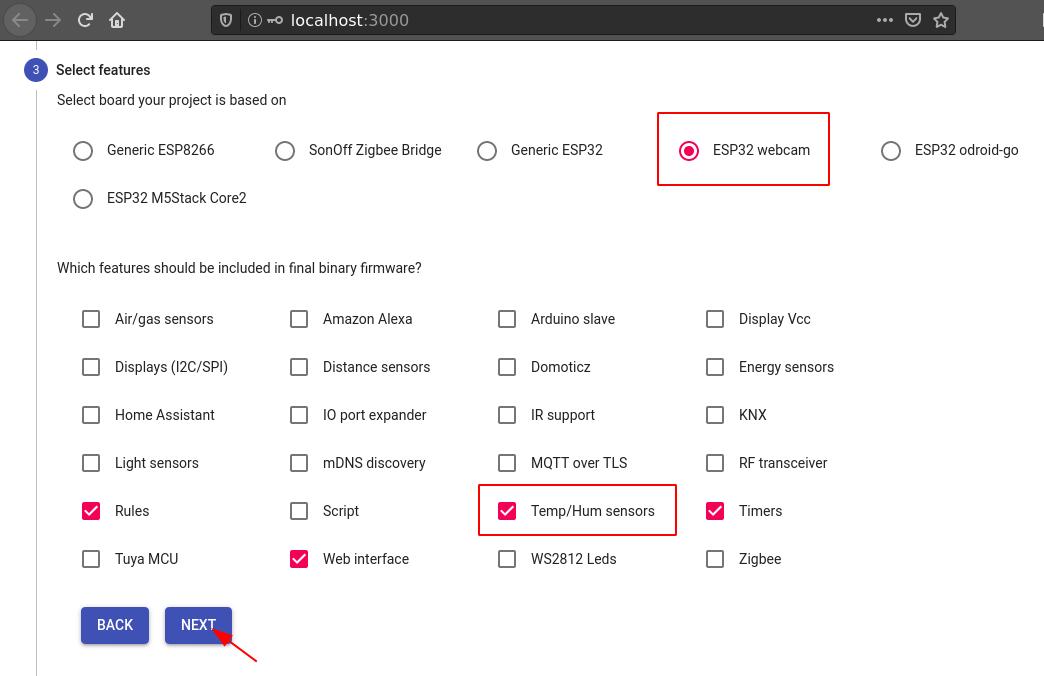


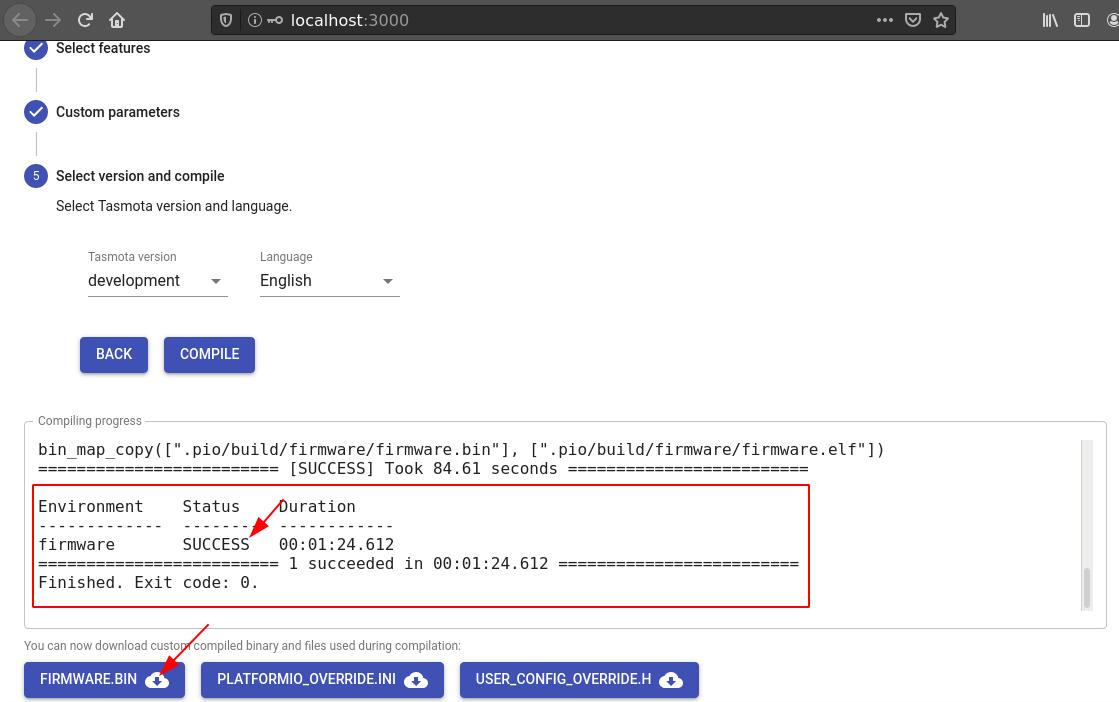


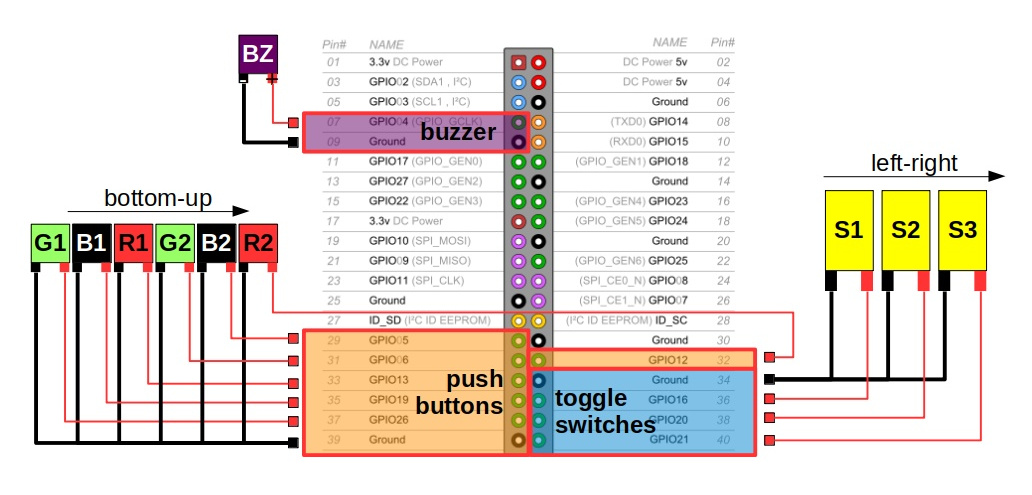

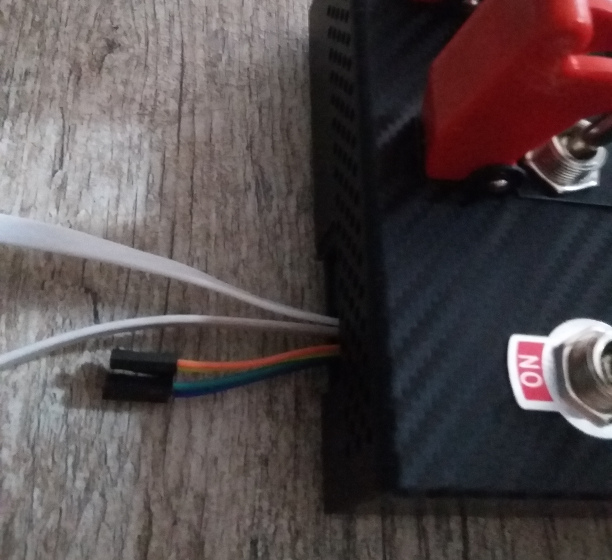
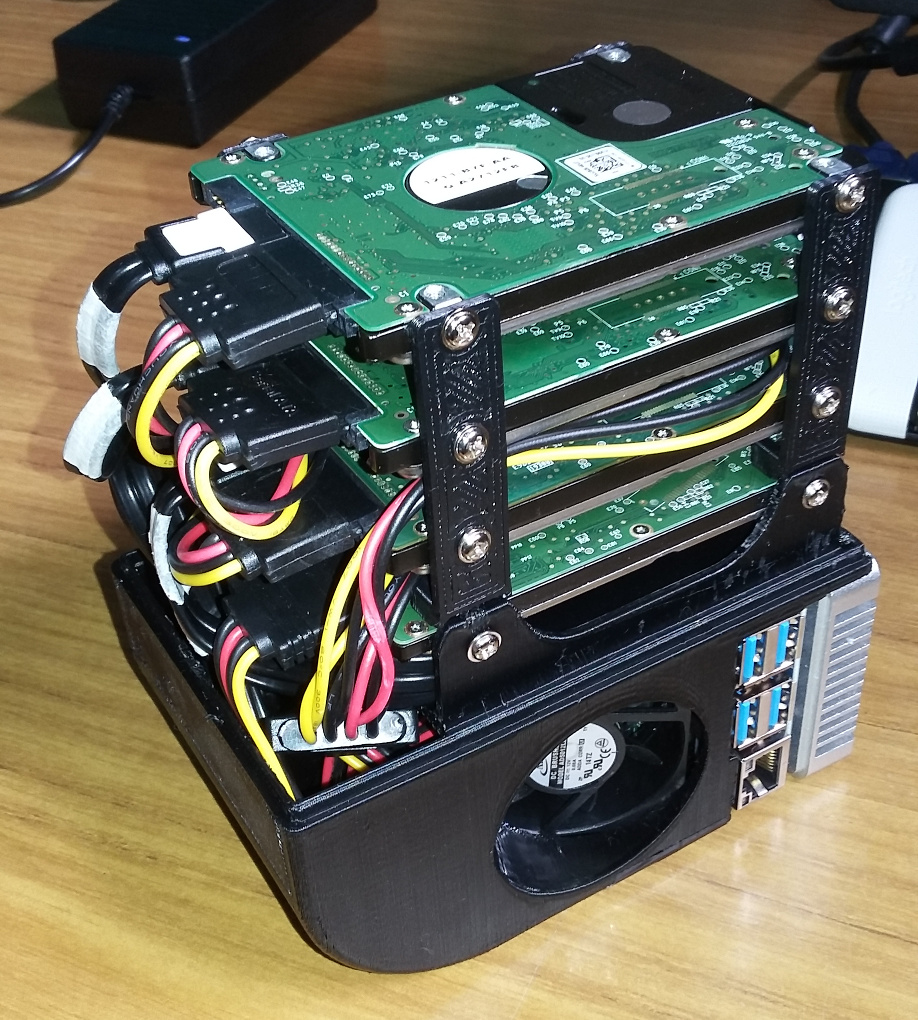

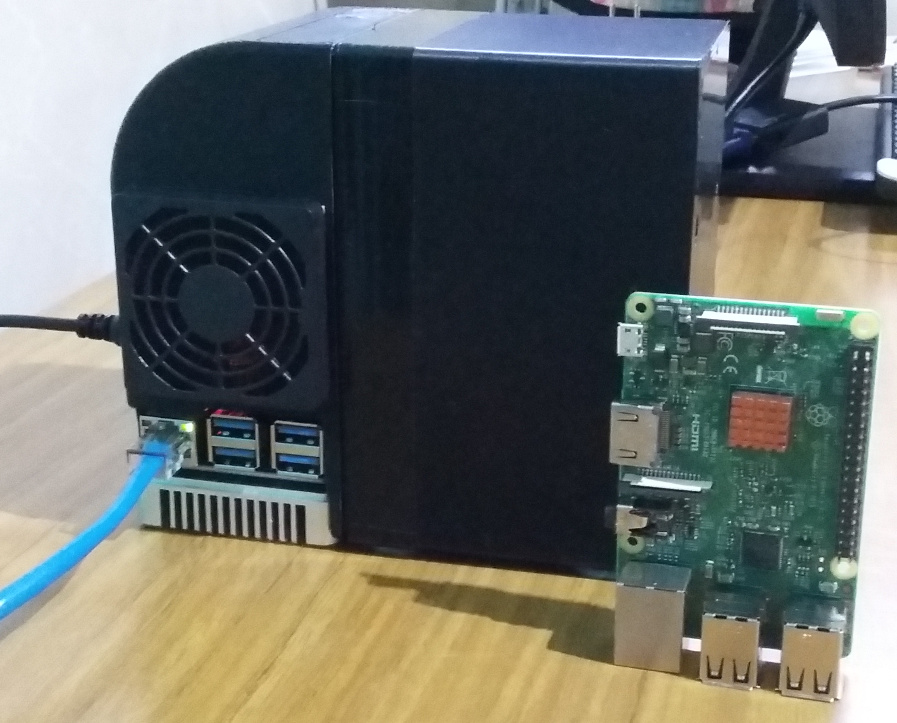
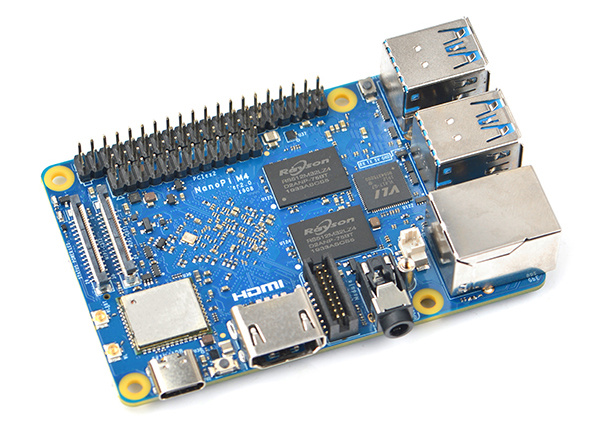
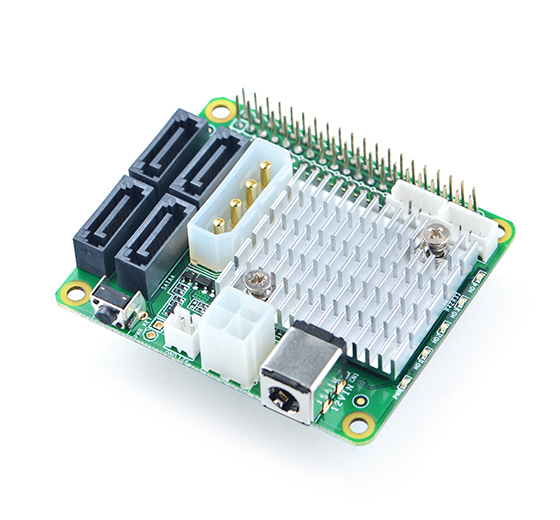
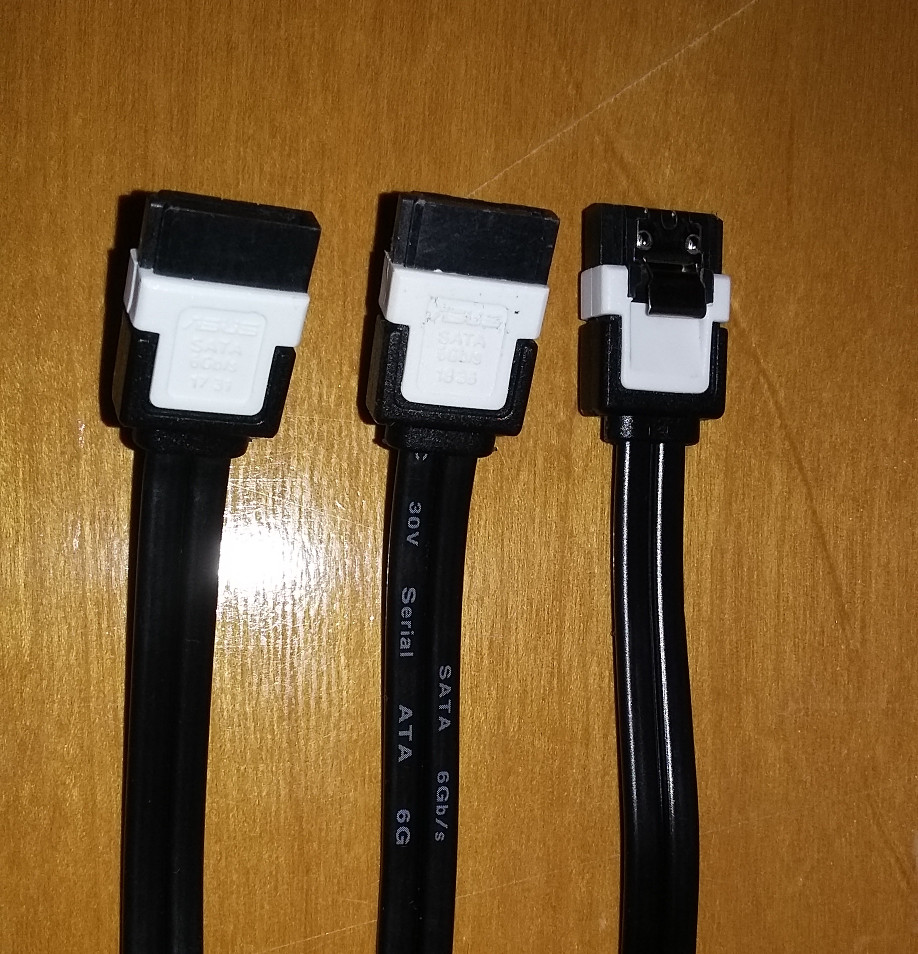
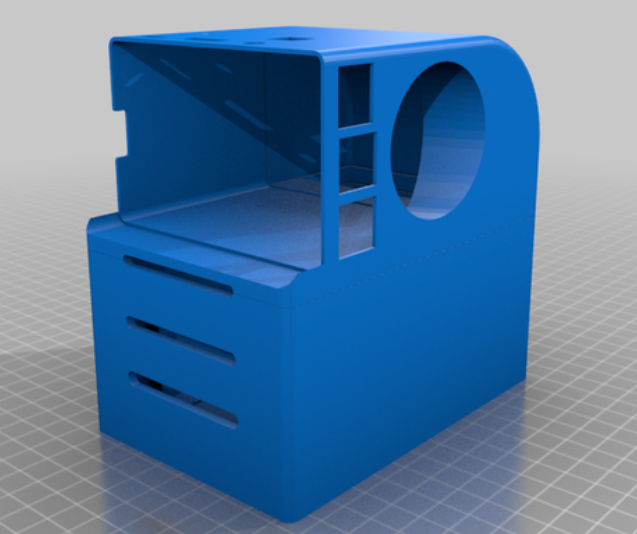


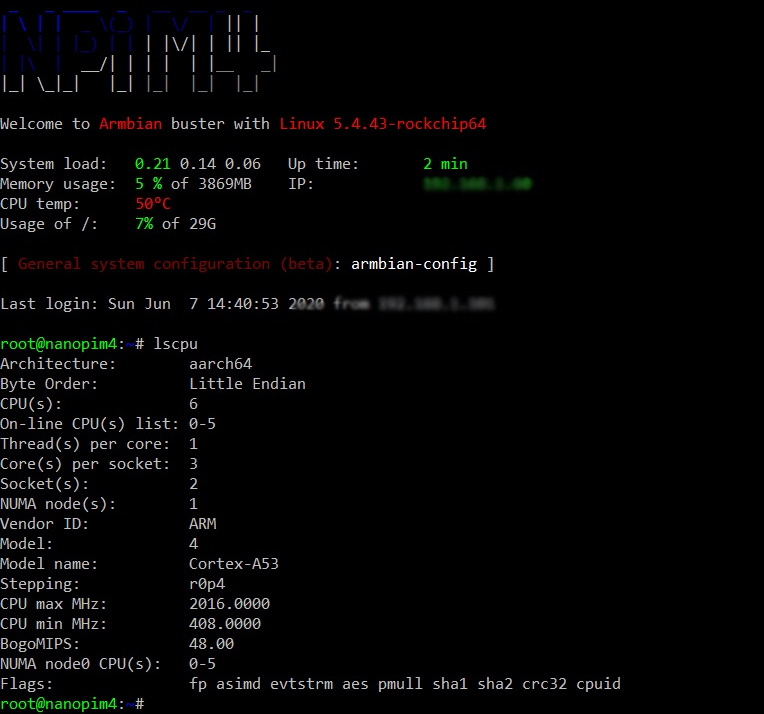
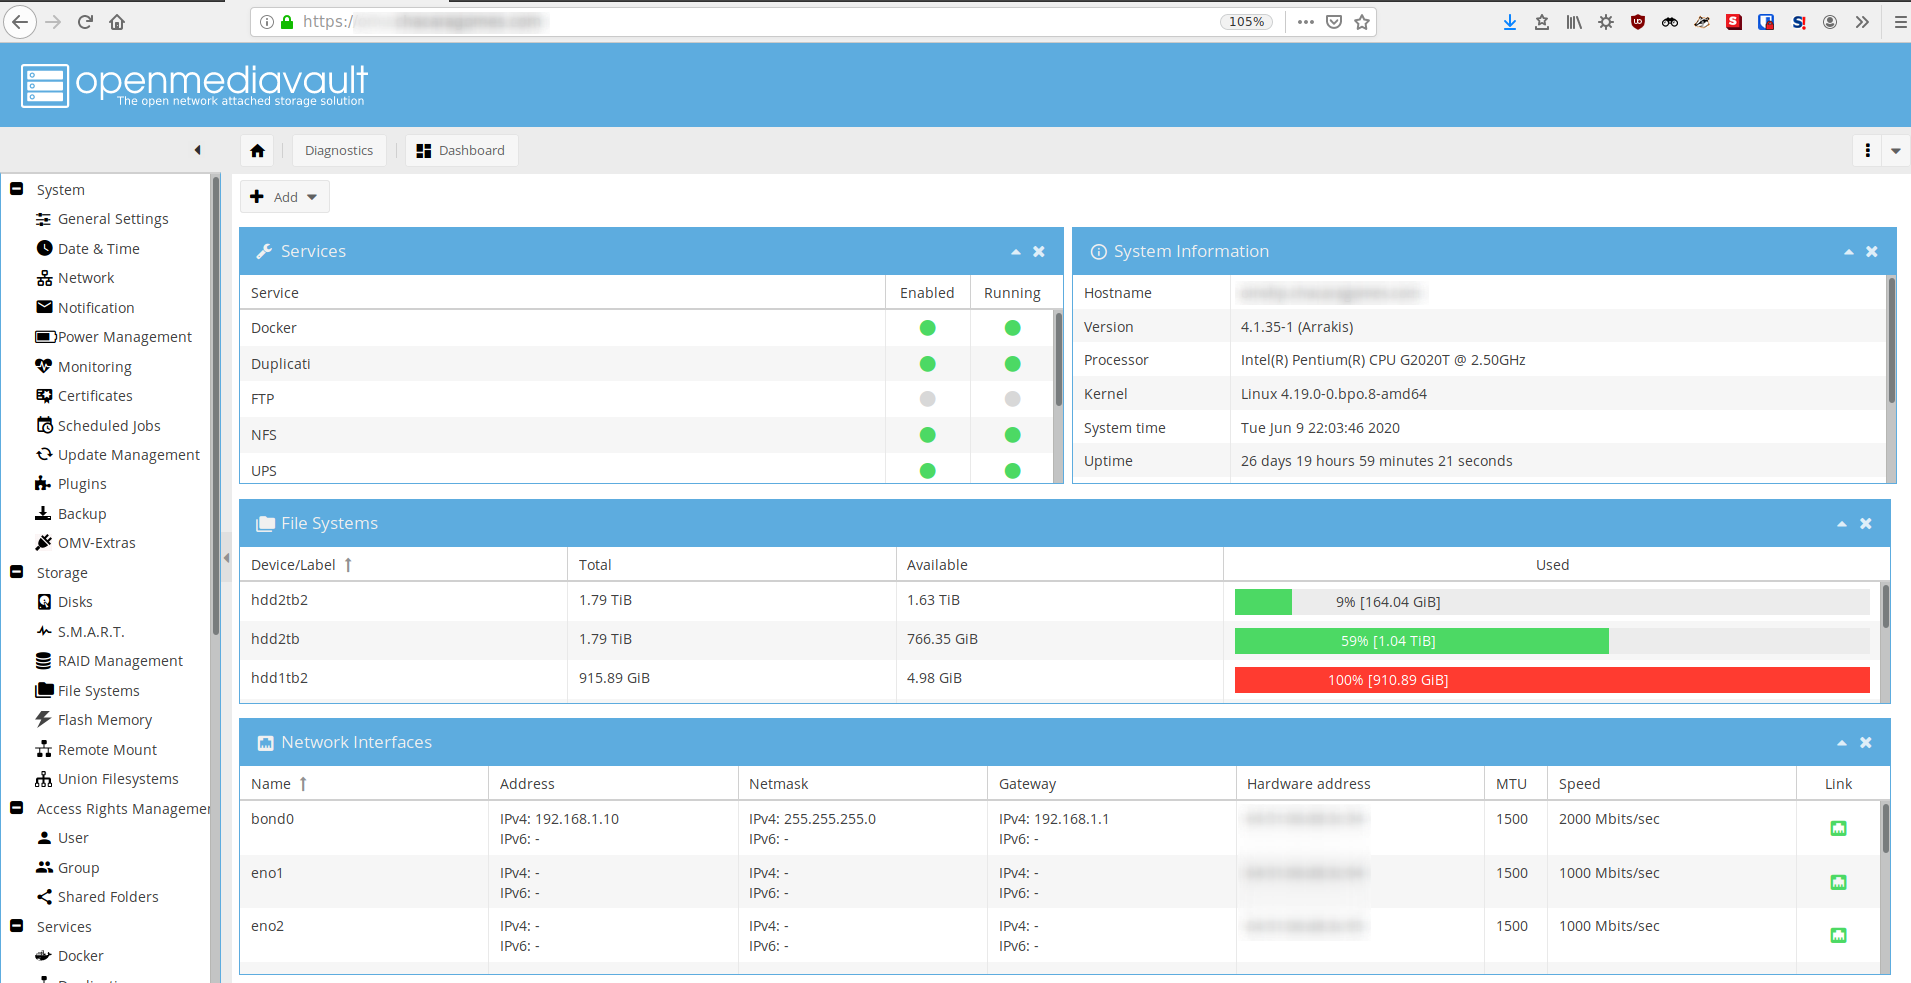
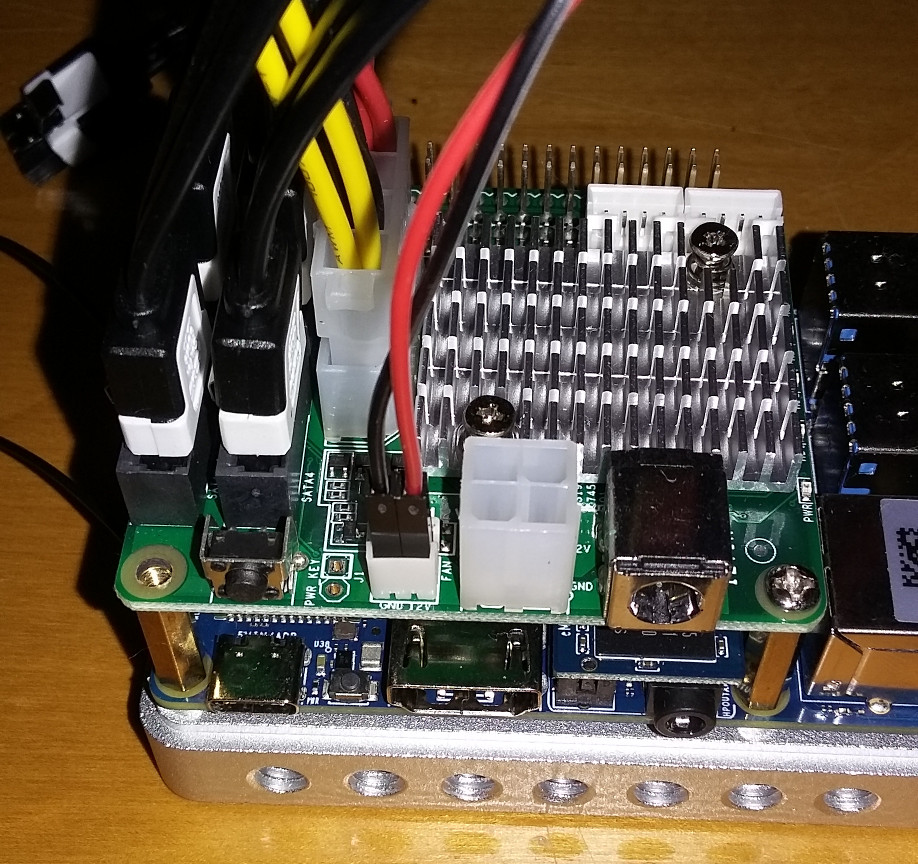
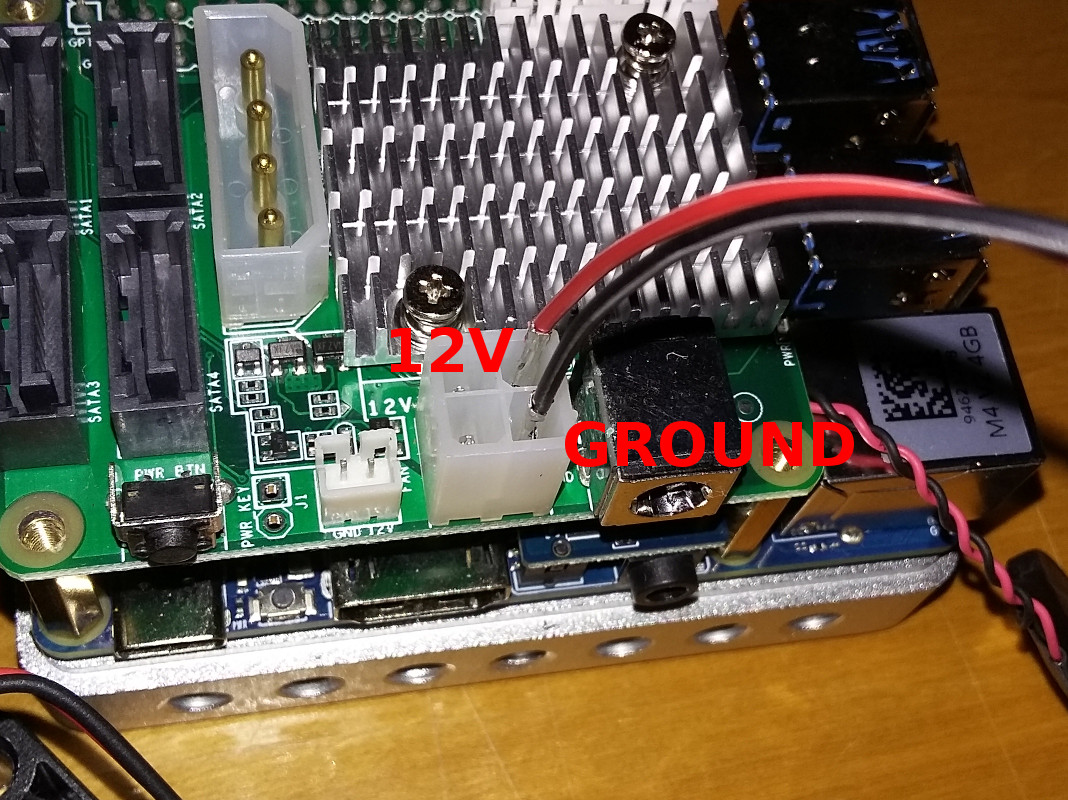
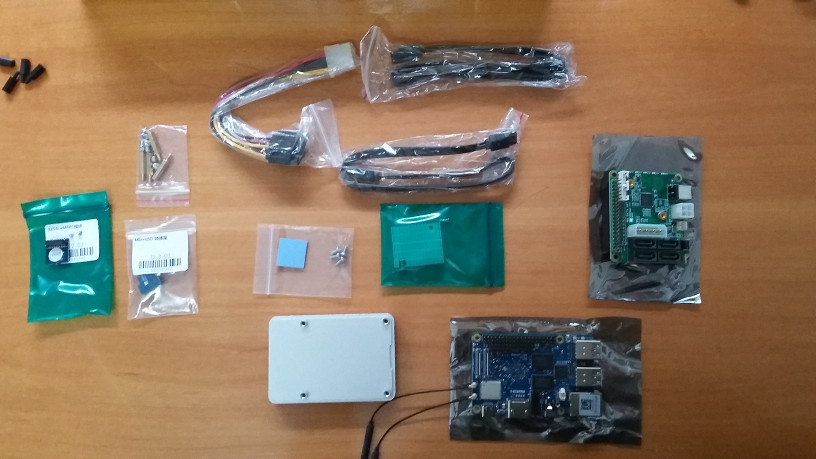
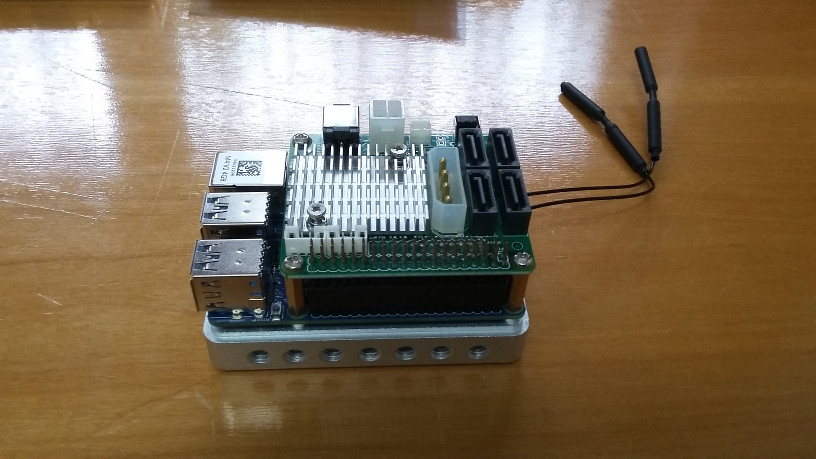
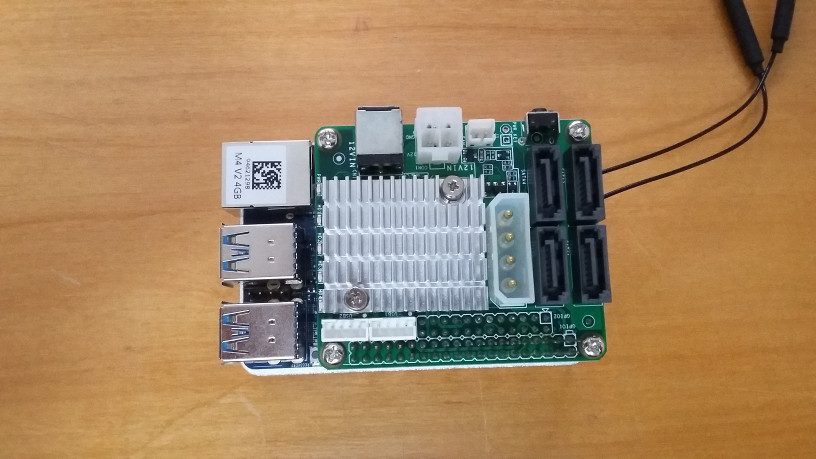
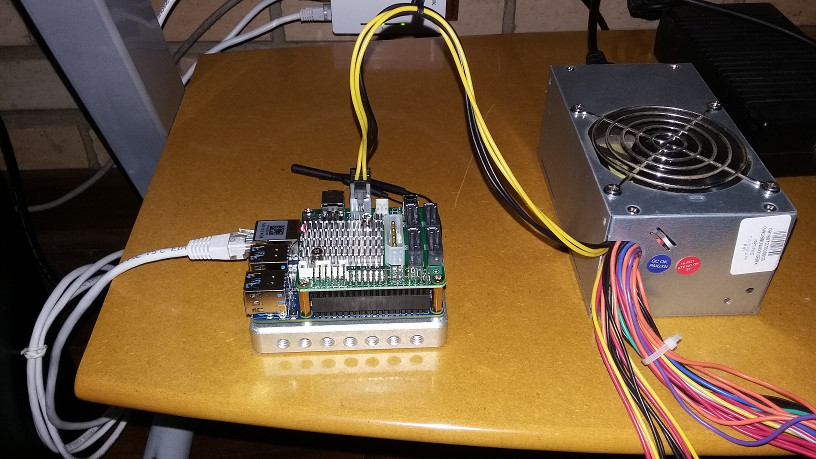
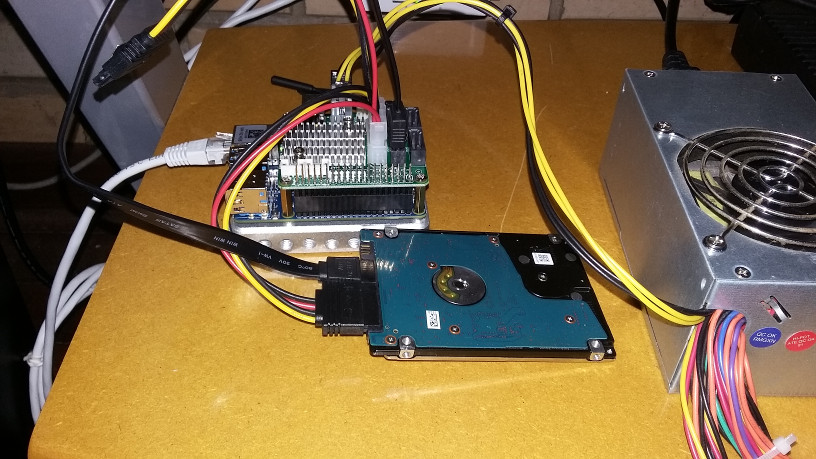
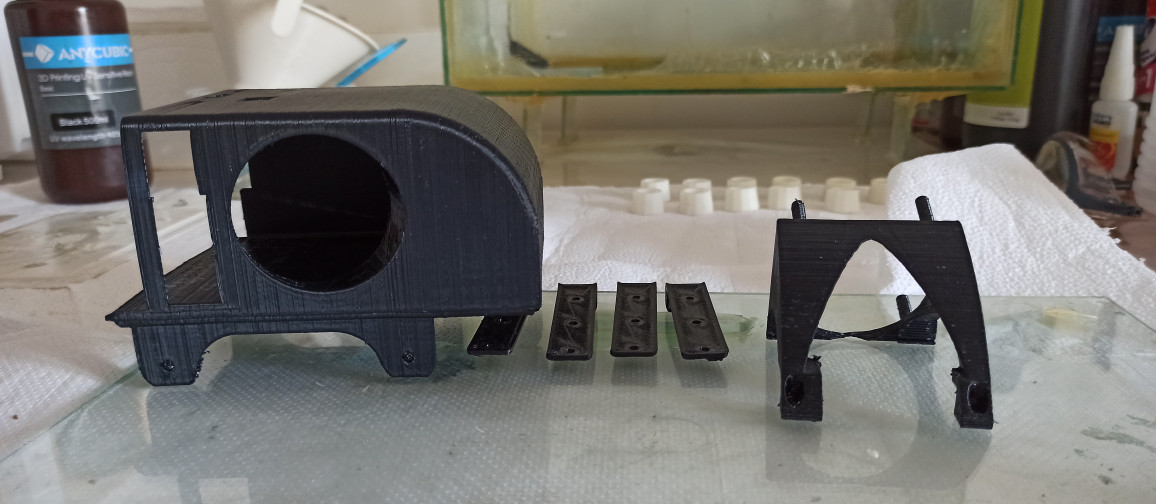
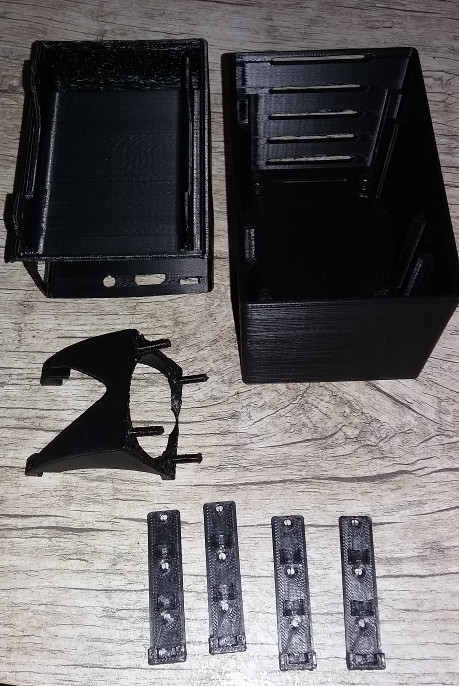
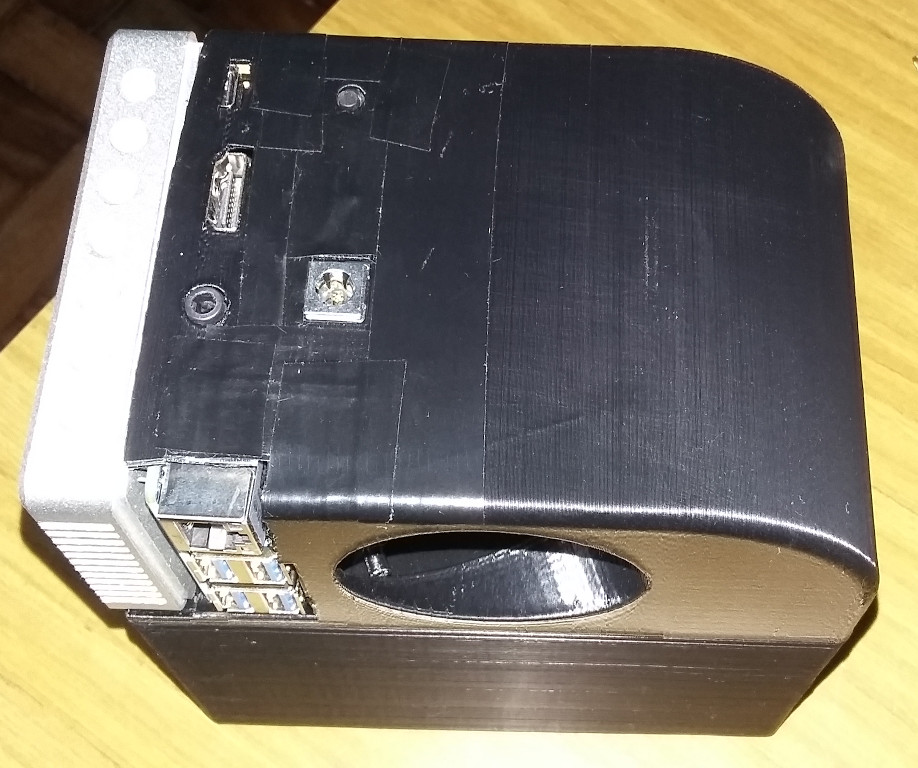
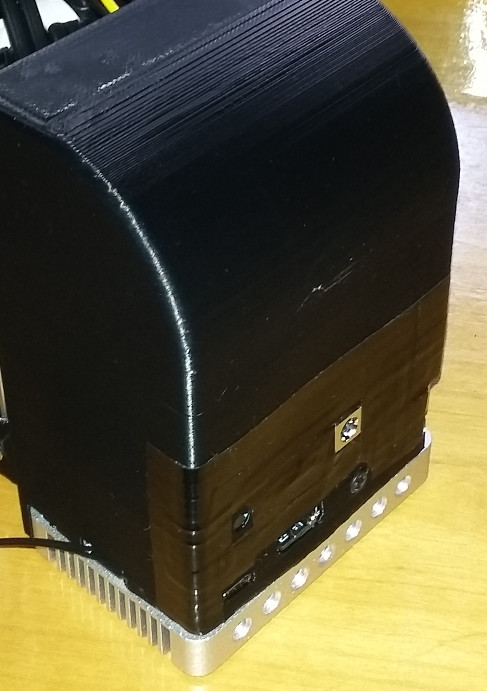
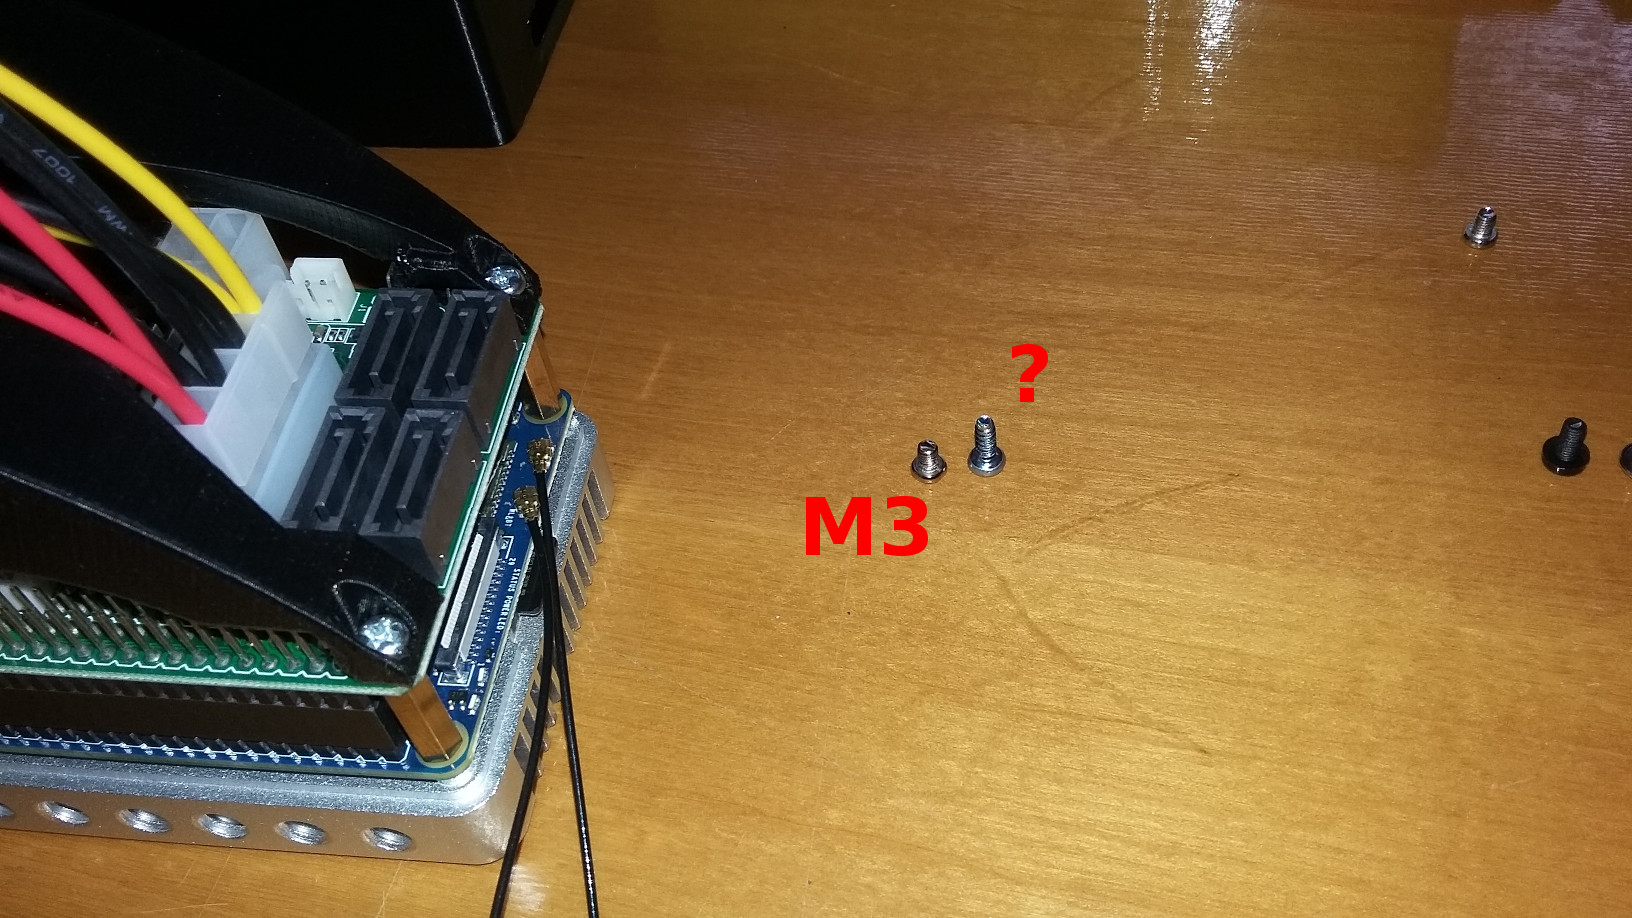
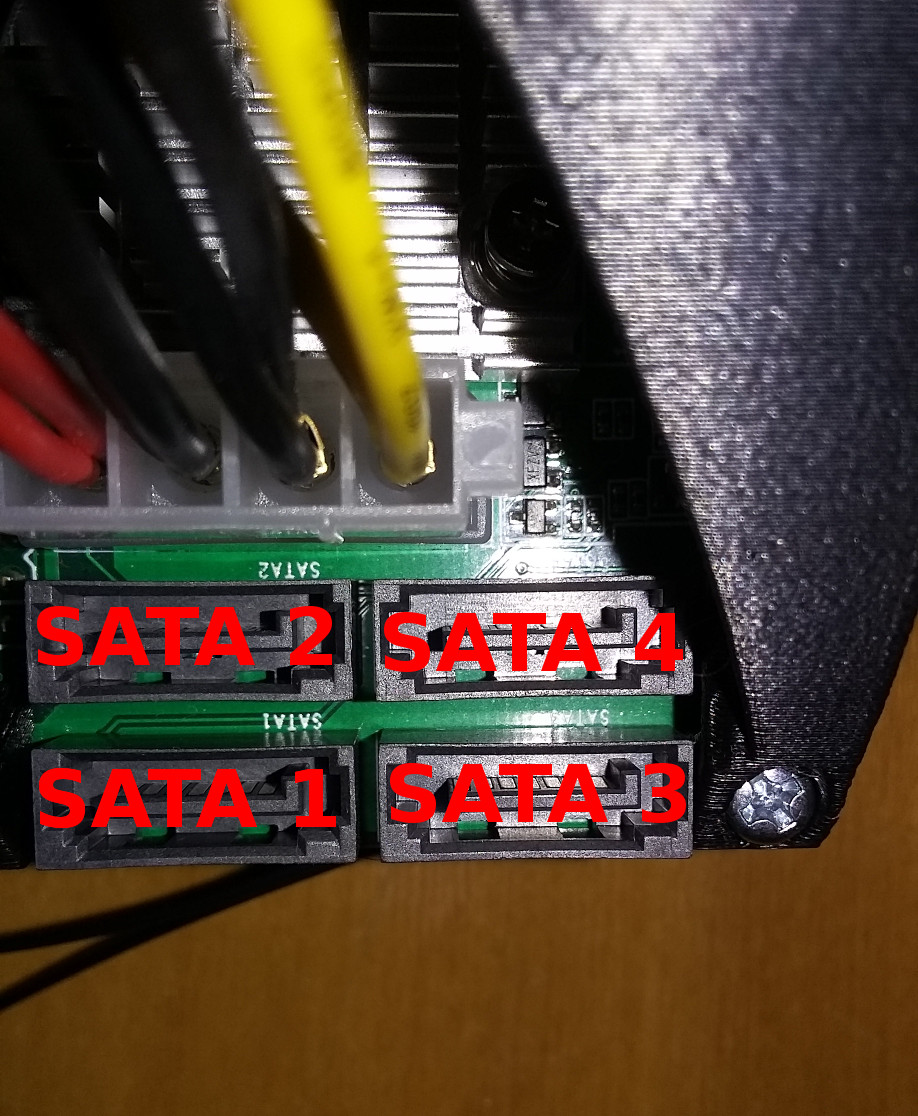
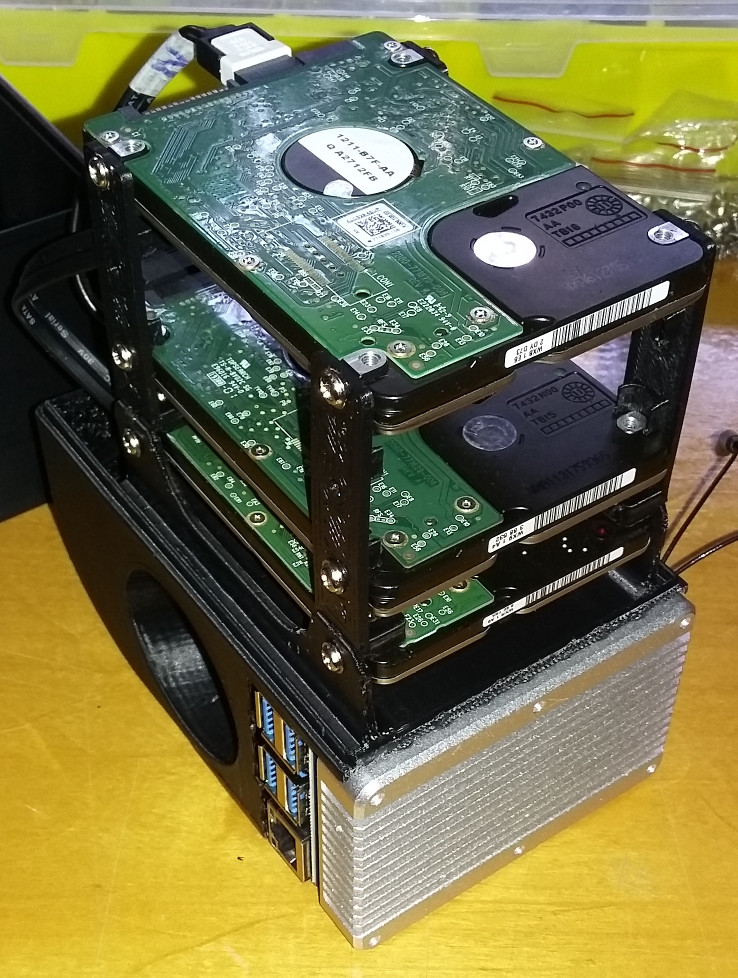
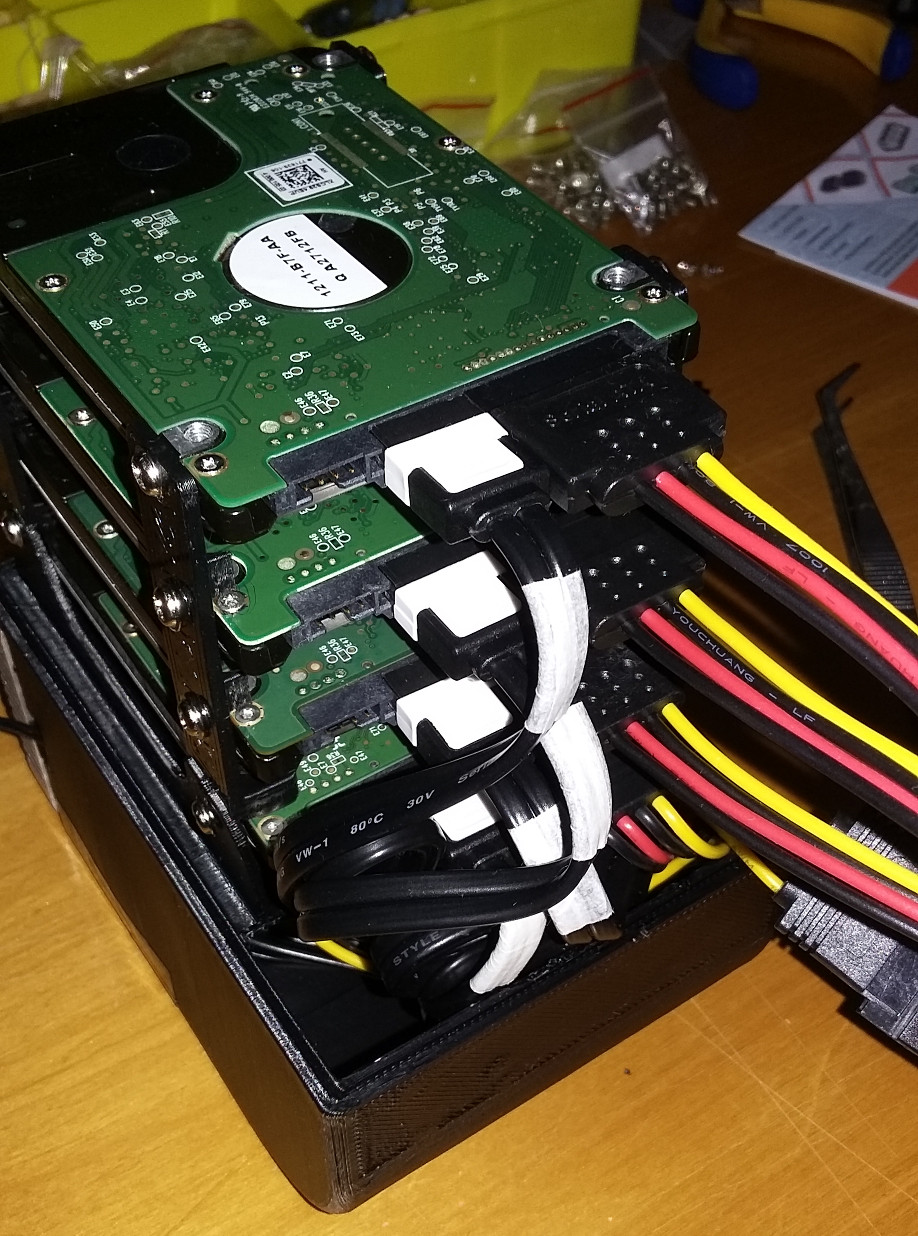
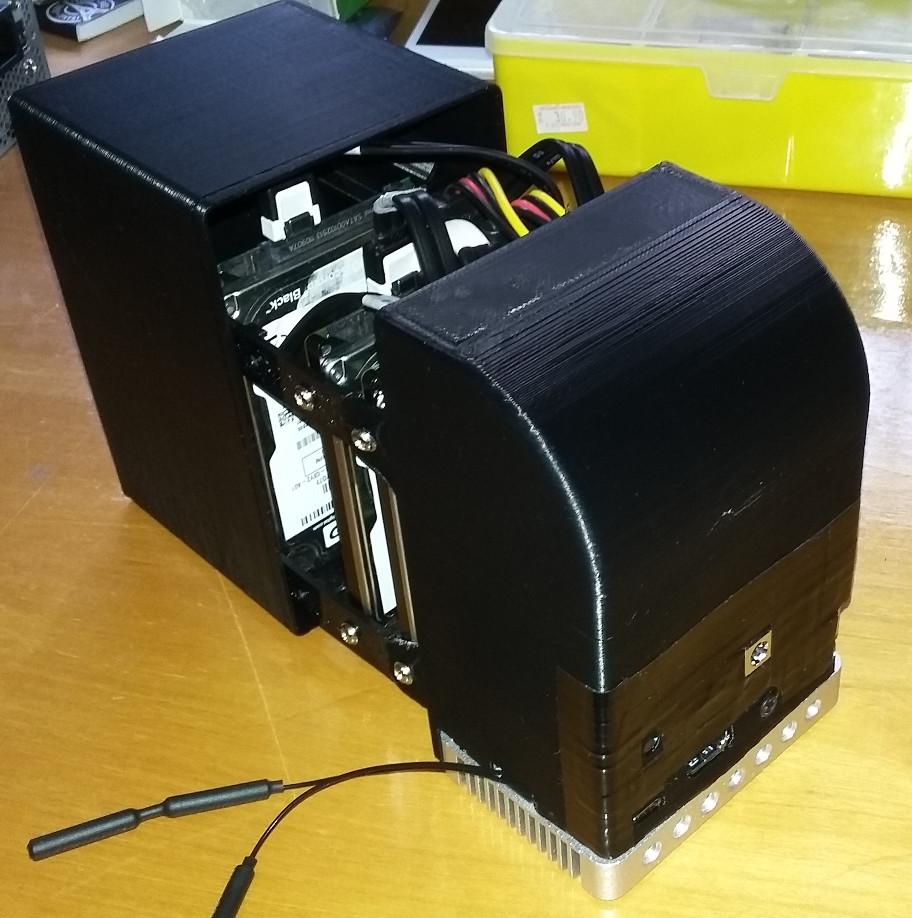
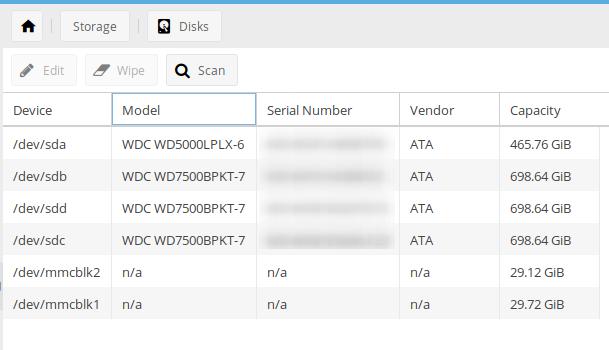
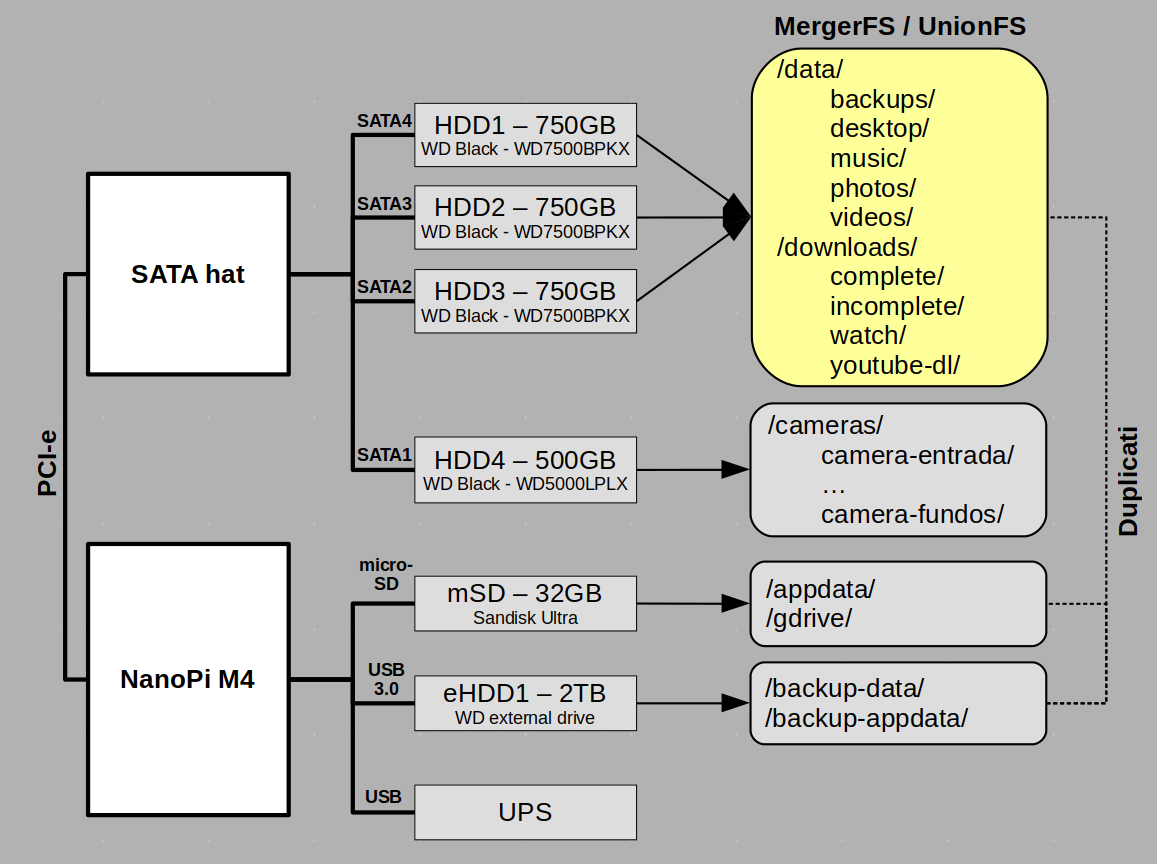
