
Changelog
Dec 18th, 2020: Publication of the original guide
Introduction
Hard disk drives (HDDs) are often sold in an external enclosure with easy-to-use interfaces as a detachable, semi-mobile data storage solution. Every so often, however, their price goes below the market price for an equivalent internal HDD and when that happens, many of us will buy them only to remove the HDD from its external enclosure and use it as a regular HDD in our PCs and servers–a practice called shucking.
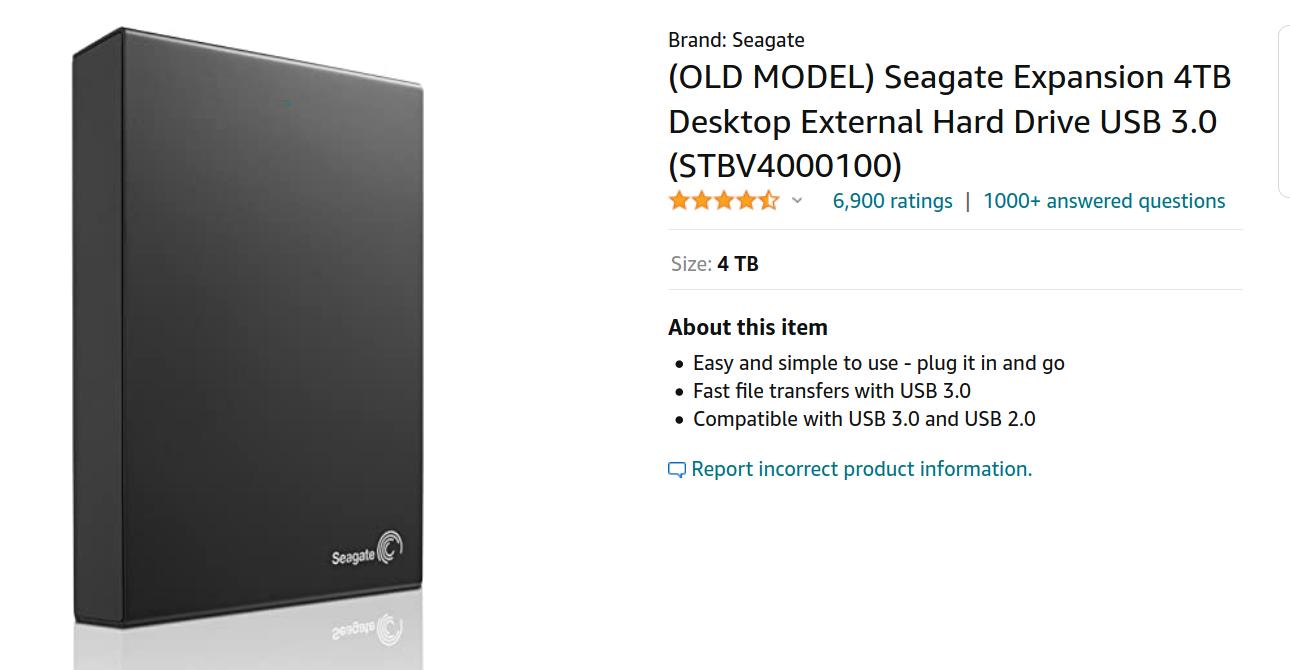
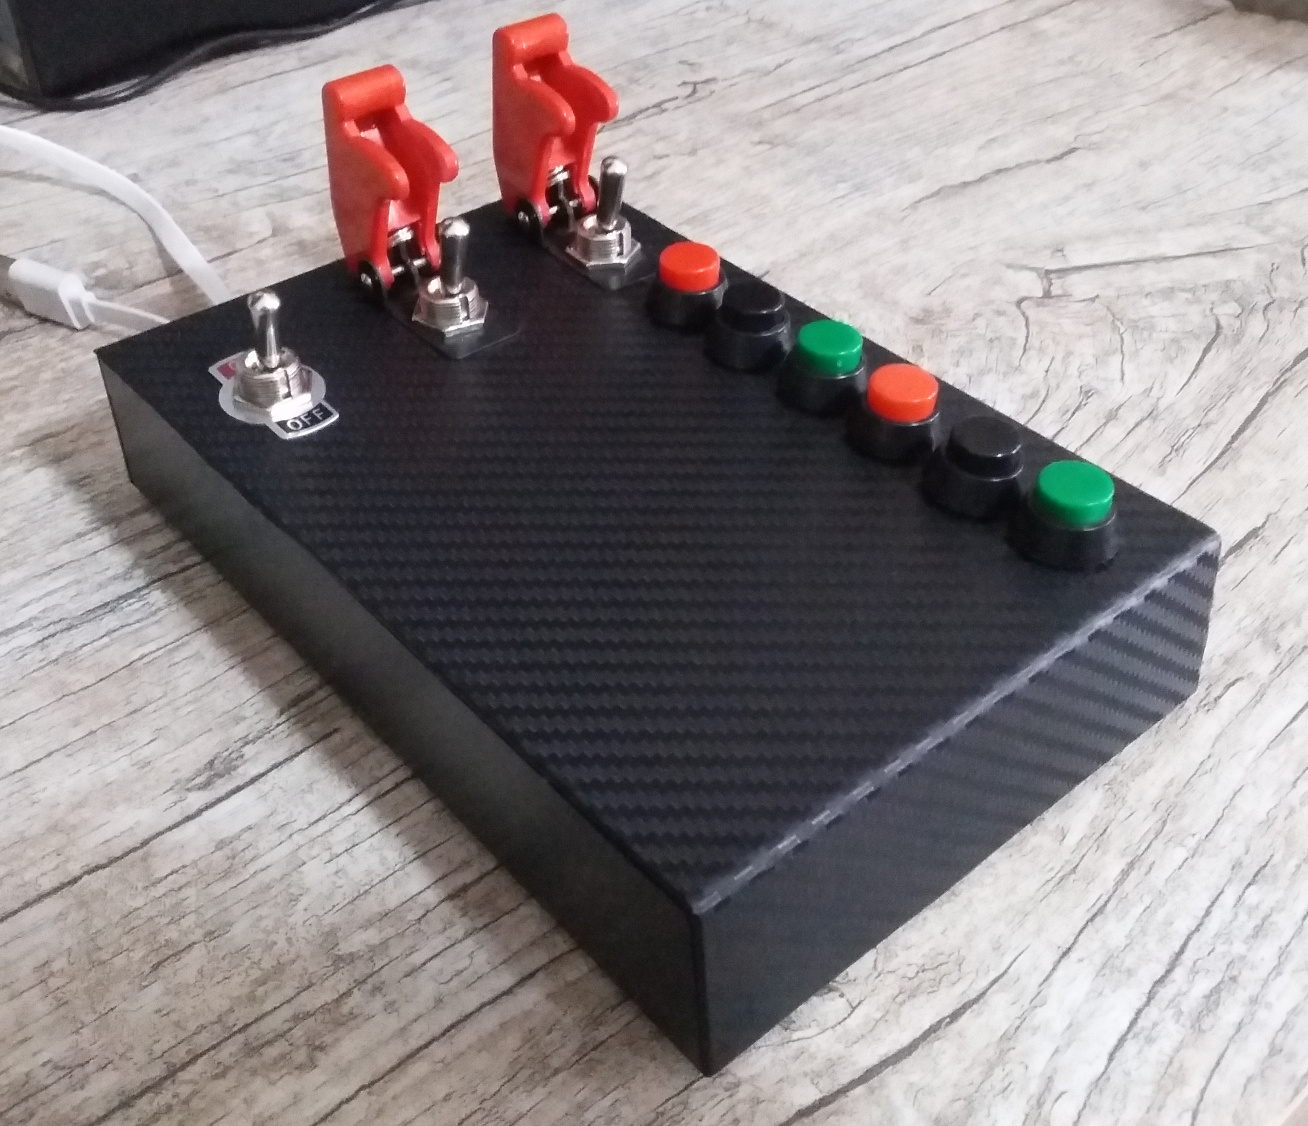
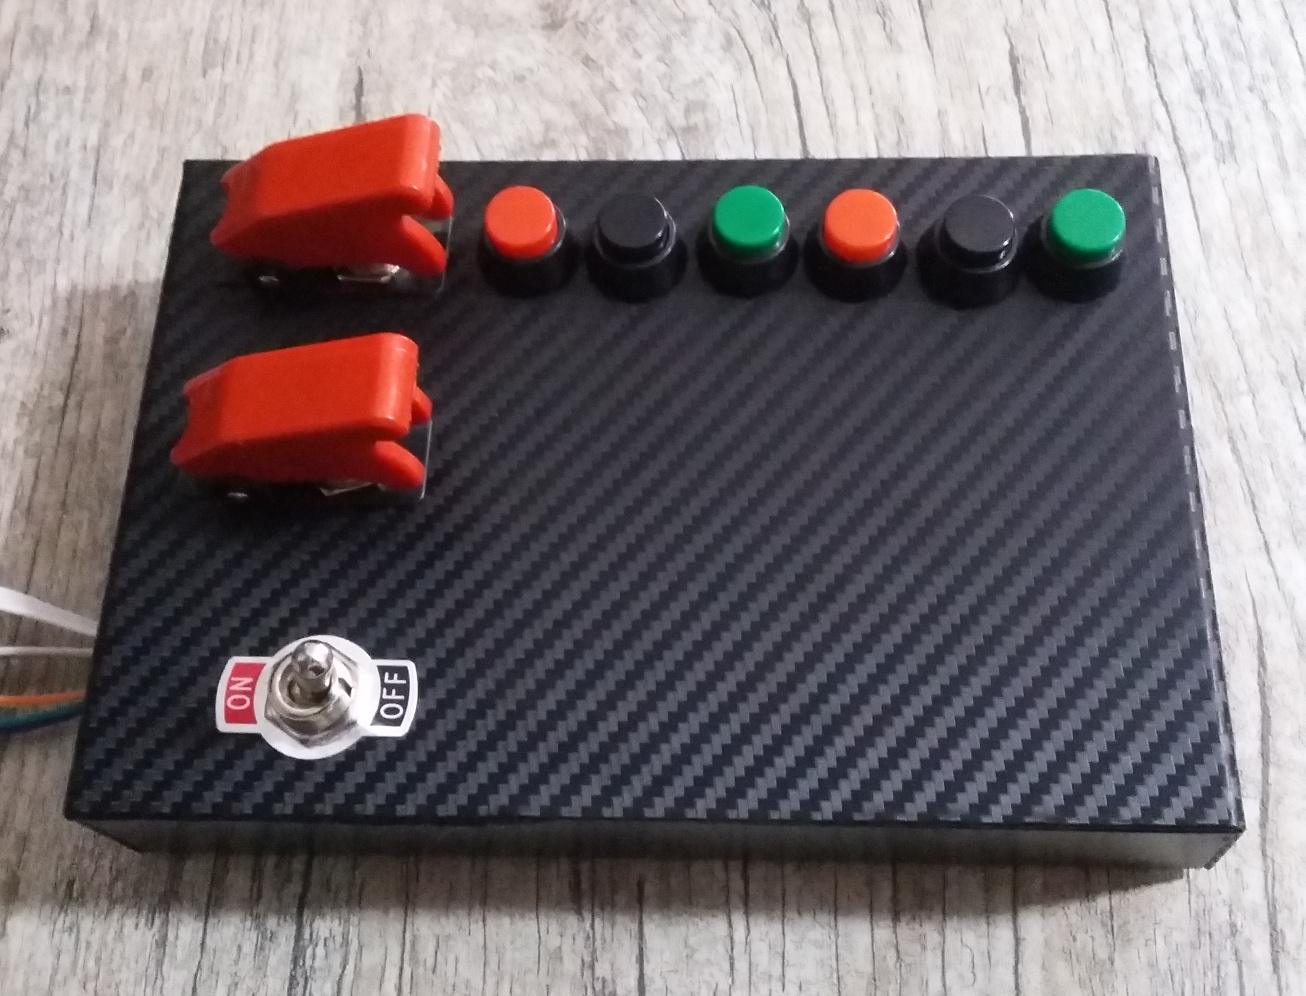
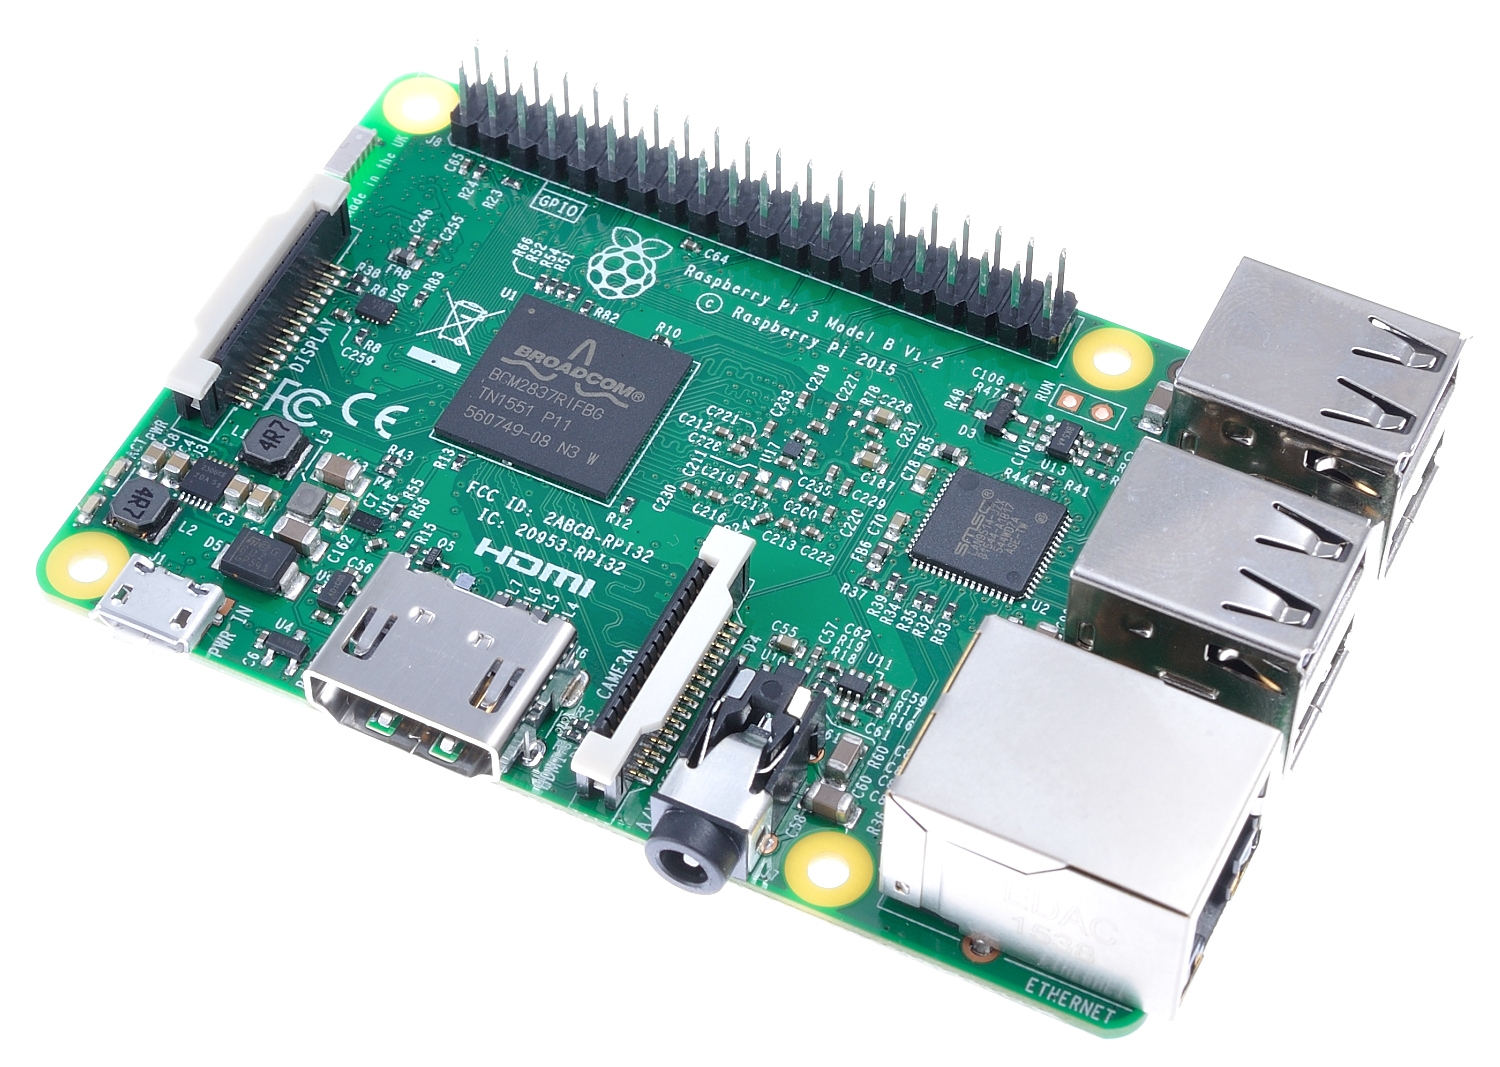
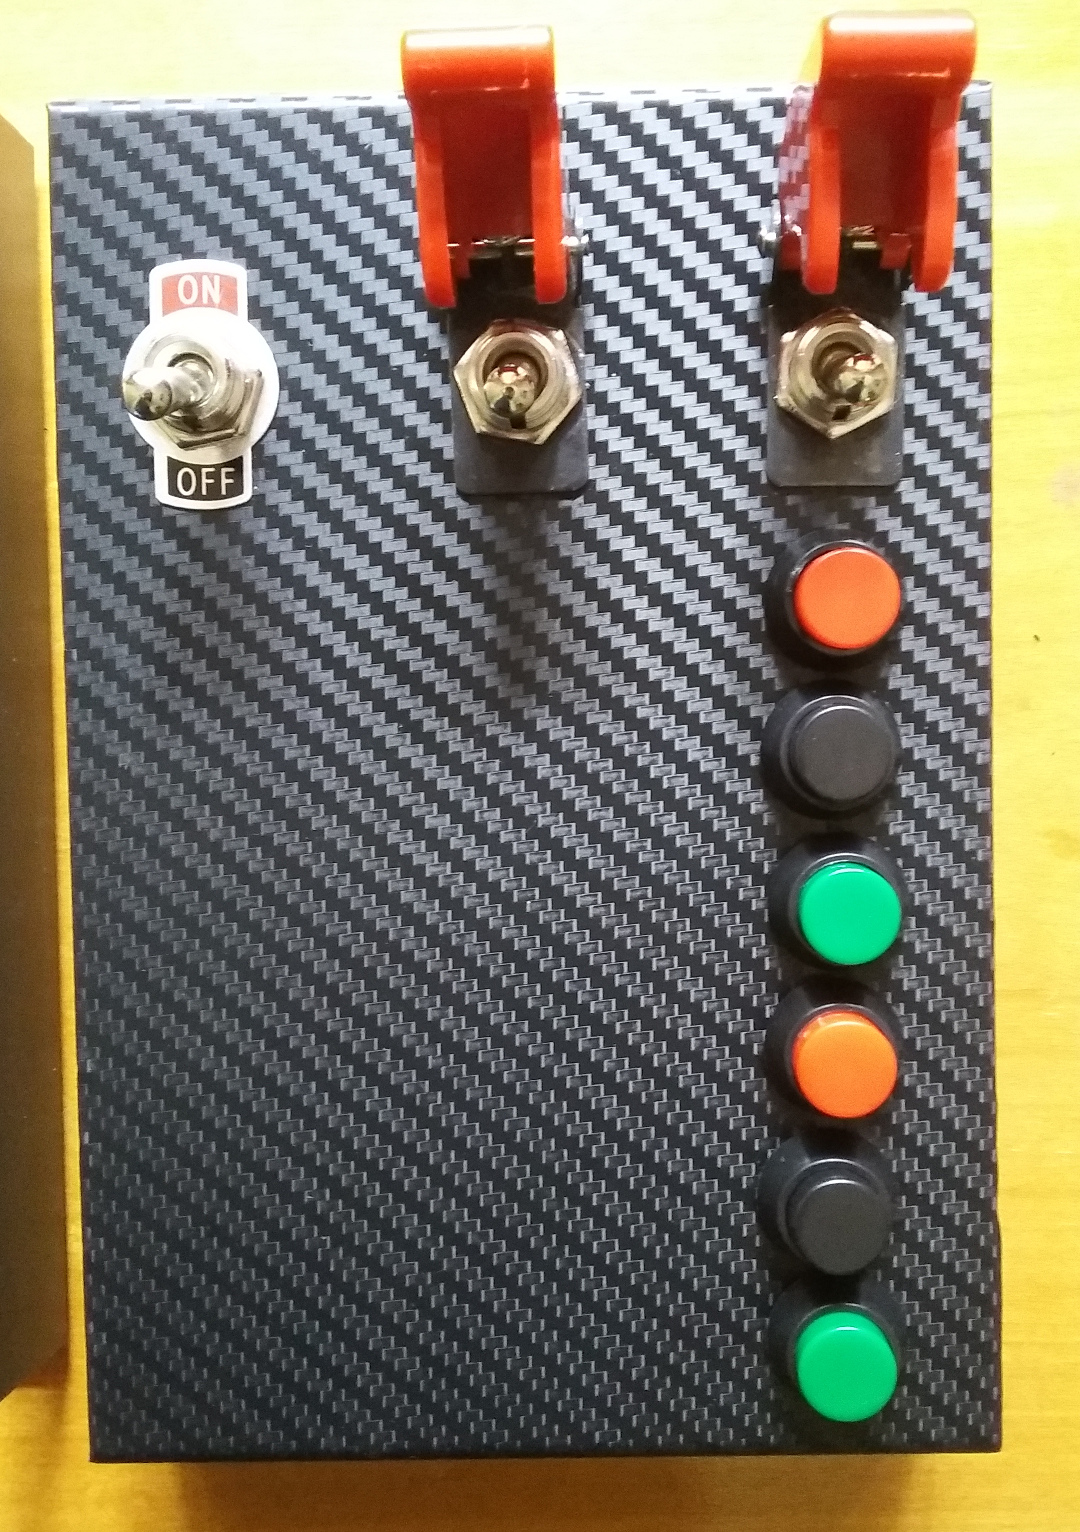
But what do you do with the external enclosure afterwards? Do you throw it away? Well, you could do that but here I’ll show that such enclosures can be repurposed into nice looking button boxes for most single board computers (SBCs). More specifically, I’ll transform an old, shucked Seagate Expansion 4TB USB3.0 HDD (STBV4000100) into a button box for the Raspberry Pi (RPi). Here’s a preview of how it looks like:
In the first section of this tutorial, I described a few general points to consider when planning your button box, such as whether the SBC fits, if it already has holes, and so on. Then, I go into the specifics of my own case, such as the hardware components of it (e.g., buttons, switches), the software used (Pi OS and a Python button box controller), and finally, the assembly of hardware and software into a functional button box. If that sounds good, let’s get started.
ATTENTION. I do not recommend to use an external HDD enclosure as a button box to control mains power. None of those enclosures was designed to have 110-220V AC running inside of it and things might melt and catch fire, and of course, you don’t want someone to get electrocuted because of a loose mains cable. Even though some of the buttons and switches might be rated 110-220V AC at 10A, for instance, to be safe, stick to low voltage DC inside the button box.
Assessment
-
Does the enclosure have a flat surface to attach the buttons?
-
Will the SBC fit inside of the enclosure?
Height-wise, make sure there’s a little bit of room for the jumper cables that will be connected to the GPIO pins–at least 5cm (roughly 2 inches) of space above the GPIO pins.
-
Will the buttons fit inside the enclosure?
Some buttons have fairly long terminals that could hit the bottom of the enclosure once the lid is closed. You also need to take into consideration that jumper cables will be soldered to the button’s terminal and might need additional room.
-
If the SBC will go inside of the enclosure, does it have holes to remove hot air from inside?
Depending on the SBC and usage, you might need to plan a small fan to remove the hot air generated by the board. However, this is likely not necessary for external HDD enclosures because heat will also harm HDDs and manufacturers will design their external cases with that in mind.
-
Can you repurpose some of the existing holes?
It’s much easier to use existing holes than making new ones and they usually look better because the case was designed with them in mind, as opposed to the new ones.
-
Is it safe to drill holes in the enclosure?
Some materials can crack/break easily and a few can be harmful to you if you do not take the necessary precautions.
Hardware
- SBC:
- External HDD enclosure:
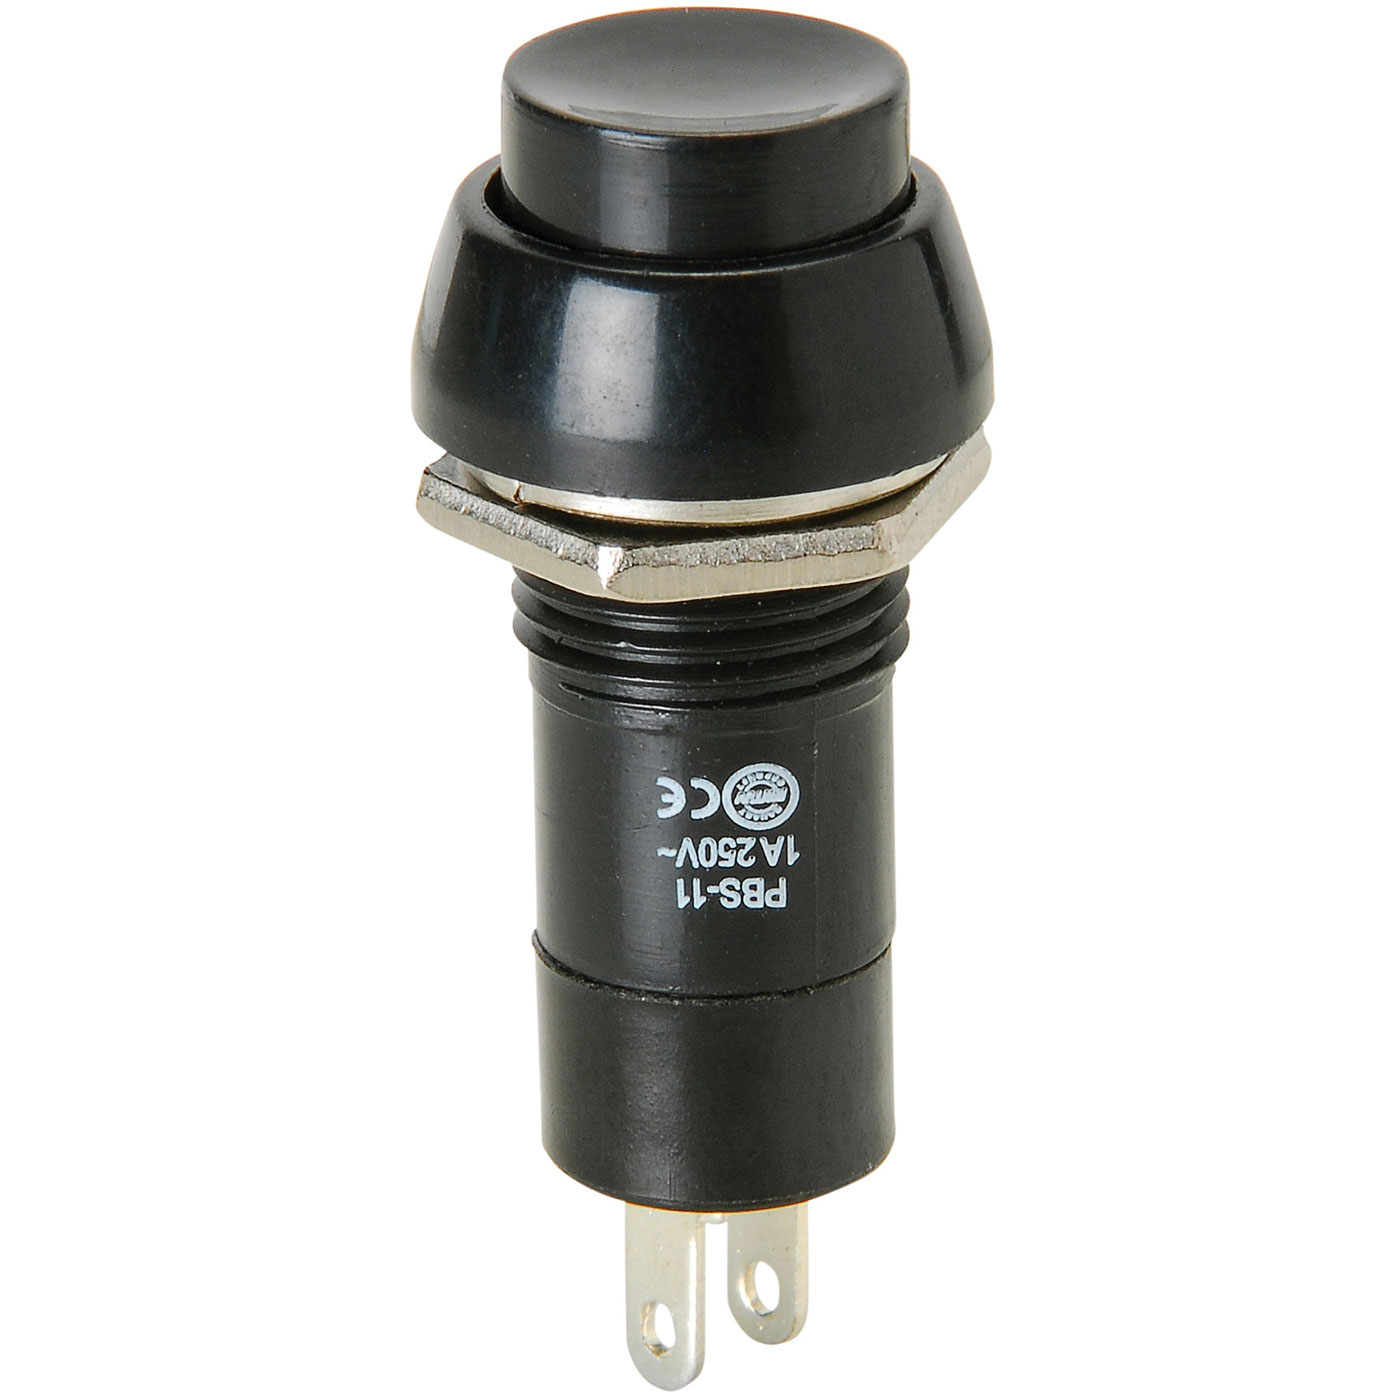
- Push buttons:
- 02x Red push button
- 02x Black push button
-
02x Green push button
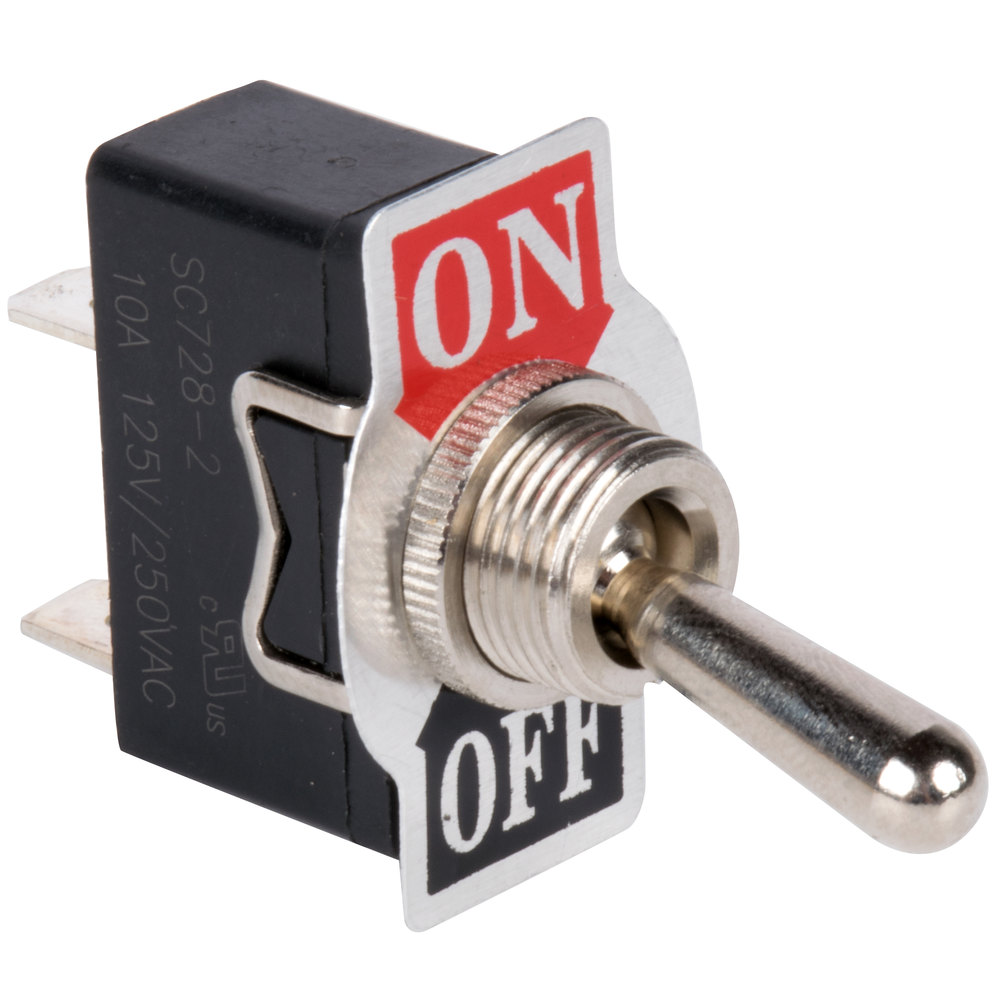
- Toggle switches:
- 03x OFF/on toggle switch
- 02x Red safety cover for the toggle switch
-
01x “ON/OFF” label for the toggle switch
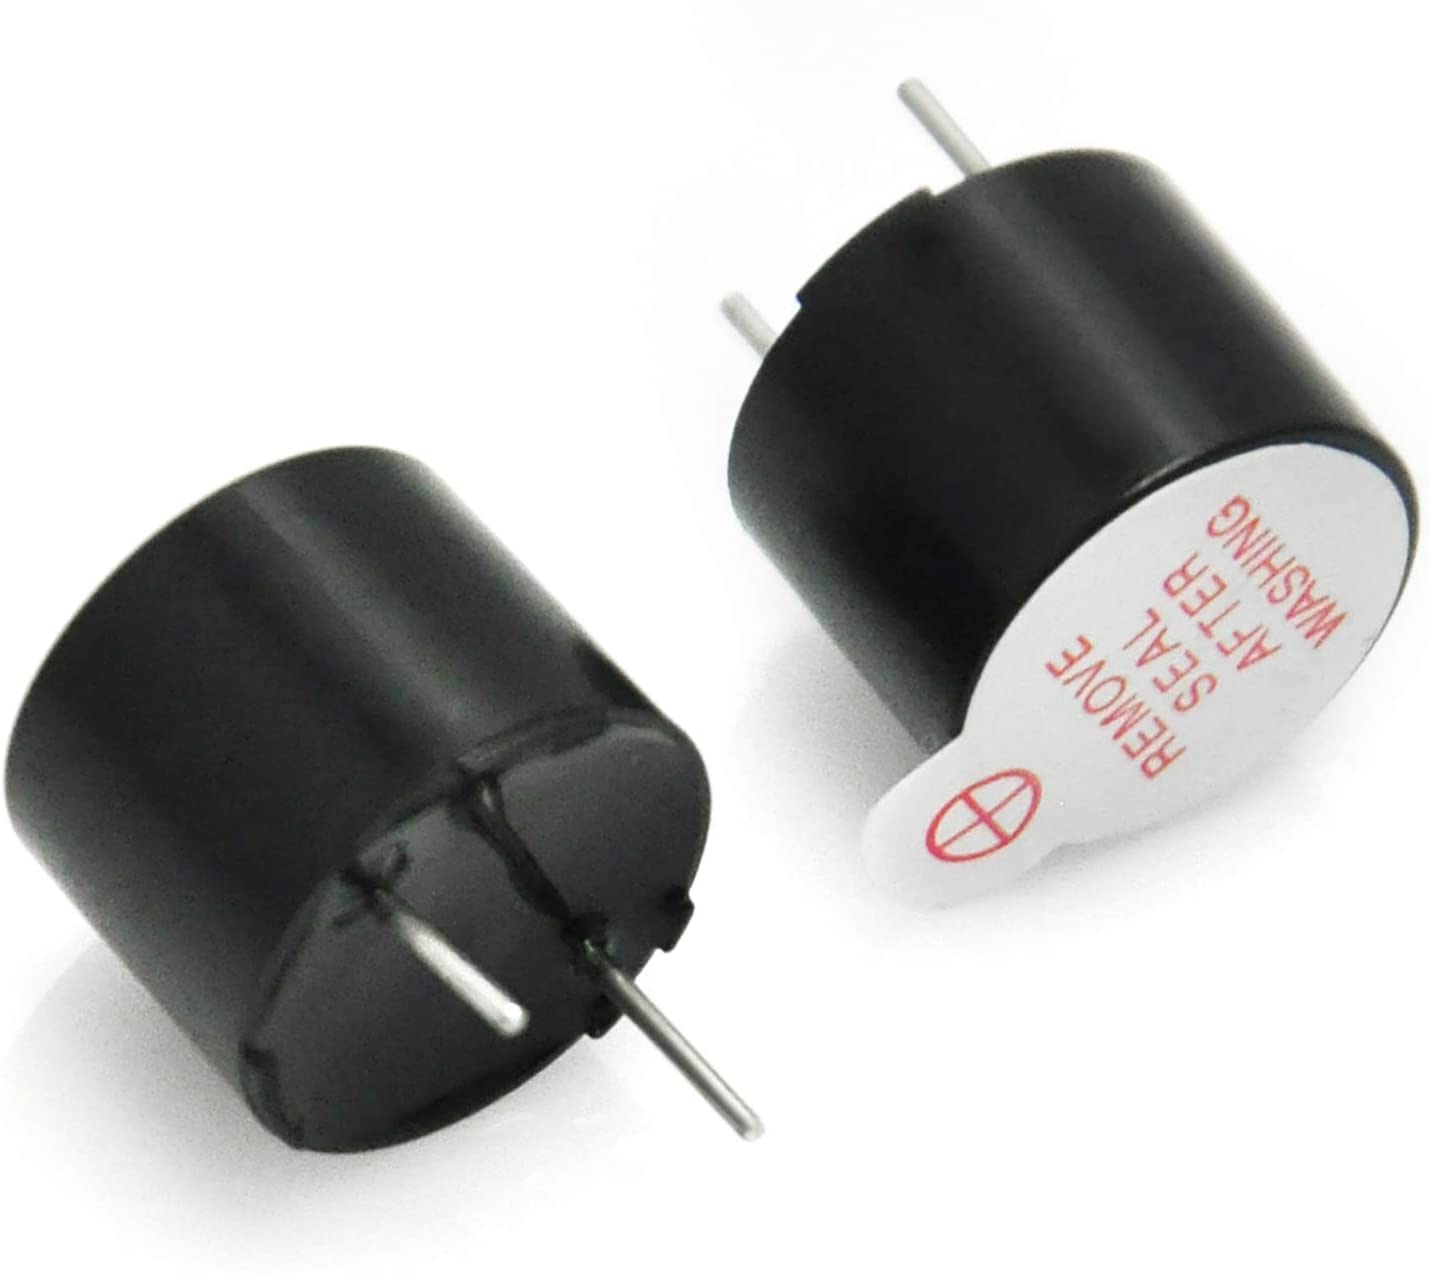
- Buzzer
- 01x Active buzzer
- Cover:
-
The size depends on the surface area you want to cover with it. My suggestion is to use a thin film instead of a thick layer because it is flexible and therefore, easy to attach to the enclosure. By the way, these things are actually super useful to have around if you are into DIY projets.

-
- Cables and related materials:
-
18x Female-X Dupont/jumper wires
The female side connects to GPIO pins and the other side can be whatever because is soldered to terminals or otherwise attached to them.

-
06x Heat shrink tube
Cut them in half to protect both terminals of each push button

-
01x Electrical tape

-
- Other tools
-

-
Any low power drill or even a manual hand drill: An electric drill will save you a lot of time. For better results, use a step drill bit after making the center hole.

-

Software
- Operating System (OS):
- Raspberry Pi OS Lite:
Raspbian GNU/Linux 10 (buster),lite edition- Kernel:
5.4 - Release date:
December 2nd 2020
- Kernel:
- Raspberry Pi OS Lite:
- Button box controller:
rpi-button-box:1.0- A custom-made controller written in Python
- Controller requirements:
- Optional:
- Logrotate:
3.14.0- Manage the
button-box.loglog files generated by the controller
- Manage the
- Logrotate:
rpi-button-box controller
Core program for a Raspberry Pi button box controller that uses the
gpiozeroPython library.
I wrote this program with the current project in mind–that is, a 40-pins Raspberry Pi with six push buttons and three switches, one of them being a power on/off for the box–but hopefully, my comments and documentation will be enough to allow adapting the program to multiple types of button boxes. In this section, I’ll explain the program’s main logic and its functionalities. The installation procedure and usage examples are described in assembly.
The gpiozero library is at the core of the button box controller. The library makes it very easy to enable GPIO devices with just a few lines of code because it leaves much of the device configuration and cleanup procedures to the background. All that we need to do is create objects for the GPIO devices of the appropriate class, which in our case is the Button class and Buzzer class.
The rpi-button-box controller’s main logic is explained next.
def main():
  try:
    logging.basicConfig(filename='/opt/rpi-button-box/button-box.log', level=logging.INFO,
      format='%(asctime)s.%(msecs)03d %(levelname)s %(module)s : %(message)s',
      datefmt='%Y-%m-%d %H:%M:%S')
    logging.info('Started the button box controller')
    buttons = config_buttons()
- The program starts by configuring and initializing the logging of controller-related events, such as whether button
G1was pressed, whichGPIOpins are being used, and so on. Then, it asksconfig_buttonsfor a list ofbuttonsto be used by the controller, as follows:
def config_buttons():
  logging.info('Loading buttons...')
  Button.label, Button.type, Button.cmdheld, Button.cmdpressed, Button.cmdreleased = False, False, False, False, False
  g1, g1.label, g1.type, g1.cmdpressed, g1.cmdreleased = Button(26), 'green #1', 'push', args['g1_pressed'], args['g1_released']
  b1, b1.label, b1.type, b1.cmdpressed, b1.cmdreleased = Button(19), 'black #1', 'push', args['b1_pressed'], args['b1_released']
  r1, r1.label, r1.type, r1.cmdpressed, r1.cmdreleased = Button(13), 'red #1', 'push', args['r1_pressed'], args['r1_released']
  g2, g2.label, g2.type, g2.cmdpressed, g2.cmdreleased = Button(6), 'green #2', 'push', args['g2_pressed'], args['g2_released']
  b2, b2.label, b2.type, b2.cmdpressed, b2.cmdreleased = Button(5), 'black #2', 'push', args['b2_pressed'], args['b2_released']
  r2, r2.label, r2.type, r2.cmdpressed, r2.cmdreleased = Button(12), 'red #2', 'push', args['r2_pressed'], args['r2_released']
  s1, s1.label, s1.type, s1.cmdheld, s1.cmdreleased = Button(16, hold_time=2), 'power', 'switch', args['s1_held'], args['s1_released']
  s2, s2.label, s2.type, s2.cmdheld, s2.cmdreleased = Button(20, hold_time=2), 'middle S2', 'switch', args['s2_held'], args['s2_released']
  s3, s3.label, s3.type, s3.cmdheld, s3.cmdreleased = Button(21, hold_time=2), 'right S3', 'switch', args['s3_held'], args['s3_released']
  logging.info('Buttons loaded')
  return [g1, b1, r1, g2, b2, r2, s1, s2, s3]
-
Notice that it starts by creating new attributes for the
Buttonclass, which are calledlabel,type, andcmd*. I found this to be useful when working with multiple buttons because it allows me to define events on a per button basis. For example, one might want to set different triggers for switches and push buttons, and thetypeattribute will help differentiate those. Similarly, one might want to execute a different command for a button labeledpowerthan a button labeledreboot. It goes without saying that if your box does not follow the same layout as mine, you have to edit this part of the code. -
Going back to
main:
    logging.info('Trying to find a power switch...')
    for button in buttons:
      if button.label == 'power':
        logging.info('Power switch found at {}'.format(button.pin))
        if not button.is_active:
          print('Waiting for the power button ({}) to be turned ON...'.format(button.pin))
          button.wait_for_active()
          logging.info('Power switch was turned ON by user'.format(button.pin))
          sleep(button.hold_time)  # wait for the power button to enter is_held state
        break
- In my original design for the button box, I had a toggle, on/off
switchlabeledpowerthat I wanted to use to enable and disable the button box controller. The code above handles the activation of the button box depending on the state of a button labeledpower.
    push_buttons, switches = [], []
    for button in buttons:
      if button.type == 'switch':
        switches.append(button)
        button.when_held, button.when_released = event_held, event_released
        logging.info('Configured the switch button ({0}) at {1}'.format(button.label, button.pin))
      else:
        push_buttons.append(button)
        button.when_pressed, button.when_released = event_pressed, event_released
        logging.info('Configured the push button ({0}) at {1}'.format(button.label, button.pin))
-
Here, the program learns what triggers each button. As mentioend before, the
typeattr is used to set different triggers forswitchandpushbuttons. -
Of note,
when_*properties will pass the device that activated it to a function that takes a single parameter (btn), and because there are multiple new attributes for each button object, it is possible to use a single function to control all buttons by reading thebtnattributes. For example, take a look at theevent_held, in which we have code for invoking an external command/script using thebtn.cmdheldattribute:
def event_held(btn):
  logging.info('The button labeled \'{0}\' at {1} was held'.format(btn.label, btn.pin))
  if args['debug']:
    print('Detected a HELD event by {0} : {1} button : {2}'.format(btn.pin, btn.type, btn.label))
  if btn.cmdheld:
    logging.info('Started running the following command: \'{}\''.format(btn.cmdheld))
    Popen(btn.cmdheld) if args['cmd'] == 'Popen' else run(btn.cmdheld)
    if args['debug']:
      print('Finished invoking the script at \'{}\''.format(btn.cmdheld))
    logging.info('Finished waiting for the following command: \'{}\''.format(btn.cmdheld))
- Going back to
main:
    if args['buzzer']:
      buzzer, buzzer.source = Buzzer(args['buzzer']), any_values(*push_buttons)
      logging.info('Configured a buzzer at {}'.format(buzzer.pin))
- This configures the
Buzzerobject to be activated whenever apushbutton is pressed.
    print('The button box is now turned ON. To close it, release the power button or press Ctrl+C.')
    logging.info('The button box is ON and waiting for user input')
    pause()
  except KeyboardInterrupt:
    end(msg='Received a signal to stop.', status=1)
  except GPIOZeroError as err:
    end(msg='GPIOZero error: {}'.format(err), status=1)
- And finally, at the end of our main logic, the program is
paused to wait for a user input to trigger an event (when_pressed,when_held,when_released). This is a better alternative to using an infinite loop (while True).
There’s a little bit more to the code than that but this covers the most important aspects of it. Check the repo for updates, start a discussion if you had an idea, or open an issue if you’re having trouble with the program.
Assembly
Installing the software
Raspberry Pi OS
Follow the official instructions to install the Raspberry Pi OS. If you don’t feel like it, here’s a brief summary:
- Download the image file from the official repository.
- Verify checksum. On Linux distros, run the following, changing
img.zipfor the filename of the downloaded OS zipped image:sha256sum img.zip - Flash onto a microSD card with balenaEtcher or similar application.
- For headless access, add an empty
sshfile to the root of thebootdrive. - Insert the microSD card into the RPi and boot it up.
- Find the RPi IP and
sshinto it (ssh pi@IPand the default passwd israspberry). - Config the RPi with
sudo raspi-config(locale, time, wireless, etc.) then reboot it. - Reconnect to the RPi and update the package list && upgrade all eligible pkgs, as follows:
sudo apt update && sudo apt upgrade -y - Reboot the device once again and you’re done!
Python3, rpi-button-box, and installing the requirements
The button box controller was developed for the Lite version of the Raspberry Pi OS but it should work with other similar systems for single board computers (e.g., Armbian).
The following instructions assume you’re logged in with the pi user with sudo permission. (This is not a requirement but if different, make sure to change file permissions accordingly. This applies to systemd service file and logrotate/button-box config as well.)
- Use
aptto install required programssudo apt update sudo apt install git python3 python3-pip - Clone the
rpi-button-boxrepo in/optcd /opt sudo git clone https://github.com/cgomesu/rpi-button-box.git sudo chown -R pi rpi-button-box - Install Python libraries from
requirements.txtpip3 install -r /opt/rpi-button-box/requirements.txt- If you get a warning that
.local/binis not in your user’s$PATH, then add it to your existing$PATHas follows:export PATH=/home/pi/.local/bin:$PATHand then append it to your user’s
.bashrc:echo "export PATH=/home/pi/.local/bin:$PATH" | tee -a /home/pi/.bashrc > /dev/null
- If you get a warning that
- Test
button-box.pyand read its usagecd /opt/rpi-button-box ./button-box.py -hIf you wish to skip to a more detailed description of the button box controller, go to Using the button box controller section in this tutorial.
Configure logrotate
(Optional.) The rpi-button-box controller generates a button-box.log file upon execution where it stores a couple of controller-related messages, such as initialization configs and button presses, releases, and so on. Over time, this file will grow forever unless you manually rotate it. Obviously, you don’t need to do that. The easiest way to rotate log files in a GNU/Linux system is to configure logrotate to manage your log files. I’ve already written such a config file for the button box controller (see logrotate.d/button-box). To enable it, just copy the config to your /etc/logrotate.d/ directory, as follows
sudo cp /opt/rpi-button-box/logrotate.d/button-box /etc/logrotate.d/
If you want, you can edit the rotation settings in button-box. The default should be good enough though.
Building the button box
ATTENTION. If you have never used a drill before, take a few minutes to learn about best practices first. When drilling holes into the case, make sure to secure the case very well before you begin. When soldering cables to terminals, use a fan to move the fumes away from you and anyone else. Wash your hands very well afterwards.
REMINDER. Inside the button box, stick to low voltage DC. External HDD enclosures were not made to house mains power and unless you have taken the time to learn how to handle it, do not tinker with it.
After the assessment, it’s DIY time.
- Start by drawing the location of each button on the box. Use a ruler and pencil.

-
Then, drill the holes and check that the buttons fit them.
-
Cut the vynil film and attach it to the surface of your button box.
-
Find the holes by gently pressing the surface of the vynil film. Then, get a scissors or other cutting tool and either cut a circle where the hole is or cut an X where the hole is and fold the vynil film inwards.
-
Attach the buttons to the enclosure. It should look like this now:
-
Flip the case and it’s time to solder the jumper cables to each button terminal.
-
Tricks for working with dupont cables:
- Because the buttons use a common ground, you could solder them together (terminal to terminal or splicing). However, if you want to reuse the buttons for another project in the future, or simply replace one of them, this will make it much harder to do that. I wanted to make each button detachable without any desoldering, so I used the following idea for a custom-made header:
-
If your heat shrinking tubes are pretty long, cut them. Also, remember to insert the tubes into the cable before soldering. (For a hobbyist like me, it’s very easy to forget that. Ugh!)
-
If at all possible, use different colors for ground (black, grey) and live/vcc (any thing else).
-
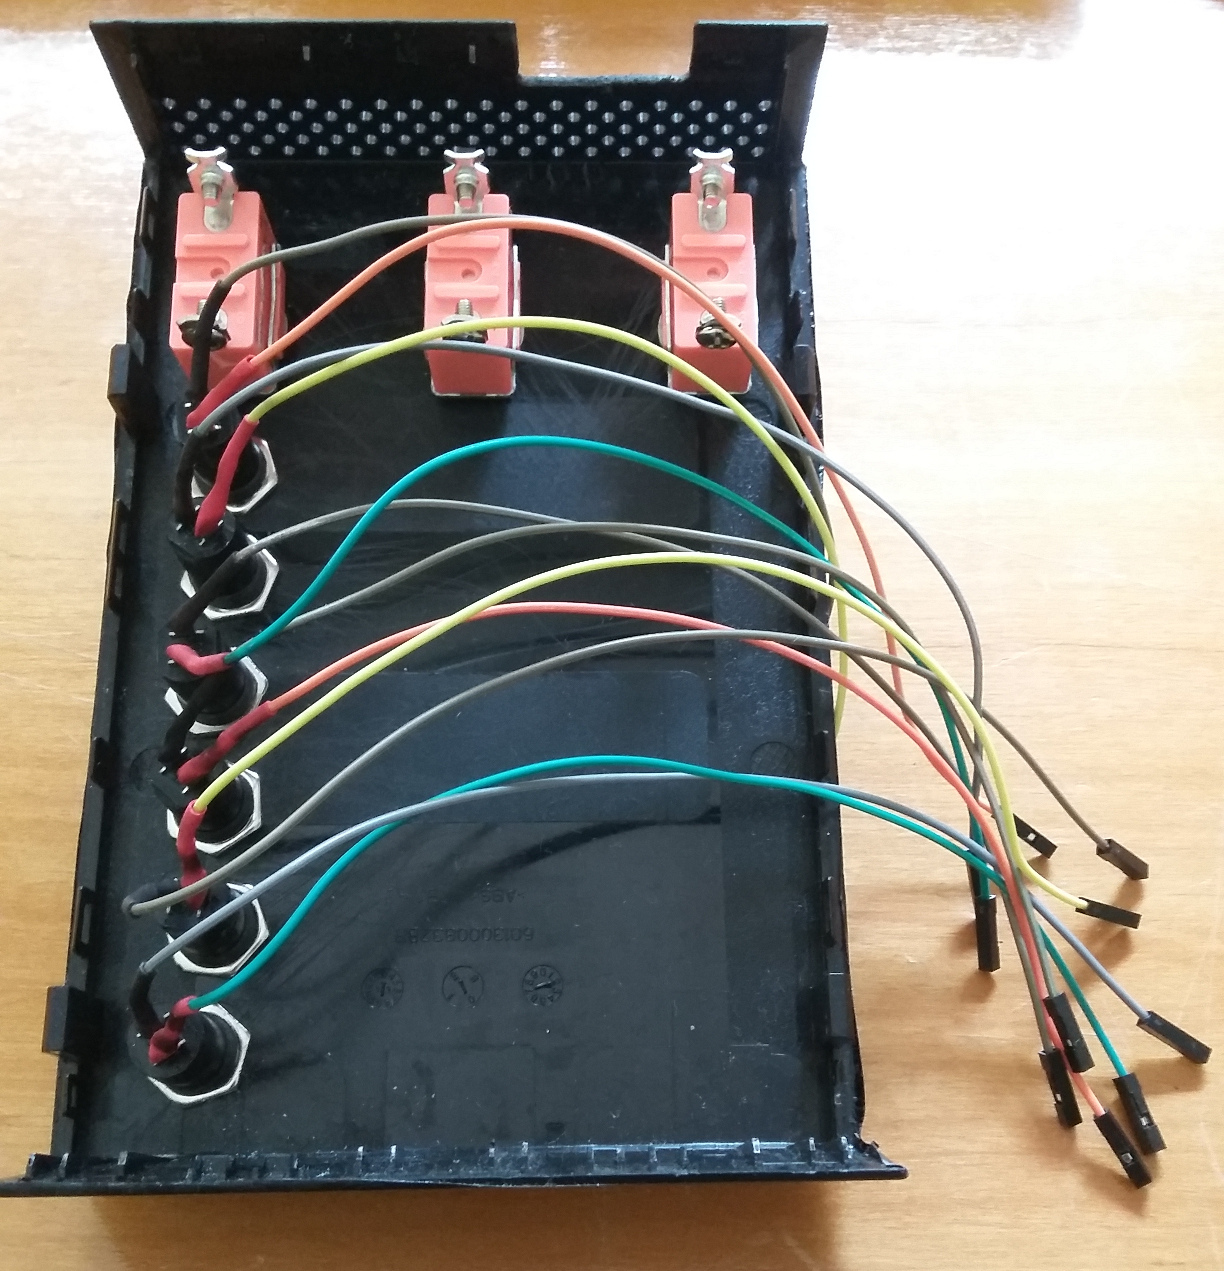
After it’s all done, it should look like this:
-
If you have a multimeter, test all your connections.
-
Connect the dupont cables to the RPi GPIO pins according to the following wiring schema:
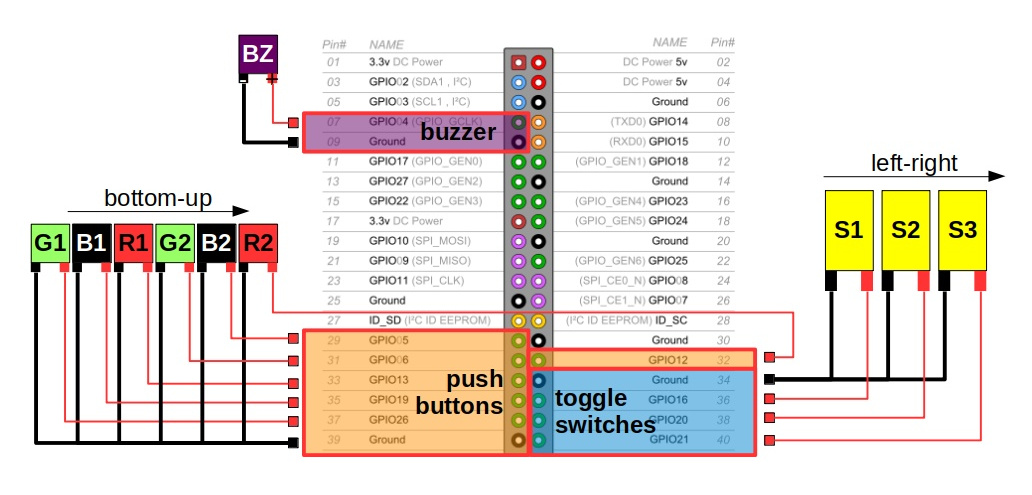
This uses the internal pull-up resistor to simplify the wiring (enabled by default in the Button class of the gpiozero Python library). Otherwise, check the wiring on my rpi-buttons repo for an example of how to wire current-limiting (1k ohms) resistors and pull-down (10k ohms) resistors. However, if you choose the latter alternative, you’ll have to change the gpiozero deafult settings for the Button class.
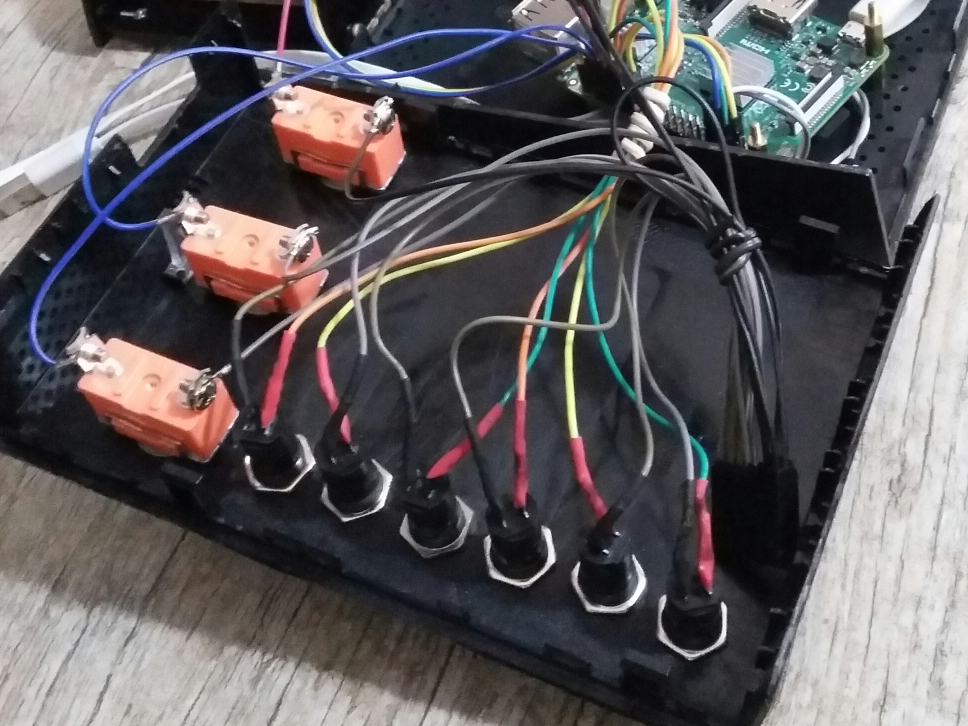
- Secure the cables as much as possible:

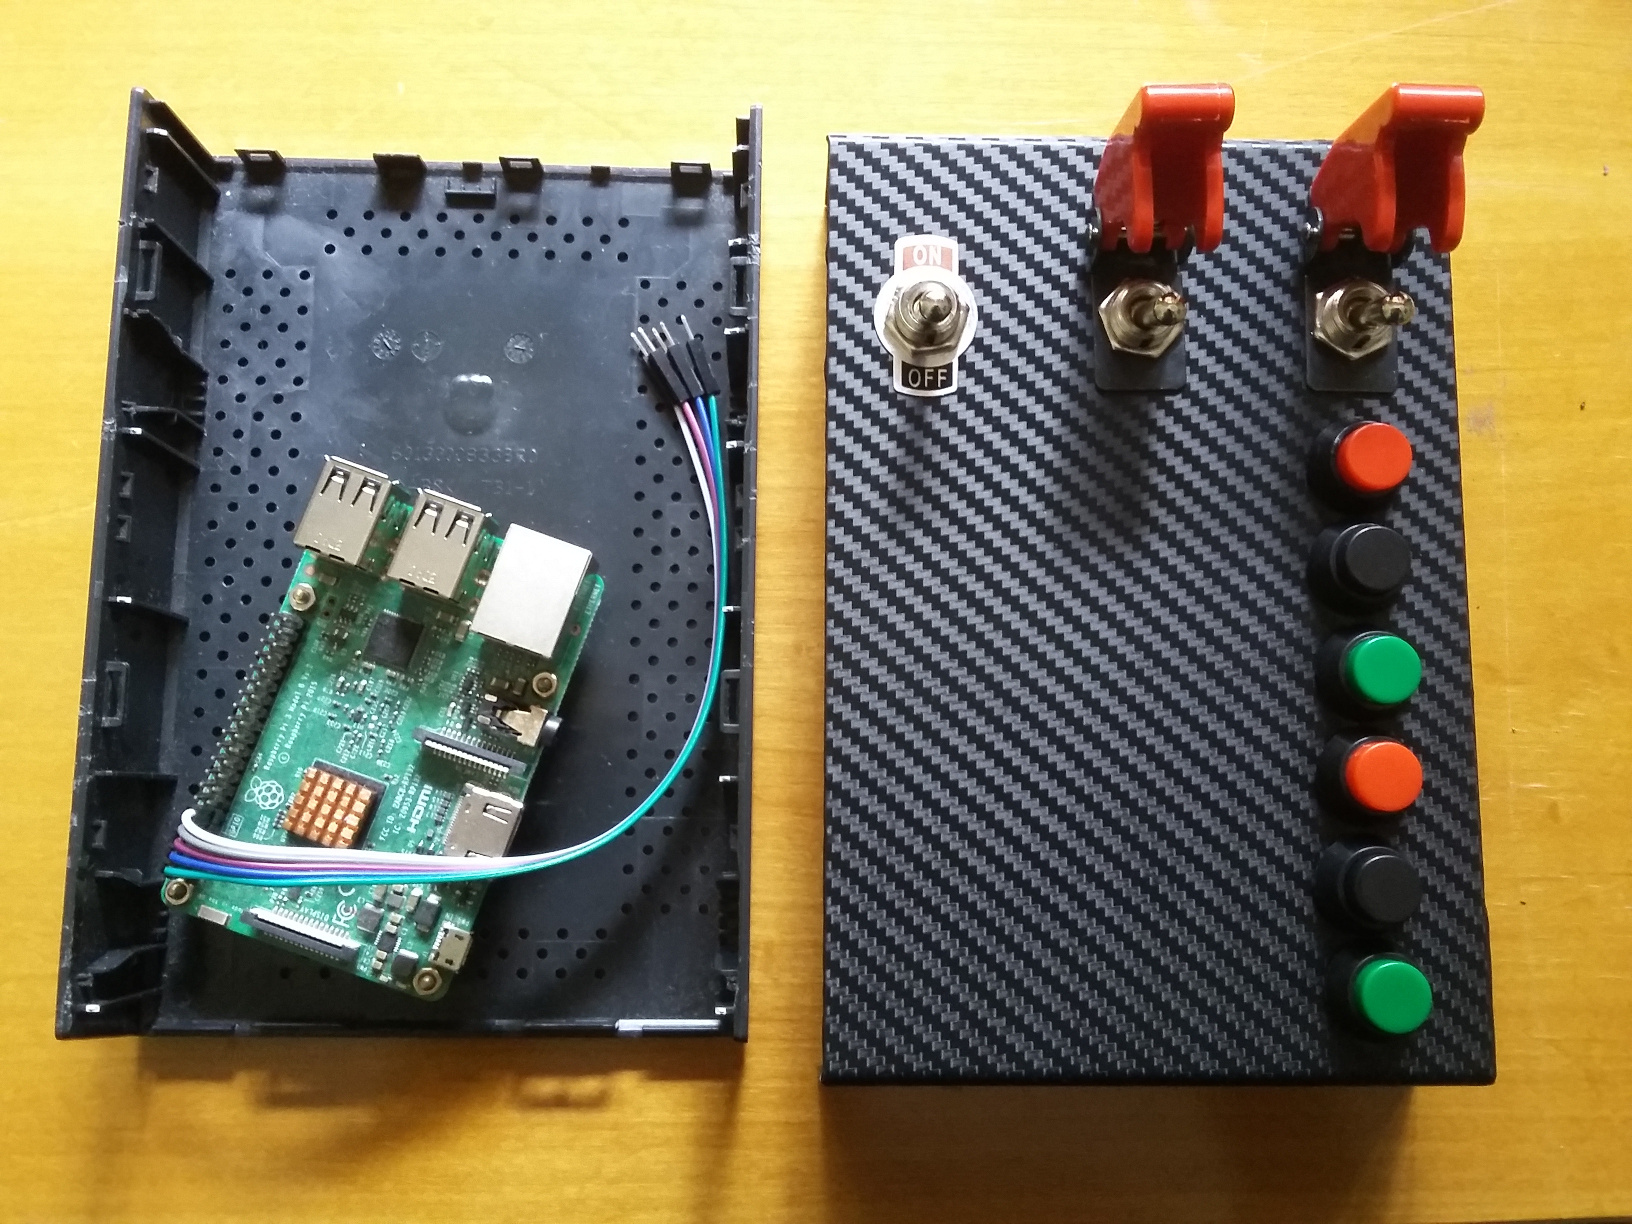
- Before closing the box, test your button box controller. Remember that once closed, these cases are not meant to be (easily) opened. If there’s anything that needs to be connected to the Raspberry Pi, this is the time to do so. For example, I wanted to make extra GPIO pins available to an LCD and added power and ethernet cable extensions:
- Once you got everything working as intended, close the box. Try to leave the area where the cpu heatsink is as clear as possible. Be gentle when closing the box and guide the cables where they should be while closing the box (use a pen or something).
- Go play with it!
Using the button box controller
Usage
./button-box.py -h
usage: button-box.py [-h] [--buzzer BUZZER] [--cmd {Popen,run}]
                     [--g1_pressed G1_PRESSED] [--g1_released G1_RELEASED]
                     [--s1_held S1_HELD] [--s1_released S1_RELEASED] [-i] [-d]

RPi button box controller. Repo: https://github.com/cgomesu/rpi-button-box

optional arguments:
  -h, --help            show this help message and exit
  --buzzer BUZZER       If installed, the buzzer's GPIO number.
  --cmd {Popen,run}     Popen: run external scripts in a NON-BLOCKING fashion.
                        run: run external scripts in a BLOCKING fashion.
                        Default=run
  --g1_pressed G1_PRESSED
                        /path/to/script to run when G1 is pressed. The
                        --btn_pressed arg is available to other PUSH buttons
                        as well.
  --g1_released G1_RELEASED
                        /path/to/script to run when G1 is released. The
                        --btn_released arg is available to other PUSH buttons
                        as well.
  --s1_held S1_HELD     /path/to/script to run when S1 is held. The
                        --btn_held arg is available to other SWITCHES as well.
  --s1_released S1_RELEASED
                        /path/to/script to run when S1 is released. The
                        --btn_released arg is available to other SWITCHES as
                        well.
  -i, --info            Show the board information.
  -d, --debug           Print additional messages to the terminal.
As mentioned, there are hidden arguments for passing external scripts to be executed upon a button event, such as pressing G2, or releasing S3. More specifically, in addition to --g1_* and --s1_* args shown in the help output, the program accepts args for any of the other seven buttons, as follows:
- script for
pressedandreleasedevents: the push buttons--g1_*,--b1_*,--r1_*,--g2_*,--b2_*, and--r2_*, - script for
heldandreleasedevents: the switches--s1_*,--s2_*, and--s3_*.
The script generates a button-box.log log file to keep track of controller-related events.
Examples
- Output info about the board
./button-box.py -i - Run the controller in debug mode (prints more messages to the terminal) and enable the buzzer (
GPIO4)./button-box.py -d --buzzer 4 - Run the controller with a buzzer and execute
/opt/rpi-button-box/scripts/template.shwhenever the push buttonR2is pressed:./button-box.py --buzzer 4 \ --r2_pressed '/opt/rpi-button-box/scripts/template.sh' - Same as before, but don’t wait for the external script to finish running (non-blocking command execution):
./button-box.py --buzzer 4 --cmd Popen \
--r2_pressed '/opt/rpi-button-box/scripts/template.sh'
Run the controller as a service
If you’re using options different than the default values, first edit the systemd/button-box.service file to include those options into the ExecStart= command execution. (Reminder: If you’ve installed Python3 libraries with a user different than pi and the rpi-button-box dir is owned by another user, you’ll have to edit the systemd/button-box.service file to reflect such changes. Otherwise, you will run into errors related to permission.) Then, run button-box.py as a service, as follows:
- Copy the
systemd/button-box.servicefile to your systemd directorysudo cp /opt/rpi-button-box/systemd/button-box.service /lib/systemd/system/ - Enable the service and start it
sudo systemctl enable button-box.service sudo systemctl start button-box.service - Check the service status to make sure it’s running without issues
systemctl status button-box.service
Bash script template
I’ve included a template for bash scripts on scripts/template.sh that anyone can use to create their customized set of commands to run upon a button event. Just copy the template, rename it, edit it according to your needs, and when running the button-box.py controller, add the full path to the new script to one (or more) of the --btn_* arguments. For example:
./button-box.py --buzzer 4 \
--g1_pressed '/opt/rpi-button-box/scripts/notification.sh' \
--b1_pressed '/opt/rpi-button-box/scripts/switch_cameras.sh' \
--r1_pressed '/opt/rpi-button-box/scripts/lights_toggle.sh' \
--g2_pressed '/opt/rpi-button-box/scripts/test_connectivity.sh' \
--b2_pressed '/opt/rpi-button-box/scripts/shutdown.sh' \
--r2_pressed '/opt/rpi-button-box/scripts/reboot.sh' \
--s2_held '/opt/rpi-button-box/scripts/alarm_on.sh' \
--s2_released '/opt/rpi-button-box/scripts/alarm_off.sh' \
--s3_held '/opt/rpi-button-box/scripts/emergency.sh'
Alternatives to Python
There are many other languages you can use to make your own button box controller. Node-RED, for example, is a nice alternative to users unfamiliarized with programming languages. It uses flow-based programming and has built-in input nodes for the RPi GPIO pins, which makes programming a button box a matter of connecting a line between two nodes. Also, it makes very easy to create a web dashboard for your button-box that you can access from anywhere. Check it out.
Conclusion
This conlcudes the tutorial on how to repurpose an old external HDD enclosure into a button box for the Raspberry Pi (or any other SBC). Check the changelog for updates. If you have any questions, feel free to get in touch with me. For anything related to the controller, please visit the rpi-button-box repo.